Are you craving comfort food but worried about what it means for your health? You’re not alone. Many of us want to enjoy hearty, satisfying meals while still sticking to our Paleo lifestyle. After all, who doesn’t love digging into a warm bowl of something delicious? That’s why I created this collection of 30+ Paleo comfort food recipes. It’s all about satisfying those cravings without sacrificing your health goals.
If you’re someone who loves indulgent flavors but also cares about what goes into your body, this post is for you. Whether you’re a long-time Paleo follower or just starting your journey, you’ll find something here that resonates with you. The recipes are crafted to bring back that cozy feeling of home-cooked meals that you’ve been missing. You won’t have to compromise on taste or texture.
What can you expect from these recipes? Each one is designed to be easy to follow and packed with flavor. From creamy soups to hearty casseroles, these dishes are comforting, hearty, and perfect for any occasion. You’ll discover meals that warm your heart and fill your belly, all while keeping it healthy. Plus, these recipes use simple ingredients that are easy to find, making meal prep a breeze.
So, let’s dive into this collection and bring some comfort back into your kitchen. With these 30+ Paleo comfort food recipes, you can indulge your cravings and feel great about what you’re eating. Get ready to enjoy delicious meals that nourish your body and soul!
1. Creamy Cauliflower Soup

Feel the warmth wrap around you with a bowl of creamy cauliflower soup. This dish is your go-to comfort food, especially when the chill of winter sets in. Made with roasted cauliflower, garlic, and a splash of coconut milk, it creates a rich, velvety texture that you’ll crave. And the best part? You can whip it up in just 30 minutes, making it perfect for a quick weeknight dinner.
This soup is not only delicious, but it’s also a low-carb option that fits perfectly into a healthy lifestyle. You’ll love how it fills you up without weighing you down. Plus, it’s family-friendly, ensuring that everyone at the table will enjoy it. The smooth blend of flavors makes each spoonful satisfying and guilt-free.
Recipe Overview:
– Servings: 4
– Prep Time: 10 minutes
– Cook Time: 20 minutes
– Total Time: 30 minutes
– Calories: 150 per serving
Nutrition Information:
Calories 150, Protein 4g, Carbs 10g, Fat 12g, Fiber 4g
Ingredients:
– 1 head of cauliflower, chopped
– 3 cloves garlic, minced
– 1 can coconut milk
– 4 cups chicken or vegetable broth
– Salt and pepper to taste
– Fresh chives for garnish
Instructions:
1. Preheat your oven to 400°F (200°C).
2. Toss the cauliflower and garlic with olive oil, salt, and pepper. Spread them out on a baking sheet and roast for about 20 minutes, until golden and tender.
3. In a large pot, combine the roasted cauliflower, broth, and coconut milk. Bring to a simmer for 10 minutes.
4. Use an immersion blender to blend the mixture until smooth and creamy.
5. Taste and adjust the seasoning if needed. Serve hot, garnished with fresh chives for a pop of color.
Tips:
– Add a sprinkle of smoked paprika on top before serving for an extra flavor boost.
– Feel free to stir in some shredded chicken or crispy bacon to make it heartier.
– This soup freezes well! Store in airtight containers for up to three months for a quick meal later.
Now you have a delightful recipe that’s quick, healthy, and sure to warm your heart. Enjoy your cozy evenings with this creamy cauliflower soup!
Creamy Cauliflower Soup
Editor’s Choice

KitchenAid Variable Speed Corded Hand Blender KHBV53, Contour Silver
 AmazonCheck Price
Thai Kitchen Gluten Free Unsweetened Coconut Milk, 13.66 fl oz (Pack of 12)
 Amazon$10.62
4 Cup Glass Soup Containers with lids, 32 oz Glass Storage Containers, T…
 Amazon$22.97
2. Zesty Chicken Stir-Fry
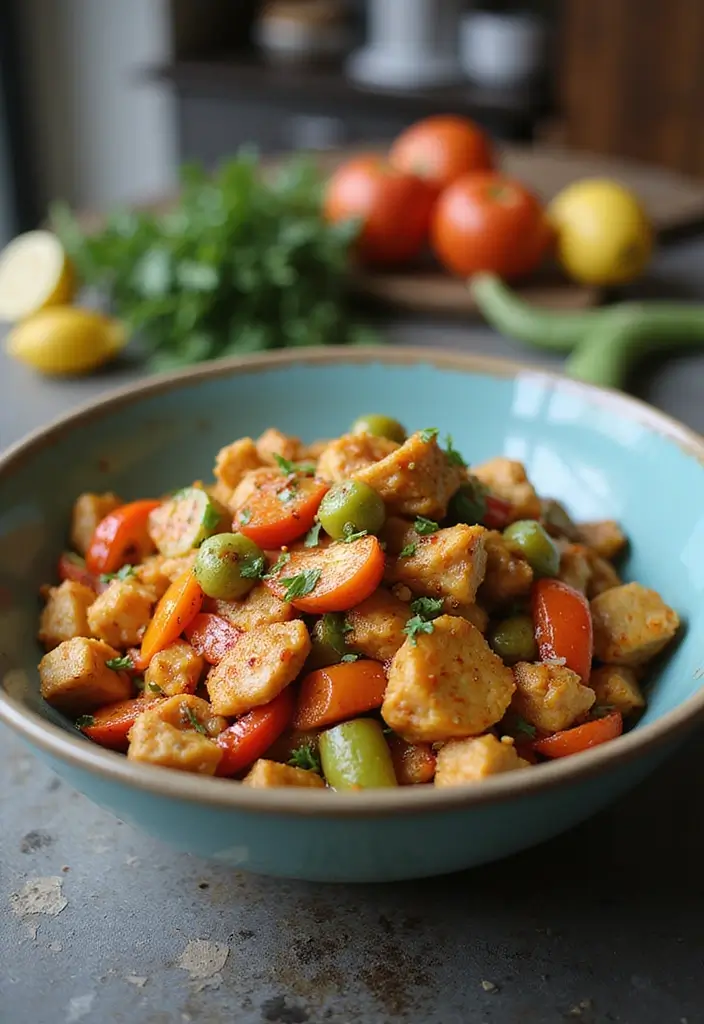
Spice up your dinner with a delicious Zesty Chicken Stir-Fry! This dish is not just colorful; it’s a feast for your taste buds. Imagine tender chicken marinated in a tangy blend of coconut aminos, ginger, and garlic. Add vibrant bell peppers, crisp broccoli, and sweet carrots, and you’ve got a meal that’s bursting with flavor and nutrition. Best of all, you can whip it up in just 20 minutes, making it a go-to for busy families.
Recipe Overview:
– Servings: 4
– Prep Time: 10 minutes
– Cook Time: 10 minutes
– Total Time: 20 minutes
– Calories: 250 per serving
Nutrition Information: Calories 250, Protein 25g, Carbs 15g, Fat 10g
Ingredients:
– 1 lb chicken breast, sliced
– 1 cup bell peppers, sliced
– 1 cup broccoli florets
– 1 cup carrots, thinly sliced
– 2 tablespoons coconut aminos
– 1 tablespoon ginger, minced
– 2 cloves garlic, minced
– Olive oil for cooking
Instructions:
1. Start by marinating the chicken. In a bowl, mix chicken with coconut aminos, ginger, and garlic. Let it sit for 10 minutes to soak up those flavors.
2. Heat a splash of olive oil in a pan over medium-high heat. Add the marinated chicken and cook until it’s golden brown and cooked through.
3. Toss in the bell peppers, broccoli, and carrots. Stir-fry everything together for about 5-7 minutes until the veggies are tender but still crisp.
4. Serve it hot! You can enjoy it over cauliflower rice or alone for a low-carb delight.
Tips: Feel free to swap in seasonal vegetables to keep things fresh and exciting!
Frequently Asked Questions:
1. Can I use frozen vegetables? Yes! Just make sure they are thawed and drained before cooking.
2. Is this recipe kid-friendly? Definitely! The sweet flavors of the veggies and sauce usually win over kids.
Zesty Chicken Stir-Fry
Editor’s Choice

Bragg Organic Coconut Aminos – 16oz, Soy-Free Alternative, Gluten-Free, …
 Amazon$8.49
Pompeian Robust Extra Virgin Olive Oil, Contains Polyphenols, First Cold…
 Amazon$15.64
3. Savory Meatballs with Zucchini Noodles
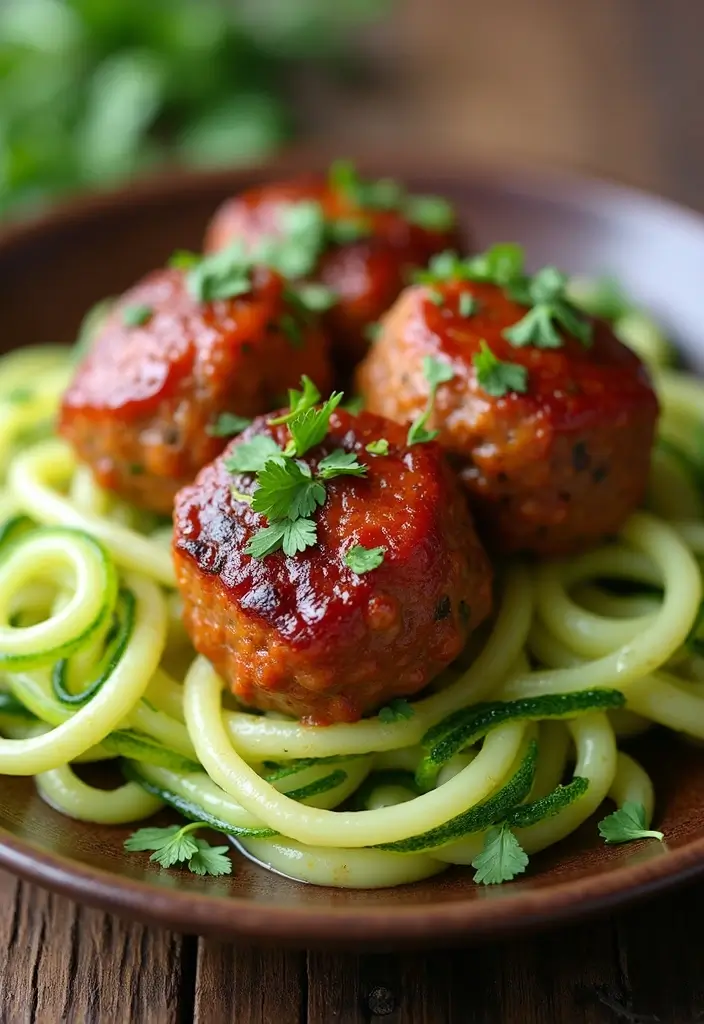
Dive into a hearty dish that redefines comfort food: Savory Meatballs with Zucchini Noodles. This delightful meal transforms a classic pasta night into a nutritious feast. Picture tender meatballs bursting with flavor from fresh parsley and aromatic garlic, simmered in a luscious marinara sauce made from crushed tomatoes and a blend of herbs.
Zucchini noodles, affectionately known as ‘zoodles’, bring a refreshing twist to the table. They are a fantastic low-carb substitute for traditional pasta, soaking up all that rich marinara goodness. Not only is this dish a treat for your taste buds, but it’s also budget-friendly, making it perfect for family dinners.
Recipe Overview:
– Servings: 4
– Prep Time: 15 minutes
– Cook Time: 20 minutes
– Total Time: 35 minutes
– Calories: 300 per serving
Nutrition Information:
Calories 300, Protein 28g, Carbs 10g, Fat 18g
Ingredients:
– 1 lb ground beef or turkey
– 1 cup zucchini, spiralized
– 1 can crushed tomatoes
– 1/4 cup parsley, chopped
– 2 cloves garlic, minced
– 1 egg
– Salt and pepper to taste
– Olive oil for cooking
Instructions:
1. Preheat your oven to 400°F (200°C).
2. In a mixing bowl, combine ground meat, parsley, egg, garlic, salt, and pepper. Mix well and form into meatballs.
3. Arrange the meatballs on a baking sheet and bake for 15-20 minutes, or until cooked through.
4. While the meatballs bake, heat the crushed tomatoes in a pot until they start to simmer. Gently add the cooked meatballs to the sauce.
5. In a skillet, sauté the zucchini noodles in olive oil for about 2 minutes until tender. Serve them topped with the meatballs and marinara sauce.
Tips:
– Use a spiralizer for perfectly shaped zoodles.
– Consider buying pre-spiralized zucchini for a quick meal option.
Frequently Asked Questions:
1. Can I use ground chicken? Yes, ground chicken is a lighter alternative that works great.
2. How do I store leftovers? Keep them in an airtight container in the fridge for up to 3 days.
This dish not only satisfies your cravings but also supports a healthy lifestyle. Enjoy your meal!
Savory Meatballs with Zucchini Noodles
Editor’s Choice

Brieftons 5-Blade Vegetable Spiralizer: Strongest-Heaviest Spiral Slicer…
 Amazon$31.99
4. Sweet Potato Hash
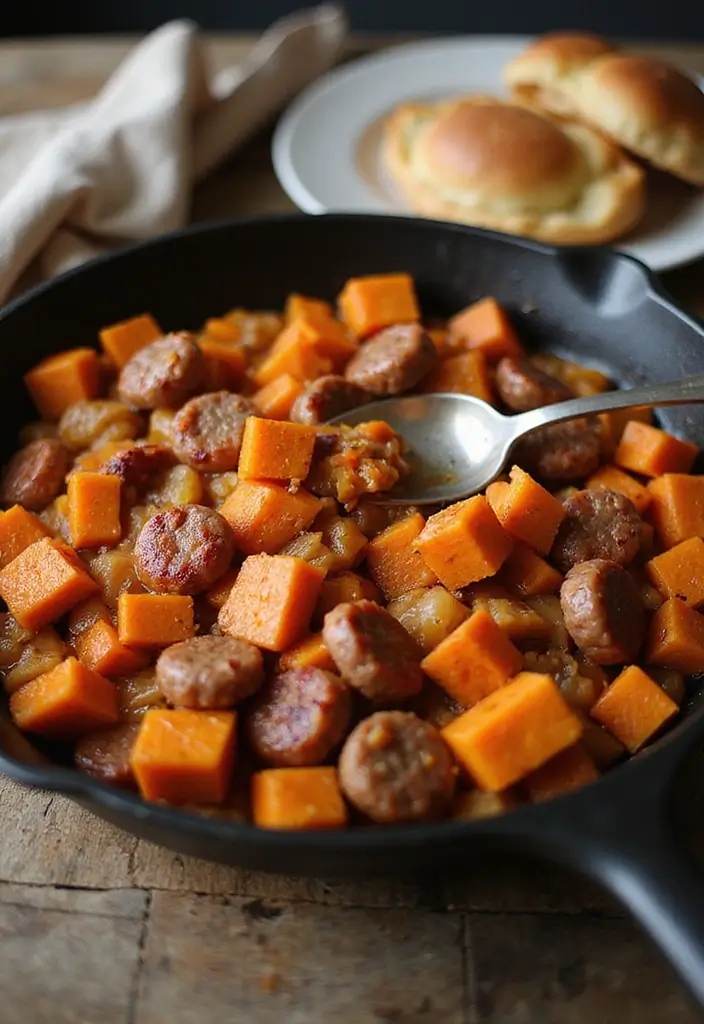
Start your day right with a delicious sweet potato hash! This hearty dish is perfect for breakfast or brunch, and your whole family will ask for seconds. Imagine crispy, golden sweet potatoes paired with savory breakfast sausage and sweet onions. Each bite is a burst of flavor that’s not only tasty but also packed with nutrition.
You can whip this up in just 30 minutes. Plus, it’s friendly on your wallet! Sweet potatoes are affordable and loaded with vitamins. Enjoy this comforting meal any time, whether it’s a busy morning or a relaxed weekend brunch.
Recipe Overview:
– Servings: 4
– Prep Time: 10 minutes
– Cook Time: 20 minutes
– Total Time: 30 minutes
– Calories: 200 per serving
Nutrition Information:
Calories: 200, Protein: 9g, Carbs: 30g, Fat: 7g
Ingredients:
– 2 medium sweet potatoes, diced
– 1 onion, chopped
– 1 lb breakfast sausage (make sure it’s paleo-friendly)
– 2 tablespoons olive oil
– Salt, pepper, and smoked paprika to taste
Instructions:
1. Heat olive oil in a large skillet over medium heat.
2. Add the diced sweet potatoes and chopped onion. Cook for about 10 minutes until they start to soften.
3. Push the sweet potatoes and onion to one side. Add the breakfast sausage to the skillet and cook until it’s browned.
4. Stir everything together and season with salt, pepper, and smoked paprika.
5. Cook for another 5 minutes, then serve hot. Enjoy your flavorful hash!
Tips:
– Add fresh spinach towards the end for an extra nutrition boost.
– Store leftovers in an airtight container in the fridge for up to 4 days.
Frequently Asked Questions:
1. Can I use other types of potatoes? Yes, you can substitute with regular potatoes, but sweet potatoes add a lovely sweetness.
2. How long will leftovers last? They are good for up to 4 days when stored properly.
Now, you have a simple yet satisfying meal ready to enjoy any time of day!
Sweet Potato Hash
Editor’s Choice

Sugar Free Breakfast Sausage Links – Naked Links – Whole30 Approved Mult…
 Amazon$75.99
Simply Organic Smoked Paprika, 2.72 Ounce, Oak Wood Smoked & Ground Span…
 Amazon$7.07
5. Baked Lemon Garlic Chicken
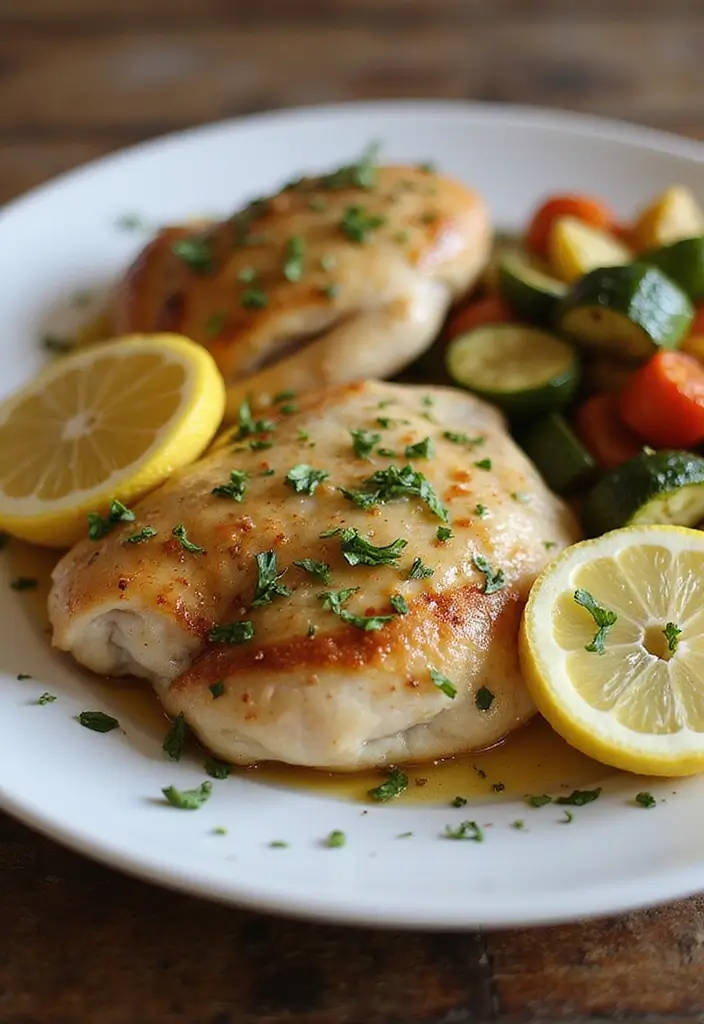
Baked lemon garlic chicken is a simple dish that bursts with flavor. It’s a family favorite that you can whip up on a busy weeknight or impress guests at dinner. The combination of zesty lemon and fragrant garlic makes this chicken irresistible. Plus, it’s healthy and budget-friendly, so you can enjoy a fancy meal without breaking the bank.
Imagine tender chicken thighs marinated in a mix of lemon juice, garlic, and fresh herbs. When baked, they turn out juicy with crispy edges. Serve it alongside roasted veggies or a crisp salad for a complete meal that everyone will love. Let’s dive into how to make this delicious dish!
Recipe Overview:
– Servings: 4
– Prep Time: 10 minutes
– Cook Time: 30 minutes
– Total Time: 40 minutes
– Calories: 280 per serving
Nutrition Information: Calories 280, Protein 32g, Carbs 5g, Fat 15g
Ingredients:
– 4 chicken thighs, skin-on
– 3 tablespoons olive oil
– Juice of 2 lemons
– 4 cloves garlic, minced
– 1 tablespoon fresh rosemary, chopped
– Salt and pepper to taste
Instructions:
1. Preheat your oven to 425°F (220°C).
2. In a bowl, whisk together olive oil, lemon juice, garlic, rosemary, salt, and pepper.
3. Place chicken thighs in a baking dish and pour the marinade over them. Turn to coat well.
4. Bake for 30-35 minutes, or until the chicken is cooked through and the skin is crispy.
5. Let the chicken rest for a few minutes before serving.
Tips:
– Pair with steamed broccoli or a side of quinoa for a nutritious meal.
– Want to add more flavor? Marinate the chicken overnight for a richer taste.
Frequently Asked Questions:
1. Can I use chicken breasts instead? Yes, but adjust the cooking time since they cook faster.
2. Can I marinate overnight? Absolutely! It enhances the flavors beautifully.
Now you have a tasty recipe that feels gourmet but is incredibly easy to make. Enjoy your flavorful baked lemon garlic chicken tonight!
Baked Lemon Garlic Chicken
Editor’s Choice

Lodge 12 Inch Cast Iron Skillet with Red Silicone Hot Handle Holder – Pr…
 Amazon$39.90
TrendPlain 16oz/470ml Glass Olive Oil Sprayer for Cooking – 2 in 1 Olive…
 Amazon$8.99
Cole & Mason Fresh Herb Keeper – Acrylic Storage Container for Refrigera…
 Amazon$24.95
6. Coconut Curry Shrimp
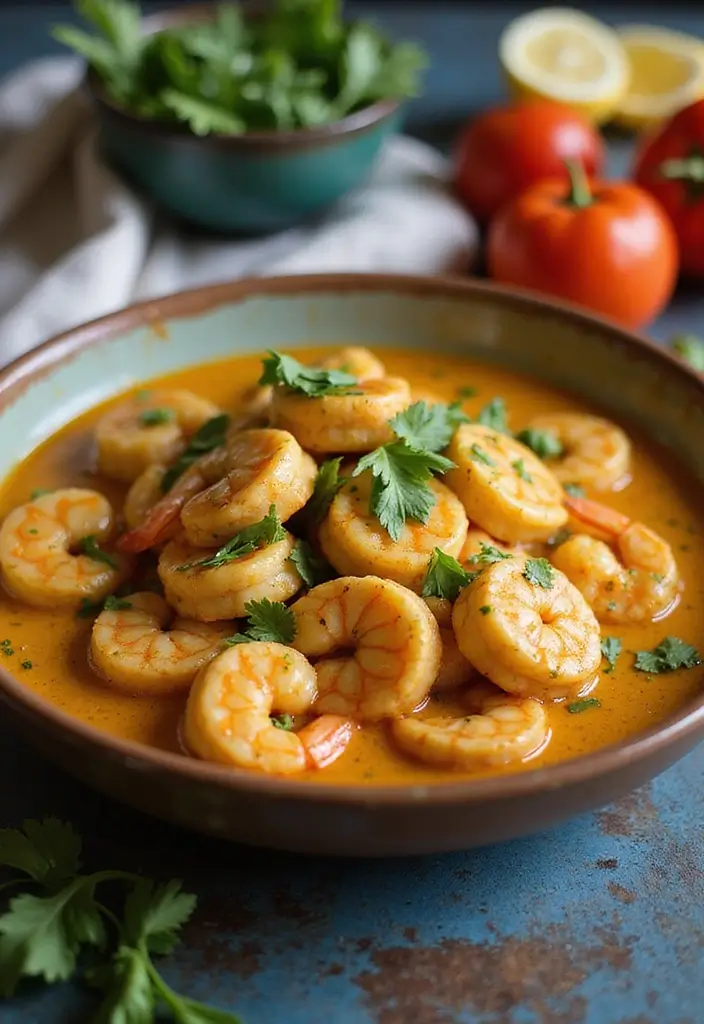
Coconut curry shrimp is your ticket to a delicious escape right in your kitchen. This dish combines sweet coconut milk with warm curry spices, creating a rich sauce that wraps around succulent shrimp and fresh veggies. It’s like a mini-vacation on a plate!
In under 30 minutes, you can whip up this delightful meal, making it perfect for those hectic weeknights. Serve it alone for a simple yet satisfying dinner, or pour it over cauliflower rice for a tasty low-carb option. Families love this dish because it’s not only easy on the wallet but also a crowd-pleaser for both kids and adults.
Recipe Overview:
– Servings: 4
– Prep Time: 10 minutes
– Cook Time: 15 minutes
– Total Time: 25 minutes
– Calories: 350 per serving
Nutrition Information:
Calories: 350, Protein: 30g, Carbs: 10g, Fat: 20g
Ingredients:
– 1 lb shrimp, peeled and deveined
– 1 can coconut milk
– 2 tablespoons curry powder
– 1 bell pepper, chopped
– 1 cup snap peas
– 2 tablespoons olive oil
– Salt and pepper to taste
Instructions:
1. Heat olive oil in a large skillet over medium heat.
2. Add the bell pepper and snap peas. Sauté for 3-4 minutes until they soften.
3. Toss in the shrimp and cook until they turn pink, about 3-4 minutes.
4. Pour in the coconut milk and stir in the curry powder. Mix well and let it come to a simmer.
5. Cook for another 2 minutes and serve hot over cauliflower rice or enjoy it as is.
Tips:
– Add red pepper flakes for extra heat!
– Use frozen shrimp? Just make sure they are thawed before cooking.
– The creamy sauce is usually a hit with kids, making it a family favorite!
This coconut curry shrimp will quickly become a go-to recipe in your home. It’s comforting, flavorful, and so easy to make. Enjoy a taste of the tropics tonight!
Coconut Curry Shrimp
Editor’s Choice

Frontier Co-op Certified Organic Curry Powder, 1-Pound Bulk, Aromatic Bl…
 Amazon$12.82
7. Garlic Butter Brussels Sprouts
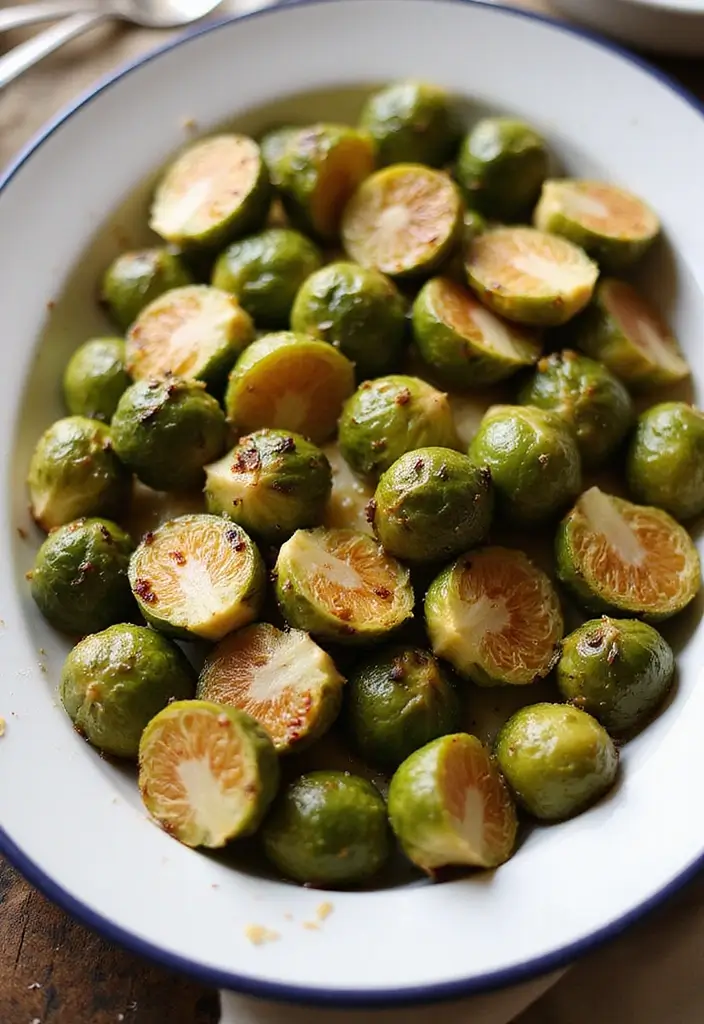
Garlic Butter Brussels Sprouts make an irresistible side dish that can brighten up any meal. Imagine tender, roasted Brussels sprouts glistening in a rich garlic butter sauce. They’re the perfect combination of crispy and creamy, making them a crowd-pleaser at any dinner table. Plus, they’re packed with nutrients and are easy on the wallet, so you can enjoy them often without breaking the bank.
These little green powerhouses are not just delicious; they also fit well with many main dishes, making them an ideal addition to family dinners or gatherings. If you’re looking for a way to add flavor and nutrition to your meals, these Garlic Butter Brussels Sprouts are the answer.
Recipe Overview:
– Servings: 4
– Prep Time: 10 minutes
– Cook Time: 20 minutes
– Total Time: 30 minutes
– Calories: 120 per serving
Nutrition Information: Calories 120, Protein 5g, Carbs 10g, Fat 8g
Ingredients:
– 1 lb Brussels sprouts, halved
– 4 tablespoons butter
– 3 cloves garlic, minced
– Salt and pepper to taste
Instructions:
1. Preheat your oven to 400°F (200°C). This ensures a nice roast.
2. In a bowl, toss the halved Brussels sprouts with olive oil, salt, and pepper. Make sure they are evenly coated.
3. Spread the sprouts on a baking sheet in a single layer. This helps them roast evenly.
4. Roast for 20 minutes until they are crispy and golden.
5. While the Brussels sprouts roast, melt the butter in a small saucepan over medium heat. Add the minced garlic and sauté until fragrant, about 1 minute.
6. Once the Brussels sprouts are done, drizzle the garlic butter over them before serving.
Tips:
– Add a sprinkle of Parmesan cheese for an extra layer of flavor.
– For a kick, toss in some red pepper flakes before roasting.
Frequently Asked Questions:
1. Can I use frozen Brussels sprouts? Fresh sprouts are best, but if you only have frozen, thaw and drain them first.
2. Can I make this dairy-free? Yes! Substitute butter with ghee or olive oil for a delicious alternative.
Now you’re ready to whip up a batch of these tasty Garlic Butter Brussels Sprouts. Enjoy the compliments!
Garlic Butter Brussels Sprouts
Editor’s Choice

Pompeian Robust Extra Virgin Olive Oil, Contains Polyphenols, First Cold…
 Amazon$15.64
Kitessensu High Effective Garlic Press With Studs, Heavy Duty Garlic Min…
 Amazon$11.99
GoodCook Everyday Nonstick Carbon Steel Baking Sheet Set, 3 Pack – Small…
 Amazon$17.99
8. Chocolate Avocado Mousse
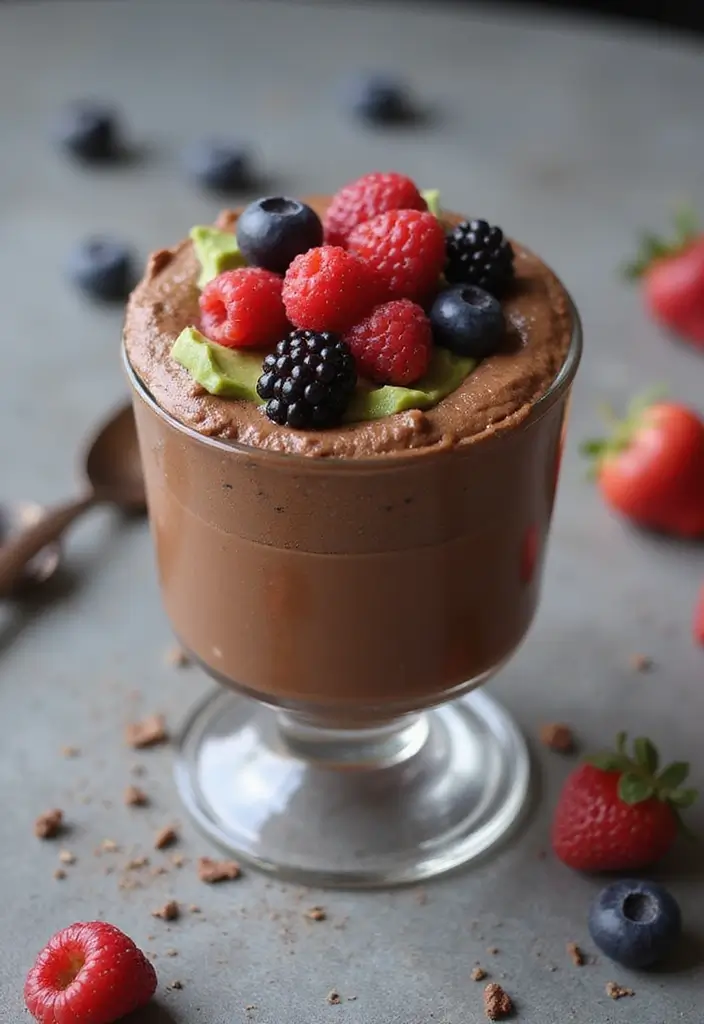
Craving a dessert that feels indulgent but is still good for you? Look no further than this delicious chocolate avocado mousse. It’s rich, creamy, and you won’t believe it’s made with avocados! This treat not only satisfies your sweet tooth but also keeps you on track with your paleo lifestyle.
Making this mousse is a breeze. Just blend ripe avocados with cocoa powder, honey, and a splash of vanilla. The result? A decadent dessert that even kids will beg for. Serve it in cute little cups for a delightful end to any meal.
Recipe Overview:
– Servings: 4
– Prep Time: 5 minutes
– Cook Time: 0 minutes
– Total Time: 5 minutes
– Calories: 250 per serving
Nutrition Information: Calories 250, Protein 3g, Carbs 20g, Fat 18g
Ingredients:
– 2 ripe avocados
– 1/2 cup cocoa powder
– 1/4 cup honey or maple syrup
– 1 teaspoon vanilla extract
– Pinch of salt
Instructions:
1. Scoop the flesh of the avocados into a food processor.
2. Add cocoa powder, honey, vanilla, and a pinch of salt.
3. Blend until the mixture is super smooth and creamy. Scrape down the sides as needed.
4. Taste the mousse and add more sweetener if desired.
5. Spoon the mousse into serving cups and chill in the fridge for at least 30 minutes before serving.
Tips:
Top with fresh berries or nuts for an extra flavor twist!
Frequently Asked Questions:
1. How long does this mousse last? It stays fresh in the fridge for up to 3 days.
2. Can I use different sweeteners? Absolutely! Try coconut sugar or agave nectar for a change.
Chocolate Avocado Mousse
Editor’s Choice

Amazon Fresh, Unsweetened Cocoa Powder, 8 Oz (Pack of 3)
 AmazonCheck Price
KitchenAid KFC3516ER 3.5 Cup Food Chopper, Empire Red, One Size
 AmazonCheck Price
50 Pack 5 oz Plastic Dessert Cups with Spoons, Mini Mousse Cup Round Pud…
 Amazon$9.99
9. Cauliflower Fried Rice
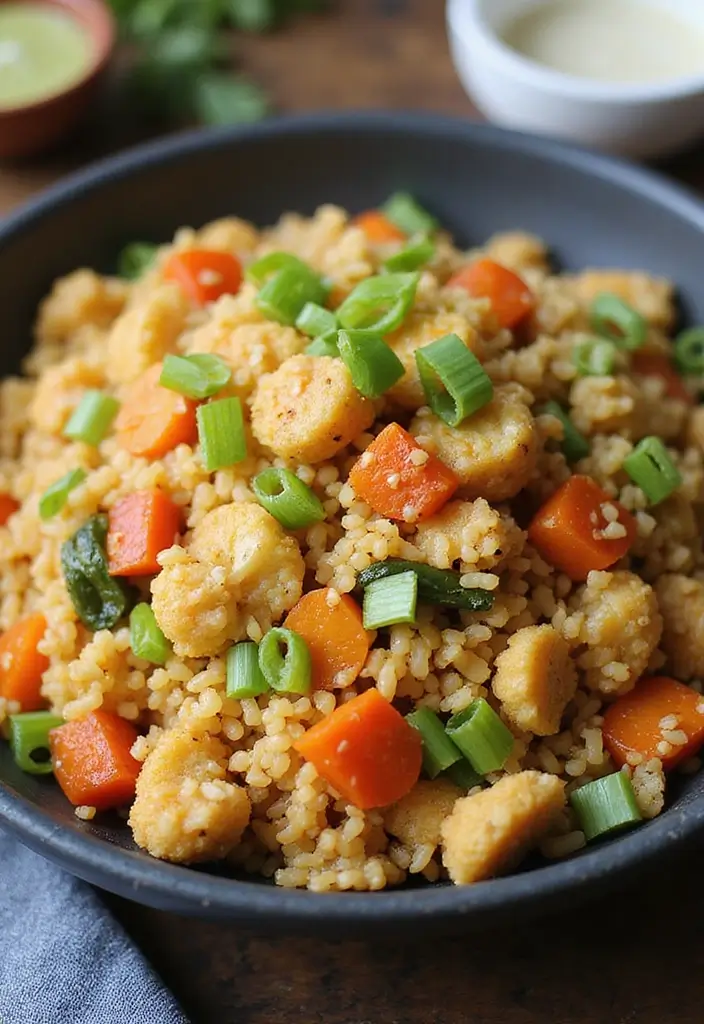
Craving a tasty and healthy meal? Look no further than this delicious cauliflower fried rice! It’s a fantastic low-carb swap for traditional fried rice, bursting with flavor and vibrant colors. You’ll love how riced cauliflower forms the base and brings a light texture, while colorful veggies and scrambled eggs add both nutrition and taste. Plus, with coconut aminos and sesame oil giving it an Asian flair, this dish satisfies your comfort food cravings in under 20 minutes. It’s a great way to sneak in more veggies for your family without breaking the bank.
Here’s how to make it:
Recipe Overview:
– Servings: 4
– Prep Time: 5 minutes
– Cook Time: 15 minutes
– Total Time: 20 minutes
– Calories: 180 per serving
Nutrition Information: Calories 180, Protein 7g, Carbs 12g, Fat 10g
Ingredients:
– 1 head cauliflower, riced
– 2 eggs, beaten
– 1 cup mixed vegetables (like carrots, peas, and bell peppers)
– 2 tablespoons coconut aminos
– 1 tablespoon sesame oil
– 2 green onions, sliced
Instructions:
1. Heat sesame oil in a large skillet over medium heat.
2. Add the riced cauliflower and sauté for about 5 minutes until it’s tender.
3. Push the cauliflower to one side of the skillet. Pour in the beaten eggs and scramble until fully cooked.
4. Mix in your chosen vegetables and coconut aminos. Cook for another 5 minutes, allowing the flavors to meld.
5. Top with sliced green onions and serve hot.
Tips: Want to boost the protein? Just toss in some cooked chicken or shrimp for an easy upgrade.
Frequently Asked Questions:
1. Can I use frozen cauliflower rice? Yes! Just thaw it before cooking.
2. How do I store leftovers? Keep them in an airtight container in the fridge for up to 4 days.
This cauliflower fried rice is not just a meal; it’s a delightful way to enjoy healthy eating without sacrificing taste!
Cauliflower Fried Rice
Editor’s Choice

Lundberg Value Size Regenerative Jasmine Rice 17.3 OZ
 AmazonCheck Price
Kadoya Roasted Sesame Oil – for Cooking, Seasoning, 11 Fl oz
 Amazon$9.48
10. Eggplant Lasagna
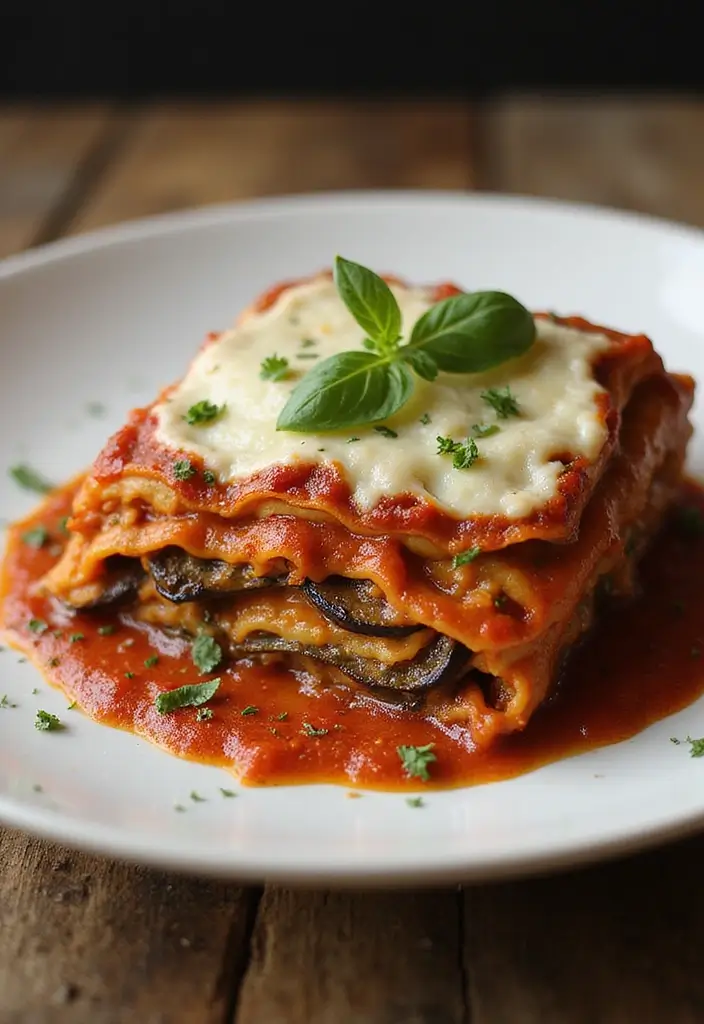
Eggplant lasagna is a delicious twist on a classic favorite, perfect for those following paleo guidelines. By swapping out traditional pasta for thin, roasted slices of eggplant, you create a hearty meal loaded with flavor. Imagine layers of savory ground meat, rich marinara, and fresh basil nestled between tender eggplant. This dish not only satisfies your cravings but also makes for a great family dinner. Best of all, it’s budget-friendly and easy to prepare ahead of time, making it a lifesaver for busy weeknights.
Recipe Overview:
– Servings: 6
– Prep Time: 20 minutes
– Cook Time: 45 minutes
– Total Time: 1 hour 5 minutes
– Calories: 350 per serving
Nutrition Information:
Calories: 350, Protein: 28g, Carbs: 12g, Fat: 20g
Ingredients:
– 2 large eggplants, sliced lengthwise
– 1 lb ground beef or turkey
– 2 cups marinara sauce
– 1 cup ricotta cheese (or a dairy-free alternative)
– 1/4 cup fresh basil, chopped
– Olive oil for drizzling
Instructions:
1. Preheat your oven to 375°F (190°C).
2. Place eggplant slices on a baking sheet, drizzle with olive oil, and roast for 20 minutes until soft.
3. In a skillet, brown the ground meat over medium heat. Once cooked, stir in the marinara sauce.
4. In a baking dish, layer eggplant, meat sauce, and ricotta. Repeat the layers until all ingredients are used.
5. Bake for 25 minutes until the top is bubbly and golden.
Tips:
– Let the lasagna cool for a few minutes before serving. This helps it set and makes it easier to slice.
– Feel free to use zucchini instead of eggplant for a different texture and taste!
– You can prepare it the night before and bake it fresh when you’re ready.
Now imagine serving this comforting dish to your family. It’s sure to become a favorite, bringing smiles around the dinner table while keeping your paleo lifestyle intact. Enjoy every flavorful bite!
Eggplant Lasagna
Editor’s Choice

Quick Prep Paleo: Simple Whole-Food Meals with 5 to 15 Minutes of Hands-…
 Amazon$17.83
YARRAMATE 16oz/470ml Glass Olive Oil Sprayer for Cooking with Stickers, …
 Amazon$8.99
8-Piece Deep Glass Baking Dish Set with Plastic lids,Rectangular Glass B…
 Amazon$35.99
11. Spaghetti Squash with Meat Sauce
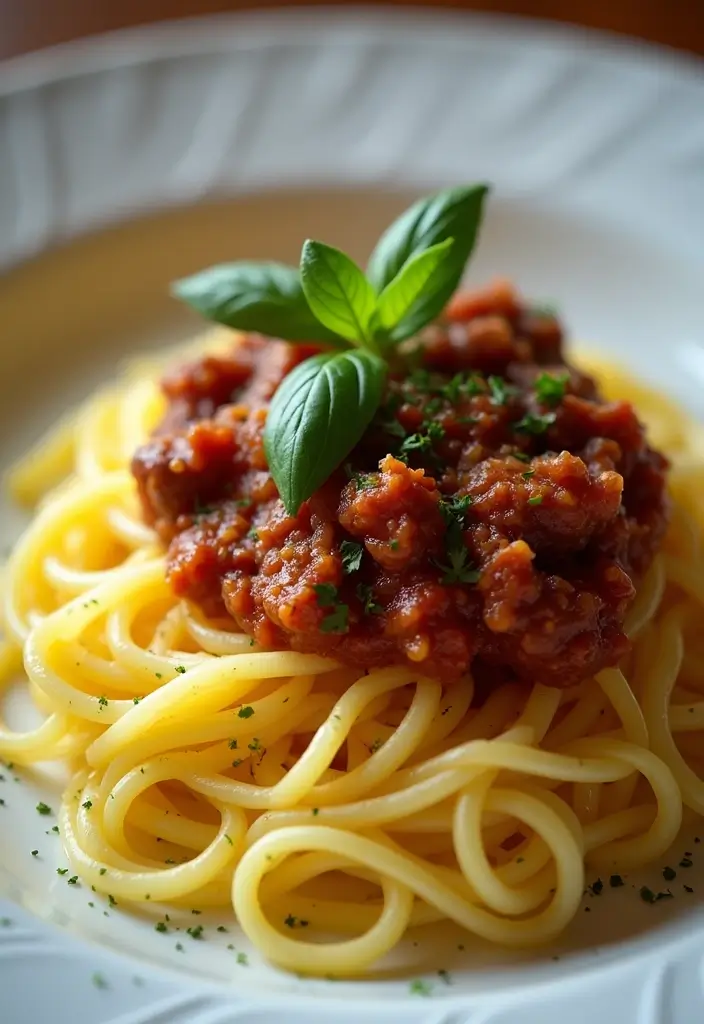
Craving a comforting meal that fits your Paleo lifestyle? Look no further than spaghetti squash with meat sauce! This delightful dish replaces traditional pasta with spaghetti squash, creating a fun and healthy alternative. When you roast spaghetti squash, it transforms into tender, spaghetti-like strands that soak up a savory meat sauce. Made with ground beef and tomatoes, this dish is not only hearty but also packed with nutrients, making it a perfect choice for any weeknight family dinner.
Cooking this meal is simple and budget-friendly, ensuring you can whip it up without breaking the bank. You’ll love how warm and satisfying it feels on a chilly evening.
Recipe Overview:
– Servings: 4
– Prep Time: 10 minutes
– Cook Time: 45 minutes
– Total Time: 55 minutes
– Calories: 300 per serving
Nutrition Information: Calories 300, Protein 25g, Carbs 14g, Fat 15g
Ingredients:
– 1 medium spaghetti squash
– 1 lb ground beef or turkey
– 1 can diced tomatoes
– 1 onion, chopped
– 2 cloves garlic, minced
– Olive oil for cooking
– Salt and pepper to taste
Instructions:
1. Preheat your oven to 400°F (200°C).
2. Cut the spaghetti squash in half lengthwise and remove the seeds. Drizzle the insides with olive oil, and season with salt and pepper. Place the squash cut-side down on a baking sheet and roast for 30-35 minutes until tender.
3. While the squash roasts, heat some olive oil in a skillet. Add the chopped onion and minced garlic, cooking until soft. Next, add the ground meat and cook until it’s browned. Finally, stir in the diced tomatoes and let it simmer for about 10 minutes.
4. Once the squash is done, use a fork to scrape the strands from the skin. Serve the meat sauce generously over the squash strands.
Tips: For an extra touch, garnish with fresh basil or parsley before serving to add a pop of color and flavor!
Frequently Asked Questions:
1. Can I use other ground meats? Yes! Chicken or pork works beautifully too.
2. How do I store leftovers? Keep them in an airtight container in the fridge for up to four days.
Try this spaghetti squash with meat sauce for a comforting, nutritious meal that everyone will love! Enjoy every bite without any guilt.
Spaghetti Squash with Meat Sauce
Editor’s Choice


Organic Extra Virgin Olive Oil – Premium Single-Source Greek EVOO with C…
 AmazonCheck Price
Kitessensu High Effective Garlic Press With Studs, Heavy Duty Garlic Min…
 Amazon$11.99
12. Buffalo Cauliflower Bites

Buffalo cauliflower bites are your new favorite snack. They offer all the bold flavor of buffalo wings but without the guilt. Imagine crispy, golden cauliflower florets, perfectly coated in spicy hot sauce and olive oil. It’s a dish that satisfies your cravings while keeping things healthy.
These bites are perfect for game nights, parties, or simply as a tasty side dish. Pair them with a creamy, paleo-friendly ranch dressing made from cashews to cool down the heat. You’ll enjoy every bite without breaking your diet or your budget.
Recipe Overview:
– Servings: 4
– Prep Time: 15 minutes
– Cook Time: 30 minutes
– Total Time: 45 minutes
– Calories: 150 per serving
Nutrition Information: Calories: 150, Protein: 5g, Carbs: 10g, Fat: 10g
Ingredients:
– 1 head cauliflower, cut into florets
– 1/2 cup hot sauce
– 2 tablespoons olive oil
– Salt and pepper to taste
– Cashews for dipping (optional)
Instructions:
1. Preheat your oven to 425°F (220°C).
2. In a large bowl, toss the cauliflower florets with olive oil, hot sauce, salt, and pepper until well coated.
3. Spread the cauliflower onto a baking sheet in a single layer.
4. Roast for 30 minutes, flipping halfway through, until crispy and golden brown.
5. For the dip, blend soaked cashews with water, garlic powder, and a pinch of salt until smooth.
6. Serve the cauliflower bites hot alongside the creamy cashew dip.
Tips:
– Adjust the hot sauce to fit your spice level. Start with a little and add more if you dare!
– Fresh cauliflower works best for texture, but frozen can work in a pinch.
Frequently Asked Questions:
1. Can I use frozen cauliflower? Fresh is best for the perfect crunch, but frozen will do in a hurry.
2. How long do leftovers last? Store any extras in the fridge for up to 3 days.
With this recipe, you can enjoy a guilt-free snack that’s bursting with flavor. It’s a win-win for your taste buds and your health!
Buffalo Cauliflower Bites
Editor’s Choice

Cosori 9-in-1 TurboBlaze Air Fryer 6 Qt, Premium Ceramic Coating, 90°–45…
 Amazon$89.93
Melinda’s Ghost Pepper Hot Sauce – Gourmet Extra Spicy Hot Sauce – Made …
 AmazonCheck Price
Pompeian Robust Extra Virgin Olive Oil, Contains Polyphenols, First Cold…
 Amazon$15.64
13. Mediterranean Stuffed Peppers
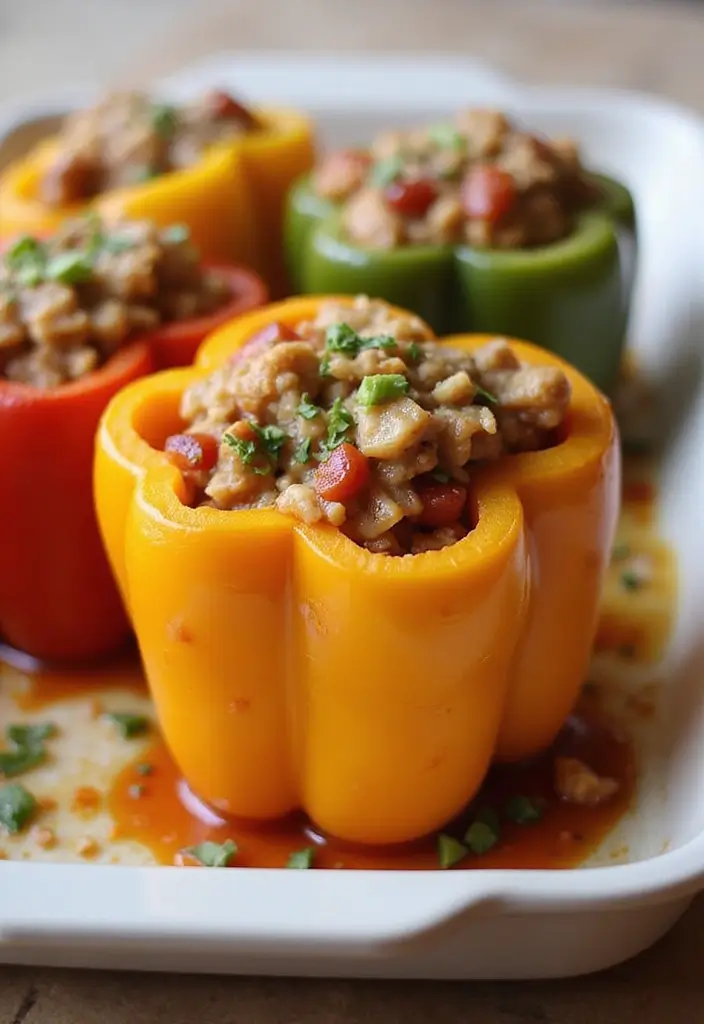
Mediterranean stuffed peppers are a feast for the eyes and the taste buds. These vibrant, bell-shaped containers hold a delightful mixture of seasoned meat, juicy tomatoes, and briny olives. Each bite bursts with flavor and warmth, making them a perfect choice for a cozy dinner or a healthy lunch. Plus, they fit well into a balanced diet without hurting your wallet. Great for meal prep, you can whip up a batch on the weekend and enjoy them all week long.
Recipe Overview:
– Servings: 4
– Prep Time: 15 minutes
– Cook Time: 30 minutes
– Total Time: 45 minutes
– Calories: 280 per serving
Nutrition Information:
Calories: 280
Protein: 24g
Carbs: 13g
Fat: 15g
Ingredients:
– 4 bell peppers, halved
– 1 lb ground beef or turkey
– 1 cup diced tomatoes
– 1/2 cup green olives, chopped
– 2 cloves garlic, minced
– Olive oil for drizzling
– Herbs (oregano, basil) to taste
Instructions:
1. Preheat your oven to 375°F (190°C).
2. In a skillet, heat a drizzle of olive oil. Sauté minced garlic until fragrant.
3. Add ground meat and cook until browned. Stir in diced tomatoes, olives, and herbs. Cook for 3-5 minutes.
4. Spoon the meat mixture into each halved pepper and place them in a baking dish.
5. Drizzle with olive oil and bake for 30 minutes until the peppers are tender.
Tips:
Top your stuffed peppers with fresh parsley for a pop of color and flavor.
Frequently Asked Questions:
1. Can I make these ahead of time? Yes! Assemble them, cover, and refrigerate. Bake when ready to eat.
2. Can I use other vegetables? Absolutely! Zucchini or squash make great substitutes for bell peppers.
This recipe not only satisfies cravings but also keeps you on track with your health goals. Enjoy your culinary adventure with these Mediterranean delights!
Mediterranean Stuffed Peppers
Editor’s Choice

Bento Box Adult Lunch Box, Containers for Adults Men Women with 4 Compar…
 Amazon$9.99
Olive Oil Dispenser Bottle, 2 Pcs Glass Olive Oil Dispenser and Vinegar …
 Amazon$8.54
14. Beef and Broccoli Stir-Fry
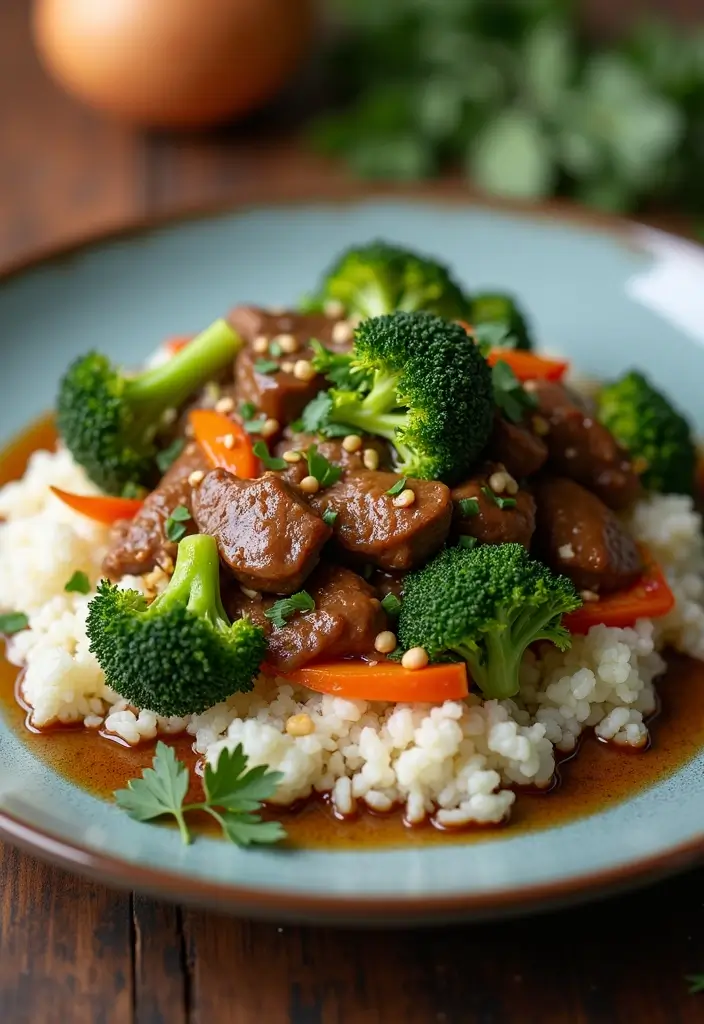
Beef and broccoli stir-fry is a beloved dish that merges bold flavors with a healthy twist. You can whip this up in no time, making it ideal for those hectic weeknights when you crave something delicious yet nutritious. Imagine tender, marinated beef strips sizzling in a hot pan, mingling with bright green broccoli florets. The aroma alone will make your mouth water!
To elevate your meal, serve this dish over fluffy cauliflower rice. It’s a fantastic way to stick to your paleo diet while keeping your budget in check. Let’s dive into the recipe!
Recipe Overview:
– Servings: 4
– Prep Time: 10 minutes
– Cook Time: 15 minutes
– Total Time: 25 minutes
– Calories: 300 per serving
Nutrition Information: Calories 300, Protein 27g, Carbs 10g, Fat 18g
Ingredients:
– 1 lb flank steak, sliced thinly
– 2 cups broccoli florets
– 2 cloves garlic, minced
– 1 tablespoon ginger, minced
– 3 tablespoons coconut aminos
– Olive oil for cooking
Instructions:
1. In a bowl, mix the flank steak with coconut aminos, garlic, and ginger. Let it marinate for at least 15 minutes to soak up those flavors.
2. Heat a splash of olive oil in a large skillet over medium-high heat. Add the beef and cook until it turns a rich brown.
3. Toss in the broccoli and stir-fry for about 5 minutes until the broccoli is bright and tender-crisp.
4. Serve hot, either on a bed of cauliflower rice or on its own for a hearty meal.
Tips: For a delightful crunch, sprinkle some sesame seeds on top right before serving.
Frequently Asked Questions:
1. Can I add other veggies? Absolutely! Bell peppers or snap peas can brighten up your dish and add more nutrients.
2. How should I store leftovers? Place them in an airtight container in the fridge, and they’ll stay fresh for up to 3 days.
Now you’re ready to enjoy a quick, savory meal that satisfies your cravings and aligns perfectly with your paleo lifestyle!
Beef and Broccoli Stir-Fry
Editor’s Choice

Kitchen & Love Organic Riced Cauliflower 8 oz (6 Pack) | Low Carb, Low C…
 Amazon$27.69
Bragg Organic Coconut Aminos – 16oz, Soy-Free Alternative, Gluten-Free, …
 Amazon$8.49
Terrasoul Superfoods Organic Black Sesame Seeds, 2 Lbs – Raw | Unhulled …
 Amazon$16.99
15. Pumpkin Spice Muffins

Pumpkin spice muffins are a cozy treat that brings the warmth of autumn right into your kitchen. With their soft texture and rich flavors, these muffins are perfect for breakfast or a snack anytime you need a little pick-me-up. Made from wholesome almond flour and pure pumpkin puree, they are not just delicious but also paleo-friendly. Plus, they’re a fantastic way to use leftover pumpkin puree!
These muffins are simple to whip up, making them a great choice for busy families. You’ll find that they are budget-friendly, too, keeping both your taste buds and your wallet happy. Imagine biting into a muffin filled with the sweet and spicy aroma of pumpkin spice—it’s a delight you won’t want to miss.
Recipe Overview:
– Servings: 12
– Prep Time: 15 minutes
– Cook Time: 25 minutes
– Total Time: 40 minutes
– Calories: 180 per muffin
Nutrition Information: Calories 180, Protein 6g, Carbs 10g, Fat 12g
Ingredients:
– 1 cup almond flour
– 1/2 cup pumpkin puree
– 3 large eggs
– 1/4 cup honey
– 1 teaspoon pumpkin spice
– 1 teaspoon baking soda
Instructions:
1. Preheat your oven to 350°F (175°C) and line a muffin tin with paper liners.
2. In a mixing bowl, combine almond flour, pumpkin puree, eggs, honey, pumpkin spice, and baking soda. Stir until everything is well blended.
3. Pour the batter into the muffin liners, filling each about three-quarters full.
4. Bake for 20-25 minutes. Check for doneness by inserting a toothpick in the center; it should come out clean.
5. Allow the muffins to cool in the pan for a few minutes before transferring them to a wire rack.
Tips:
– Add chocolate chips or chopped nuts for a fun twist.
– Store leftovers in an airtight container for a week or freeze for longer storage.
Frequently Asked Questions:
1. Can I make these dairy-free? Yes! This recipe is naturally dairy-free.
2. How should I store the muffins? Keep them in an airtight container for up to a week to maintain freshness.
Fun fact: A batch of paleo pumpkin spice muffins clocks in under 30 minutes from start to bake. Almond flour and pumpkin puree keep them moist and satisfying, perfect for busy mornings and budget-friendly paleo comfort food recipes.
Pumpkin Spice Muffins
Editor’s Choice

Blue Diamond Almonds Almond Flour, Gluten Free, Blanched, Finely Sifted,…
 AmazonCheck Price

2Pack Silicone Muffin Pan for Baking with Metal Reinforced Frame, 12 Cup…
 Amazon$19.99
16. Thai Chicken Curry
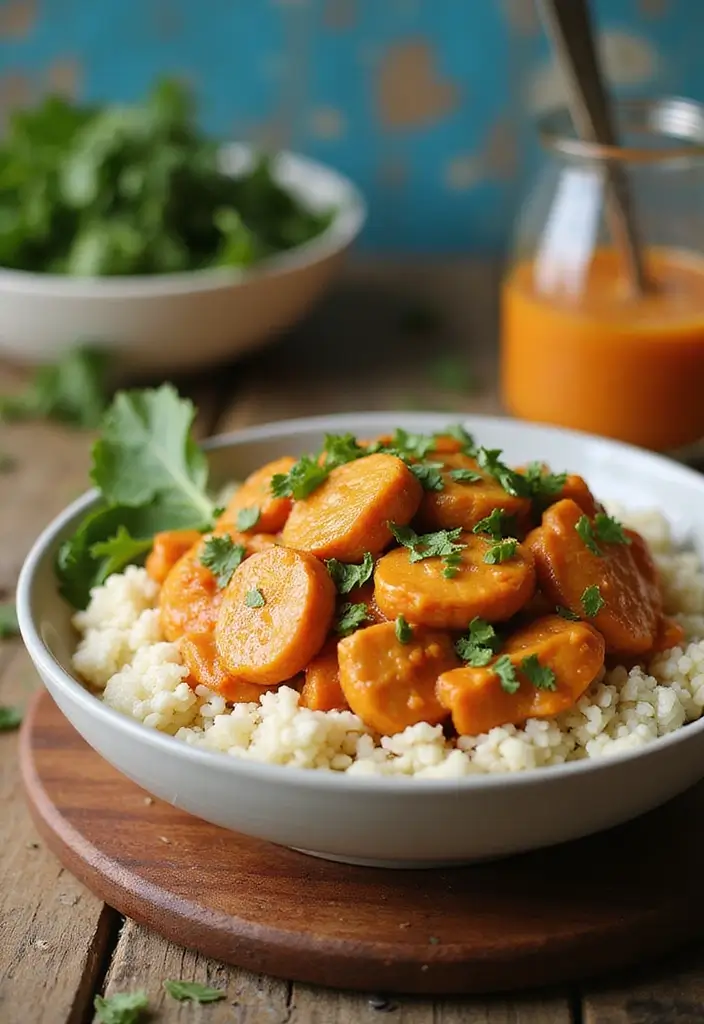
Experience the rich flavors of Thai Chicken Curry, a dish that transforms your dinner into a culinary adventure. Imagine tender chicken bathed in a creamy coconut milk sauce, bursting with the warmth of spices and the crunch of fresh vegetables. This dish not only satisfies your taste buds but also fits perfectly into your busy lifestyle, taking just 30 minutes from start to finish. Pair it with cauliflower rice or steamed broccoli for a wholesome comfort meal that feels indulgent yet healthy.
Here’s what you need to make this delightful dish:
Recipe Overview:
– Servings: 4
– Prep Time: 10 minutes
– Cook Time: 20 minutes
– Total Time: 30 minutes
– Calories: 400 per serving
Nutrition Information: Calories 400, Protein 30g, Carbs 12g, Fat 28g
Ingredients:
– 1 lb chicken breast, diced
– 1 can coconut milk
– 2 tablespoons red curry paste
– 1 bell pepper, sliced
– 1 zucchini, sliced
– Olive oil for cooking
Instructions:
1. Heat a splash of olive oil in a large skillet over medium heat. Add the diced chicken and cook until it’s golden brown.
2. Stir in the red curry paste, letting it cook for about a minute to develop its flavor.
3. Pour in the coconut milk and bring the mixture to a gentle simmer.
4. Add the sliced bell pepper and zucchini. Cook until the vegetables are tender and vibrant.
5. Serve your Thai Chicken Curry hot over a bed of cauliflower rice for a deliciously satisfying meal.
Tips:
– Adjust the level of spice by adding more or less curry paste according to your taste.
– Want to switch things up? Use shrimp or tofu instead of chicken for different flavors.
Frequently Asked Questions:
1. Can I use other proteins? Yes! Shrimp or tofu work well here.
2. Can I make this vegetarian? Absolutely! Just omit the chicken and load it up with your favorite veggies.
This Thai Chicken Curry not only delights the palate but also brings the family together, making it a go-to dish for busy weeknights. Enjoy the journey of flavors in every bite.
Thai Chicken Curry
Editor’s Choice

Simply Asia Unsweetened Coconut Milk, 13.66 fl oz – One 13.66 Ounce Can …
 AmazonCheck Price

Kitchen & Love Organic Riced Cauliflower 8 oz (6 Pack) | Low Carb, Low C…
 Amazon$27.69
17. Lemon Herb Grilled Salmon
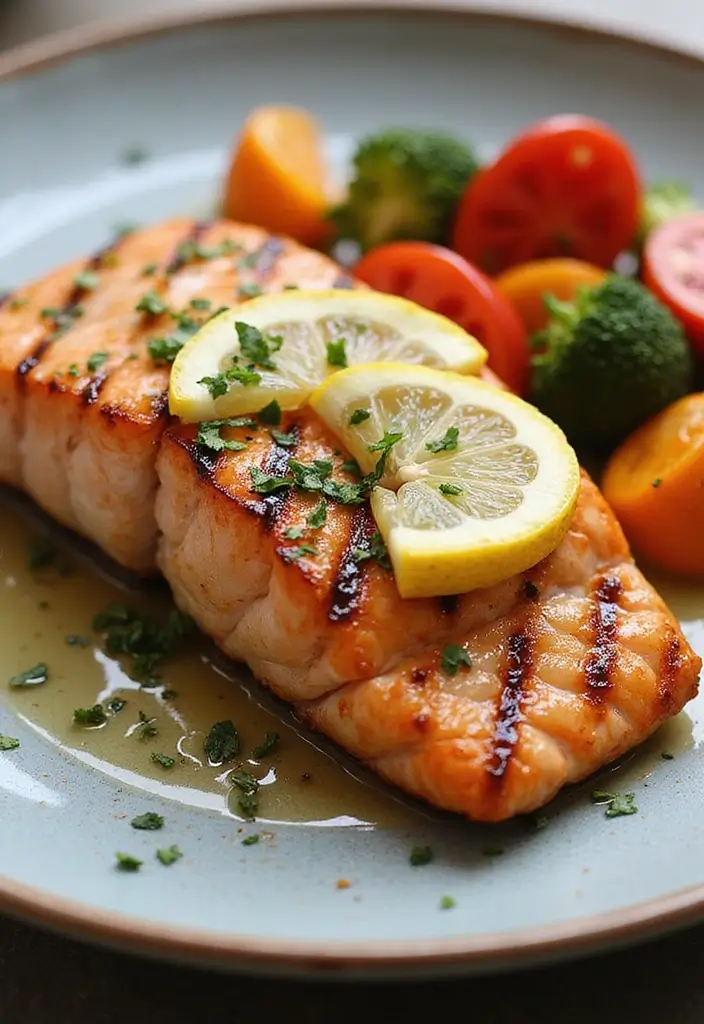
This dish pairs beautifully with roasted vegetables or a crisp green salad, creating a well-rounded meal that won’t break the bank. It’s perfect for busy weeknights or a relaxed weekend dinner.
Recipe Overview:
– Servings: 4
– Prep Time: 10 minutes
– Cook Time: 12 minutes
– Total Time: 22 minutes
– Calories: 300 per serving
Nutrition Information: Calories 300, Protein 35g, Carbs 5g, Fat 18g
Ingredients:
– 4 salmon fillets
– Juice of 1 lemon
– 2 tablespoons olive oil
– 2 tablespoons fresh dill, chopped
– Salt and pepper to taste
Instructions:
1. In a bowl, whisk together lemon juice, olive oil, dill, salt, and pepper. Marinate the salmon fillets for 10 minutes.
2. Preheat your grill to medium-high heat.
3. Grill the salmon for about 6 minutes on each side, or until it flakes easily with a fork.
4. Serve hot, alongside your favorite sides. Enjoy!
Tips:
For an extra kick, add minced garlic to the marinade.
Frequently Asked Questions:
1. Can I bake the salmon instead? Yes, simply bake at 400°F for 15-20 minutes.
2. How do I store leftovers? Keep them in an airtight container in the fridge for up to 3 days.
This lemon herb grilled salmon is not just a meal; it’s a way to enjoy healthy eating without sacrificing flavor. You’ll love how easy it is to prepare, and the vibrant taste will keep you coming back for more!
Lemon Herb Grilled Salmon
Editor’s Choice


YARRAMATE 16oz/470ml Glass Olive Oil Sprayer for Cooking with Stickers, …
 Amazon$8.99
Herb Scissors Set,Multipurpose 5 Blade Kitchen Herb Cutter with Safety C…
 Amazon$9.99
18. Ranch Chicken Skewers

Ranch chicken skewers are a delightful way to enjoy grilled chicken, and they’re perfect for any gathering or a simple weeknight dinner. These skewers are marinated in zesty ranch seasoning, making each bite juicy and flavorful. Plus, they’re simple to make and easy on your wallet, especially if you buy chicken in bulk. Pair them with fresh veggies or a crisp salad for a wholesome meal that everyone will love.
Here’s how to whip up these tasty ranch chicken skewers:
Recipe Overview:
– Servings: 4
– Prep Time: 15 minutes
– Cook Time: 10 minutes
– Total Time: 25 minutes
– Calories: 250 per serving
Nutrition Information:
Calories: 250, Protein: 30g, Carbs: 5g, Fat: 12g
Ingredients:
– 1 lb chicken breast, cut into cubes
– 2 tablespoons ranch seasoning (store-bought or homemade)
– Olive oil for drizzling
Instructions:
1. In a bowl, combine the chicken cubes with ranch seasoning and a drizzle of olive oil. Toss well to coat.
2. Thread the seasoned chicken onto skewers. If you’re using wooden skewers, soak them in water for 30 minutes to prevent burning.
3. Preheat your grill to medium heat. Grill the skewers for about 10-12 minutes, turning occasionally until they’re cooked through and slightly charred.
4. Serve hot with your favorite dipping sauce or alongside fresh veggies for a colorful plate.
Tips:
– Experiment with different proteins like pork or shrimp for variety.
– Store leftovers in an airtight container in the fridge for up to 3 days.
These ranch chicken skewers are not only delicious but also a hit at parties. You’ll love how easy they are to whip up, making them perfect for any occasion!
Ranch Chicken Skewers
Editor’s Choice

Metal Skewer for Grilling,Kabob Skewer,Flat BBQ Barbecue Skewer,Grilling…
 Amazon$7.99
McCormick Garlic Ranch Crunchy Chicken Seasoning Mix, 1.25 oz (Pack of 12)
 AmazonCheck Price
AOZITA 17oz Glass Olive Oil Bottle Dispenser – 500ml Green Oil and Vineg…
 Amazon$9.99
19. Grilled Veggie and Quinoa Salad
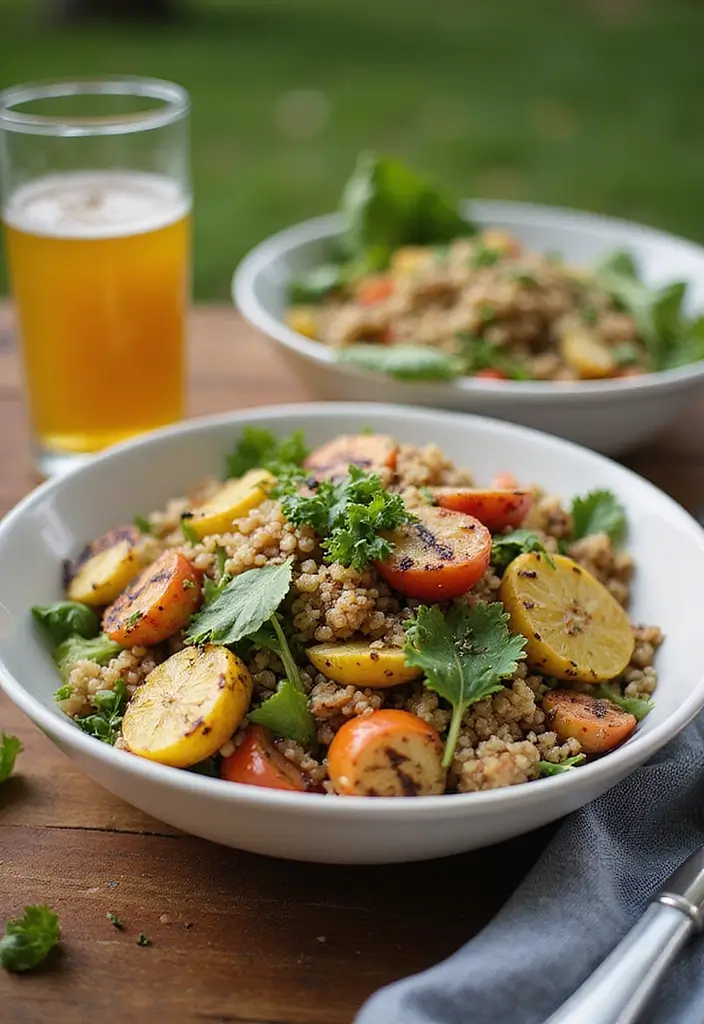
Grilled Veggie and Quinoa Salad is your go-to dish when you want something light yet filling. This salad bursts with flavors from seasonal grilled vegetables and fluffy quinoa. Toss in a zesty lemon vinaigrette, and you have a refreshing meal that won’t break the bank. Plus, it’s a fantastic meatless option, making it perfect for any family dinner.
This dish works beautifully as a main course or a side. It’s a simple way to sneak more veggies into your diet while keeping things tasty and satisfying. Imagine the smoky flavor of grilled zucchini and bell peppers mingling with the nuttiness of quinoa. Your taste buds will thank you!
Recipe Overview:
– Servings: 4
– Prep Time: 15 minutes
– Cook Time: 15 minutes
– Total Time: 30 minutes
– Calories: 250 per serving
Nutrition Information:
Calories: 250, Protein: 8g, Carbs: 40g, Fat: 10g
Ingredients:
– 1 cup quinoa
– 2 cups mixed vegetables (like zucchini, bell peppers, and red onion)
– 2 tablespoons olive oil
– Juice of 1 lemon
– Salt and pepper to taste
Instructions:
1. Rinse the quinoa and cook it according to the package instructions. Set it aside once it’s fluffy.
2. Slice your vegetables. Toss them in olive oil, salt, and pepper. Grill them until they’re nicely charred.
3. In a large bowl, mix together the cooked quinoa, grilled veggies, and lemon juice. Toss it all to combine well.
4. Serve it warm or chill it in the fridge for a refreshing twist.
Tips:
– Add nuts or seeds for a crunchy texture.
– Use frozen veggies if fresh ones aren’t available.
– Store leftovers in an airtight container for up to four days.
– Experiment with different veggies based on the season!
This Grilled Veggie and Quinoa Salad will brighten your meals and keep you feeling good. It’s easy to make, affordable, and packed with nutrients. Enjoy every bite!
Grilled Veggie and Quinoa Salad
Editor’s Choice

Pride Of India – Natural Royal Red Bolivian Quinoa – Protein Rich Whole …
 AmazonCheck Price
Pompeian Robust Extra Virgin Olive Oil, Contains Polyphenols, First Cold…
 Amazon$15.64
20. Coconut Chia Seed Pudding
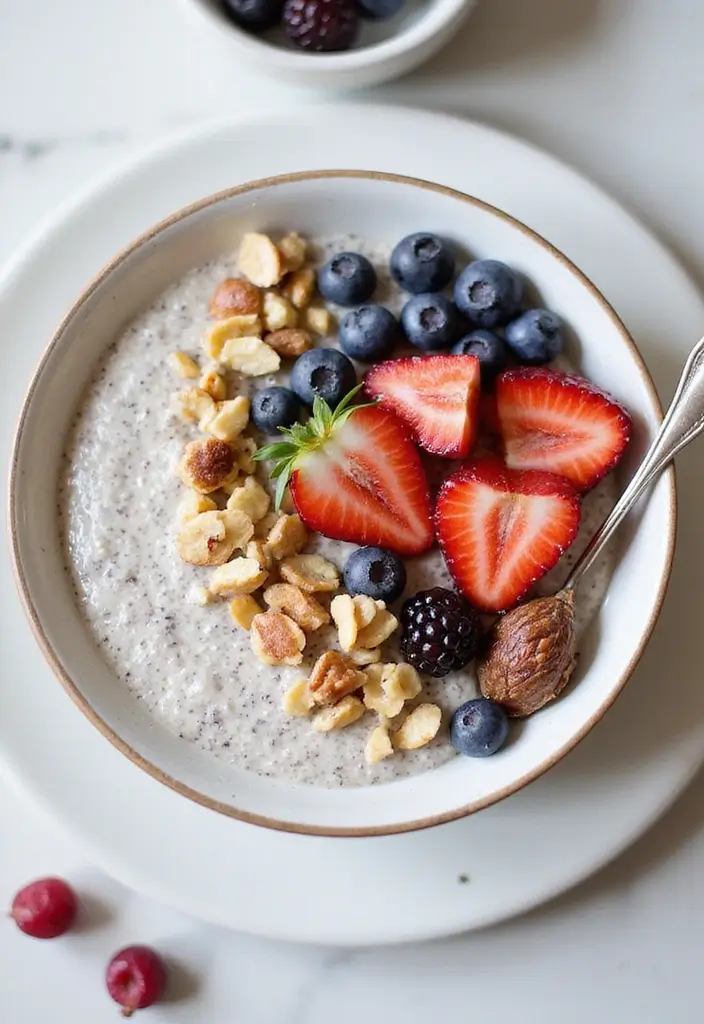
Coconut chia seed pudding is a delightful treat that doubles as breakfast or dessert. Its creamy texture makes it incredibly satisfying. Plus, it’s packed with nutrients, making it a smart choice for your diet. When you soak chia seeds in rich coconut milk, they swell and create a pudding-like consistency that’s simply irresistible.
You can whip this up in just a few minutes, and it’s perfect for busy mornings. Make it the night before and let it chill in the fridge. Top it with your favorite fruits or nuts for added flavor and texture. This pudding is not only paleo-friendly but also easy on your wallet.
Recipe Overview:
– Servings: 4
– Prep Time: 5 minutes
– Cook Time: 0 minutes
– Total Time: 5 minutes + refrigeration
– Calories: 200 per serving
Nutrition Information:
Calories 200, Protein 5g, Carbs 14g, Fat 15g
Ingredients:
– 1 cup coconut milk
– 1/4 cup chia seeds
– 2 tablespoons honey or maple syrup
– Pinch of salt
Instructions:
1. In a bowl, mix the coconut milk, chia seeds, honey, and salt until well combined.
2. Let the mixture sit for 5 minutes. Then, whisk it again to avoid clumping.
3. Cover the bowl and refrigerate for at least 2 hours or overnight.
4. Serve it chilled and add fresh fruits or nuts on top for a delicious finish.
Tips:
– Experiment by adding cocoa powder or vanilla extract for extra flavor!
– Store in an airtight container in the fridge for up to 5 days. Perfect for meal prep!
– If you’re out of coconut milk, feel free to use almond milk or another plant-based alternative.
Enjoy this quick and nutritious treat that satisfies your sweet tooth while keeping your paleo goals on track!
Coconut Chia Seed Pudding
Editor’s Choice

BetterBody Foods Organic Chia Seeds 2 lbs, 32 Oz, with Omega-3, Non-GMO,…
 Amazon$11.97
Simply Asia Unsweetened Coconut Milk, 13.66 fl oz – One 13.66 Ounce Can …
 AmazonCheck Price
50 Pack (100-Piece) 32 oz Meal Prep Containers Reusable with Lids 3-Comp…
 Amazon$21.99
21. Slow Cooker Stuffed Cabbage

Slow cooker stuffed cabbage is your go-to dish when you crave comfort food without the fuss. This meal combines tender cabbage leaves with a delicious filling of ground meat, cauliflower rice, and flavorful spices, all simmered together in a rich tomato sauce. It’s nutritious, easy on the wallet, and perfect for busy weeknights or family gatherings.
Imagine coming home to the warm aroma of this hearty dish after a long day. The slow cooker does all the work while you focus on other tasks. Plus, it’s ideal for meal prep, meaning you can enjoy leftovers for days!
Recipe Overview:
– Servings: 6
– Prep Time: 20 minutes
– Cook Time: 4 hours
– Total Time: 4 hours 20 minutes
– Calories: 350 per serving
Nutrition Information: Calories 350, Protein 25g, Carbs 20g, Fat 15g
Ingredients:
– 1 head of cabbage
– 1 lb ground beef or turkey
– 1 cup cauliflower rice
– 1 can diced tomatoes
– 1 tablespoon Italian seasoning
– Salt and pepper to taste
Instructions:
1. In a large bowl, mix the ground meat, cauliflower rice, Italian seasoning, salt, and pepper until well combined.
2. Carefully peel off cabbage leaves. Place a generous spoonful of the filling into each leaf.
3. Roll the cabbage leaves tightly and place them in your slow cooker. Pour the diced tomatoes over the top.
4. Set your slow cooker to low and cook for about 4 hours, or until the cabbage is tender.
5. Serve your stuffed cabbage hot, perhaps with a fresh side salad for balance.
Tips:
– Freeze leftovers for quick, future meals!
– Swap out cauliflower rice for quinoa or brown rice if you prefer.
Frequently Asked Questions:
1. Can I use other grains? Yes, quinoa or brown rice are great substitutes.
2. How do I store leftovers? Keep them in an airtight container in the fridge for up to 4 days.
This comforting dish not only satisfies your cravings but also fits perfectly into a busy lifestyle. Enjoy the simplicity of slow cooking and the delicious flavors that come together effortlessly!
Slow Cooker Stuffed Cabbage
Editor’s Choice

Crock-Pot 7 Quart Oval Manual Slow Cooker, Stainless Steel (SCV700-S-BR)…
 Amazon$35.99
50 Pack (100-Piece) 32 oz Meal Prep Containers Reusable with Lids 3-Comp…
 Amazon$21.99
22. Ranch Beef Tacos
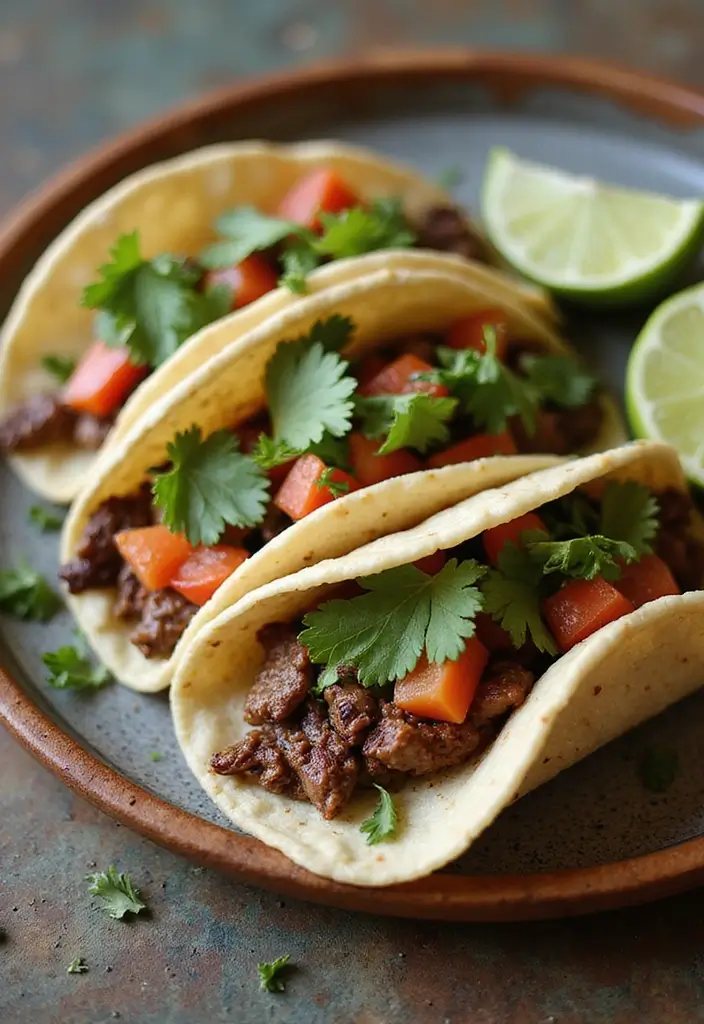
Ranch beef tacos bring a burst of flavor to your taco night with minimal effort. Imagine juicy, seasoned ground beef wrapped in crispy taco shells, topped with fresh lettuce, ripe tomatoes, and creamy avocado. These tacos are not only a hit with the whole family, but they also make dinner prep a breeze. Plus, they’re a fantastic way to get the kids involved in the kitchen, making mealtime more fun!
Let’s dive into the recipe so you can savor these delicious tacos tonight. They’re healthy and budget-friendly, ensuring everyone leaves satisfied. With just 20 minutes from start to finish, you’ll have a tasty meal on the table in no time.
Recipe Overview:
– Servings: 4
– Prep Time: 10 minutes
– Cook Time: 10 minutes
– Total Time: 20 minutes
– Calories: 300 per serving
Nutrition Information:
Calories: 300, Protein: 25g, Carbs: 10g, Fat: 20g
Ingredients:
– 1 lb ground beef
– 1 packet ranch dressing mix
– Paleo-friendly taco shells
– Fresh lettuce, diced tomatoes, and sliced avocado for toppings
Instructions:
1. Heat a skillet over medium heat. Add the ground beef and cook until browned, stirring occasionally.
2. Mix in the ranch dressing packet and a splash of water. Cook for 2-3 minutes until everything is well combined.
3. Spoon the seasoned beef into taco shells.
4. Top with fresh veggies like lettuce, tomatoes, and avocado.
5. Serve hot, adding your favorite salsa for an extra kick, if desired!
Tips:
– Use ground turkey for a lighter option.
– Make the beef ahead of time and fill the tacos just before serving.
– Feel free to switch up toppings based on your family’s favorites!
Frequently Asked Questions:
1. Can I prepare these tacos in advance? Yes, cook the beef and fill the tacos right before serving for the best flavor.
2. What toppings can I use? Feel free to get creative! Try cheese, jalapeños, or even salsa for variety.
These ranch beef tacos are sure to be a crowd-pleaser any night of the week. Enjoy the flavors and the time spent with your loved ones around the table!
Ranch Beef Tacos
Editor’s Choice


Hidden Valley Original Ranch Salad Dressing and Seasoning Mix (16 oz.) I…
 Amazon$12.45
23. Lemon Garlic Roasted Chicken Thighs
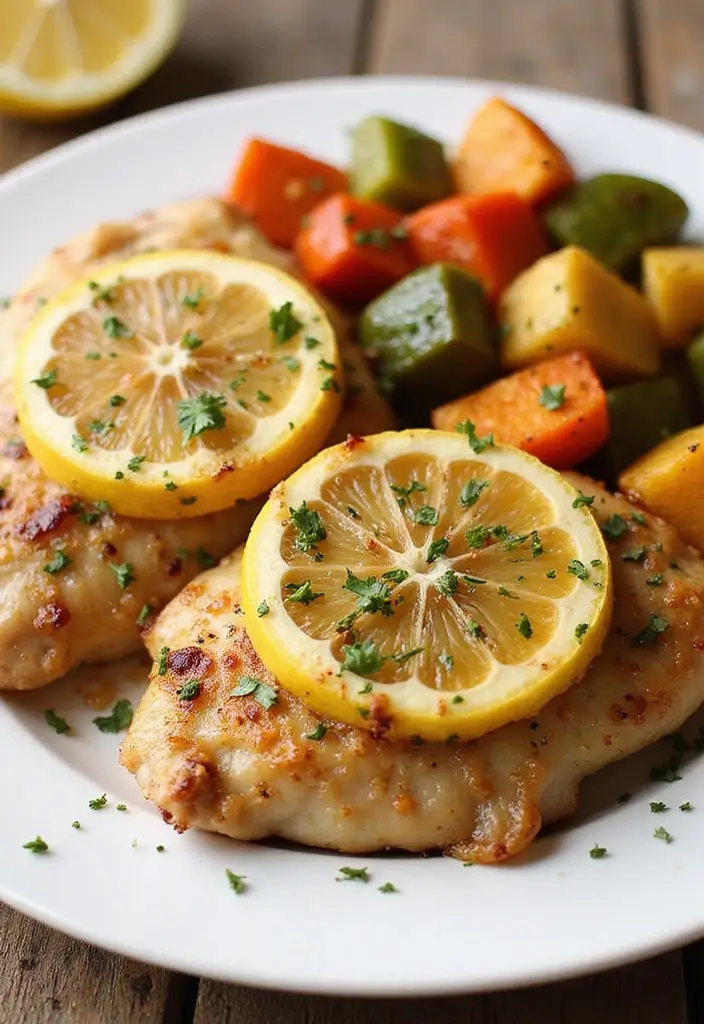
Lemon garlic roasted chicken thighs are a fantastic choice for an easy weeknight dinner. They burst with flavor and are sure to please everyone at your table. The magic happens when you marinate the chicken in fresh lemon juice, minced garlic, and fragrant herbs. The result? Juicy, tender meat with a crispy, golden skin that you can’t resist.
Pair these thighs with some colorful roasted vegetables or a crisp salad for a complete meal. Plus, chicken thighs are budget-friendly, allowing you to enjoy a delicious dinner without overspending. It’s a win-win!
Recipe Overview:
– Servings: 4
– Prep Time: 10 minutes
– Cook Time: 45 minutes
– Total Time: 55 minutes
– Calories: 320 per serving
Nutrition Information: Calories 320, Protein 30g, Carbs 5g, Fat 22g
Ingredients:
– 4 chicken thighs, bone-in and skin-on
– Juice of 2 lemons
– 4 cloves garlic, minced
– 2 tablespoons olive oil
– Salt and pepper to taste
Instructions:
1. Preheat your oven to 425°F (220°C).
2. In a mixing bowl, combine lemon juice, minced garlic, olive oil, salt, and pepper.
3. Marinate the chicken thighs in this mixture for at least 30 minutes. The longer, the better!
4. Arrange the thighs in a roasting pan and bake for 45 minutes, or until the skin is crispy and the meat is fully cooked.
5. Serve hot with your favorite roasted veggies or a fresh salad.
Tips:
– For super crispy skin, broil the chicken for the last few minutes of cooking.
– Feel free to add your favorite herbs to the marinade for extra flavor.
Frequently Asked Questions:
1. Can I use chicken breasts instead? Yes, but remember they cook faster, so check them earlier.
2. How should I store leftovers? Keep them in an airtight container in the fridge for up to 3 days.
This recipe is not just about filling your stomach; it’s about creating a delightful dining experience that you and your family will love. Enjoy!
Lemon Garlic Roasted Chicken Thighs
Editor’s Choice

Ofargo Stainless Steel Meat Injector Syringe Kit with 4 Marinade Needles…
 Amazon$27.99

Lodge 10.25 Inch Cast Iron Skillet – Pre-Seasoned Frying Pan with Teardr…
 Amazon$24.90
Alpha Grillers Meat Thermometer Digital – Instant Read Food Thermometer …
 Amazon$15.98
24. Quinoa and Black Bean Salad
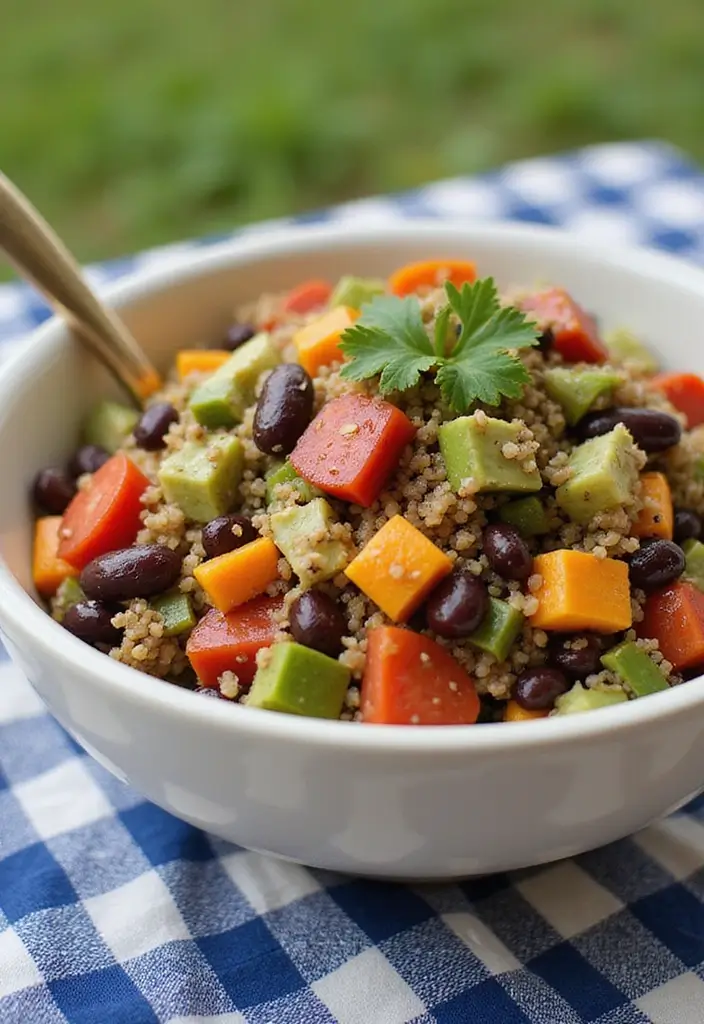
Quinoa and black bean salad is a delicious way to enjoy a healthy meal. It’s bright, refreshing, and packed with nutrition. This dish combines fluffy quinoa with protein-rich black beans, crunchy bell peppers, and a zesty lime dressing that wakes up your taste buds. You can serve it as a main dish or a side, making it super versatile for any occasion. Plus, it’s an excellent option for meal prep since it stays fresh in the fridge for days.
Here’s why you’ll love this salad: it’s budget-friendly and uses simple ingredients you probably have at home. Whether you’re heading to a picnic or a potluck, this salad will impress your friends and family.
Recipe Overview:
– Servings: 4
– Prep Time: 10 minutes
– Cook Time: 15 minutes
– Total Time: 25 minutes
– Calories: 250 per serving
Nutrition Information:
Calories: 250, Protein: 10g, Carbs: 45g, Fat: 5g
Ingredients:
– 1 cup quinoa
– 1 can black beans, drained and rinsed
– 1 bell pepper, diced
– 1/4 cup red onion, chopped
– 1/4 cup cilantro, chopped
– Juice of 2 limes
– Olive oil for drizzling
Instructions:
1. Cook the quinoa according to the package instructions and let it cool.
2. In a large bowl, mix together the cooked quinoa, black beans, bell pepper, red onion, and cilantro.
3. Drizzle the lime juice and olive oil over the salad. Toss everything together until well combined.
4. Serve the salad chilled or at room temperature for a refreshing meal.
Tips:
– Add chopped nuts or seeds for extra crunch.
– Feel free to swap black beans for kidney beans or chickpeas if you like.
– Store leftovers in an airtight container for up to 4 days, making it perfect for lunch or a quick snack.
Now you have a tasty, nutritious salad that satisfies cravings while keeping things simple! Enjoy every bite!
Quinoa and Black Bean Salad
Editor’s Choice

BetterBody Foods Organic Quinoa, Vegan, Gluten Free, Low Glycemic Rice R…
 Amazon$11.49
Bentgo Prep – 20-Piece 3-Compartment Reusable Meal Prep Containers with …
 Amazon$14.99
Pompeian Robust Extra Virgin Olive Oil, Contains Polyphenols, First Cold…
 Amazon$15.64
25. Honey Garlic Chicken Wings

Honey garlic chicken wings are the ultimate crowd-pleaser, perfect for game day or family get-togethers. Imagine biting into crispy wings coated in a sweet, sticky honey garlic sauce that makes your taste buds sing. Not only are these wings delicious, but they’re also baked, making them a healthier choice compared to fried options. Plus, they’re easy on your wallet and simple to prepare, which means you can focus more on enjoying the moment with your loved ones.
Here’s how to make these mouthwatering wings at home:
Recipe Overview:
– Servings: 4
– Prep Time: 10 minutes
– Cook Time: 40 minutes
– Total Time: 50 minutes
– Calories: 350 per serving
Nutrition Information: Calories 350, Protein 20g, Carbs 30g, Fat 20g
Ingredients:
– 2 lbs chicken wings
– 1/4 cup honey
– 4 cloves garlic, minced
– 2 tablespoons soy sauce or coconut aminos
– Salt and pepper to taste
Instructions:
1. Preheat your oven to 400°F (200°C).
2. In a bowl, combine honey, garlic, soy sauce, salt, and pepper.
3. Toss the chicken wings in the honey garlic mixture until they are fully coated.
4. Arrange the wings on a baking sheet and bake for 40 minutes, or until they turn golden and crispy.
5. Serve them hot with your favorite dipping sauce for an extra kick!
Tips: For added crispiness, turn on the broiler for the last 5 minutes of cooking.
Frequently Asked Questions:
1. Can I use frozen wings? Yes, just ensure they are completely defrosted before cooking.
2. Are these wings healthy? Yes! They fit well into a balanced diet when baked instead of fried.
Now you’re ready to impress your friends and family with these tasty honey garlic chicken wings. Enjoy the crunch and sweetness in every bite!
Honey Garlic Chicken Wings
Editor’s Choice

GoodCook Everyday Nonstick Carbon Steel Baking Sheet Set, 3 Pack – Small…
 Amazon$17.99
Kitessensu High Effective Garlic Press With Studs, Heavy Duty Garlic Min…
 Amazon$11.99
26. Spanish Cauliflower Rice
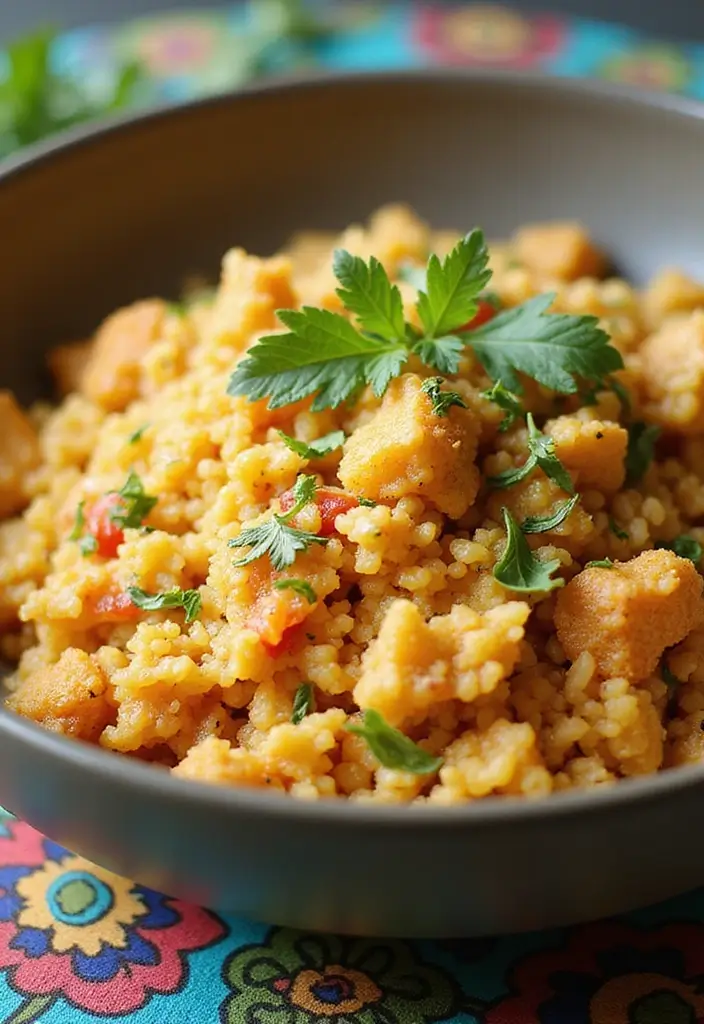
Spanish cauliflower rice is your new go-to side dish when you want comfort without the carbs. This dish takes the classic flavors of Spanish rice and gives it a healthy twist by using riced cauliflower. Packed with diced tomatoes, colorful bell peppers, and a kick of spices, it’s both tasty and easy to whip up. Plus, it’s budget-friendly since it uses simple, affordable ingredients.
Imagine serving this vibrant dish alongside your favorite protein. It’s rich in flavor and looks great on the plate. This side dish not only satisfies your cravings but helps you stick to your health goals too!
Recipe Overview:
– Servings: 4
– Prep Time: 5 minutes
– Cook Time: 15 minutes
– Total Time: 20 minutes
– Calories: 150 per serving
Nutrition Information: Calories 150, Protein 6g, Carbs 10g, Fat 8g
Ingredients:
– 1 head of cauliflower, riced
– 1 can of diced tomatoes
– 1 bell pepper, diced (any color you like)
– 2 cloves of garlic, minced
– 1 teaspoon of paprika
– Olive oil for cooking
Instructions:
1. Heat a splash of olive oil in a skillet over medium heat. Sauté the minced garlic until it smells heavenly.
2. Toss in the diced bell pepper. Cook for about 2-3 minutes until it softens slightly.
3. Stir in the riced cauliflower, canned tomatoes, and paprika. Cook everything together for about 10 minutes until it’s heated through.
4. Serve hot and enjoy this tasty side dish!
Tips: For an extra pop of flavor, sprinkle fresh cilantro or parsley on top before serving.
Frequently Asked Questions:
1. Can I use frozen riced cauliflower? Yes! Just remember to reduce the cooking time to keep it from getting mushy.
2. How do I store leftovers? Place them in an airtight container in the fridge. They’ll stay fresh for up to 3 days.
Spanish Cauliflower Rice
Editor’s Choice

Kitchen & Love Organic Riced Cauliflower 8 oz (6 Pack) | Low Carb, Low C…
 Amazon$27.59
Pompeian Robust Extra Virgin Olive Oil, Contains Polyphenols, First Cold…
 Amazon$15.64
Kamenstein 20 Jar Revolving Countertop Spice Rack with Spices Included, …
 Amazon$31.99
27. Balsamic Glazed Brussels Sprouts
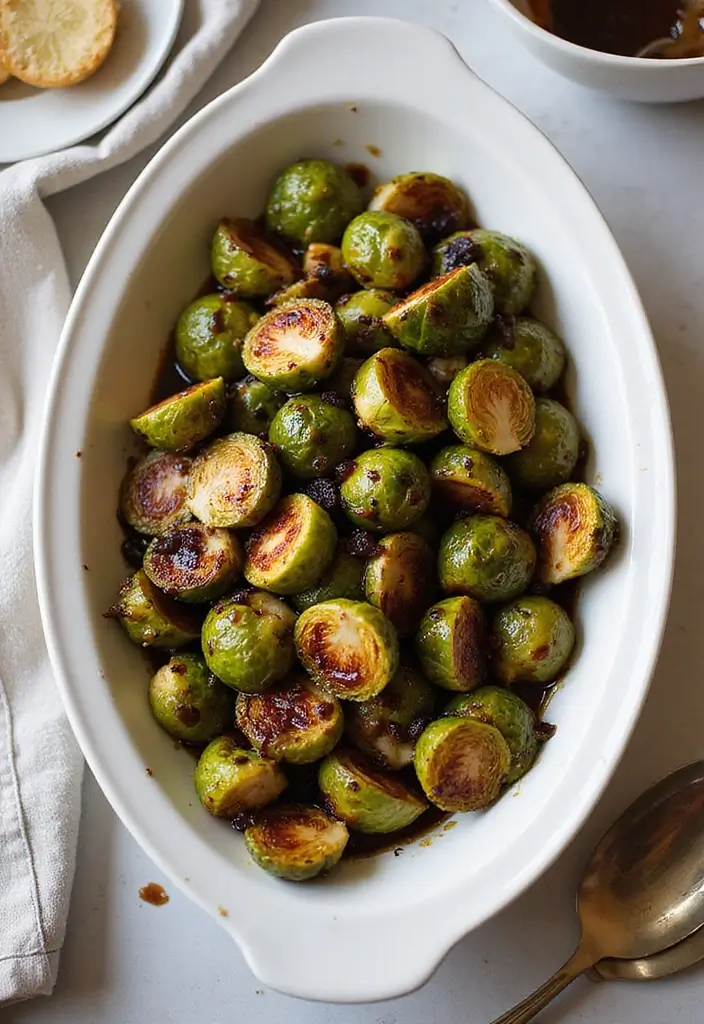
Balsamic glazed Brussels sprouts can transform any meal into something special. This side dish combines rich flavors and impressive presentation. The sweetness of honey meets the tanginess of balsamic vinegar, creating a delightful taste that even veggie skeptics will love. Serve these at your next dinner party or enjoy them on a cozy weeknight. They’re not just tasty; they’re also a fun way to encourage your family to eat their greens!
Here’s how to whip up this delicious dish. You’ll need just a few simple ingredients and about 35 minutes. The steps are easy to follow, making this recipe perfect for cooks of all skill levels. Plus, with just 140 calories per serving, you can feel good about indulging in this flavorful treat!
Recipe Overview:
– Servings: 4
– Prep Time: 10 minutes
– Cook Time: 25 minutes
– Total Time: 35 minutes
– Calories: 140 per serving
Nutrition Information:
Calories 140, Protein 5g, Carbs 12g, Fat 8g
Ingredients:
– 1 lb Brussels sprouts, halved
– 1/4 cup balsamic vinegar
– 2 tablespoons honey
– Olive oil for drizzling
– Salt and pepper to taste
Instructions:
1. Preheat your oven to 400°F (200°C).
2. Toss the halved Brussels sprouts with olive oil, salt, and pepper in a bowl. Spread them out on a baking sheet.
3. Roast for 20 minutes until they’re tender and golden.
4. Drizzle the balsamic vinegar and honey over the sprouts, then roast for another 5 minutes.
5. Serve warm, drizzling any leftover glaze on top for extra flavor.
Tips:
– Add a sprinkle of feta cheese for a creamy contrast.
– Experiment with nuts like walnuts or pecans for added crunch.
Frequently Asked Questions:
1. Can I use frozen Brussels sprouts? Fresh is best, but thawed frozen ones can work too.
2. How long do leftovers last? Store them in the fridge for up to 3 days.
Enjoy this easy and delicious recipe that’s sure to please everyone at your table! You’ll find yourself making these balsamic glazed Brussels sprouts again and again.
Balsamic Glazed Brussels Sprouts
Editor’s Choice


Nate’s 100% Pure, Raw & Unfiltered Honey – Award-Winning Taste, 32oz. Sq…
 Amazon$10.63
Pompeian Robust Extra Virgin Olive Oil, Contains Polyphenols, First Cold…
 Amazon$15.64
28. Shrimp and Cauliflower Grits
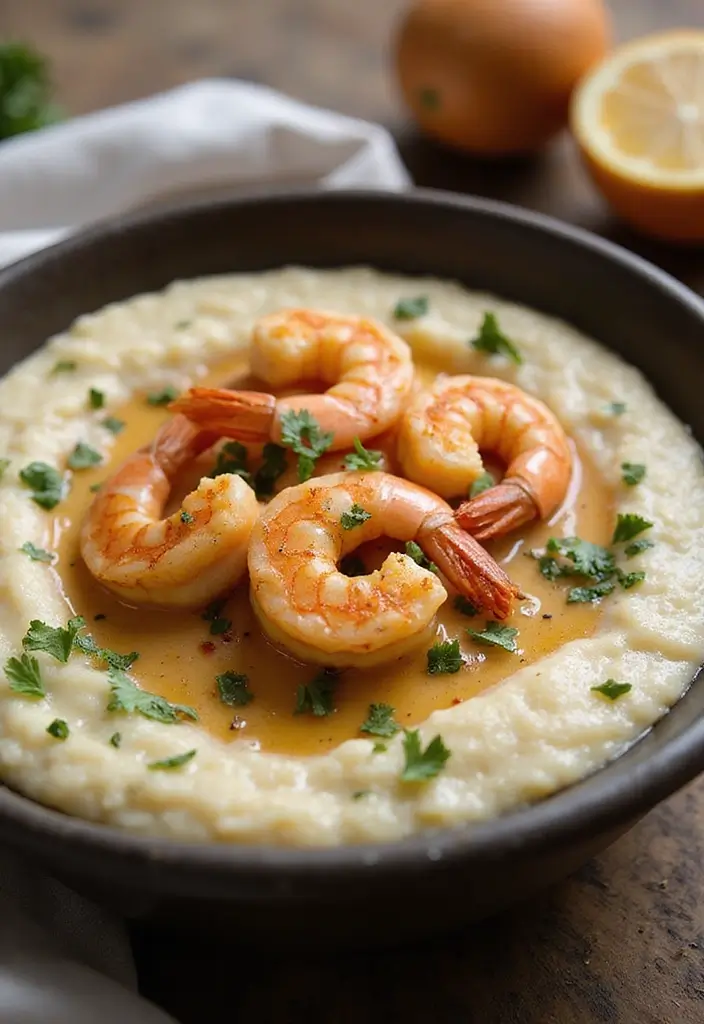
Indulge in a tasty twist on a southern favorite with shrimp and cauliflower grits. This dish is a delightful blend of sautéed shrimp served on a bed of creamy cauliflower grits, infused with aromatic garlic and fresh herbs. It’s comfort food that warms the heart and impresses your guests, all while keeping it paleo-friendly. Plus, it’s easy on the wallet, using simple ingredients you can find at any grocery store.
Recipe Overview:
– Servings: 4
– Prep Time: 10 minutes
– Cook Time: 20 minutes
– Total Time: 30 minutes
– Calories: 330 per serving
Nutrition Information:
Calories: 330
Protein: 24g
Carbs: 15g
Fat: 22g
Ingredients:
– 1 lb shrimp, peeled and deveined
– 1 head cauliflower, riced
– 1 cup vegetable broth
– 2 tablespoons butter or ghee
– 4 cloves garlic, minced
– Salt and pepper to taste
Instructions:
1. In a medium saucepan, melt the butter over medium heat. Add the minced garlic and sauté until fragrant, about 1 minute.
2. Stir in the riced cauliflower and vegetable broth. Cook for about 10 minutes, or until the cauliflower is tender.
3. Blend the mixture until smooth to create a creamy texture. You can use an immersion blender or a regular blender.
4. In a separate skillet, sauté the shrimp over medium-high heat, seasoning with salt and pepper. Cook until the shrimp turns pink and is cooked through, about 3-4 minutes.
5. Serve the sautéed shrimp over the creamy cauliflower grits.
Tips for Perfecting Your Dish:
– Add a tablespoon of cream cheese for an extra layer of creaminess.
– Experiment with spices like paprika or cayenne for a kick.
Frequently Asked Questions:
1. Can I use frozen shrimp? Yes, just be sure to thaw them in advance.
2. How do I store leftovers? Place in an airtight container and refrigerate for up to 3 days.
This shrimp and cauliflower grits recipe is not only delicious but also a great way to enjoy a classic dish while sticking to your paleo lifestyle. Enjoy every bite!
Shrimp and cauliflower grits prove that cozy, budget-friendly meals can be paleo comfort food recipes in minutes. This dish warms the heart and feeds a family without breaking the bank—garlic, herbs, and creamy cauliflower mash crown your table.
Shrimp and Cauliflower Grits
Editor’s Choice

KitchenAid Variable Speed Corded Hand Blender KHBV53, Contour Silver
 AmazonCheck Price
Maine Man Shrimp Peeler Deveiner Cleaner Tool, 8-Inches, Red
 Amazon$9.72
29. Turkey Meatloaf
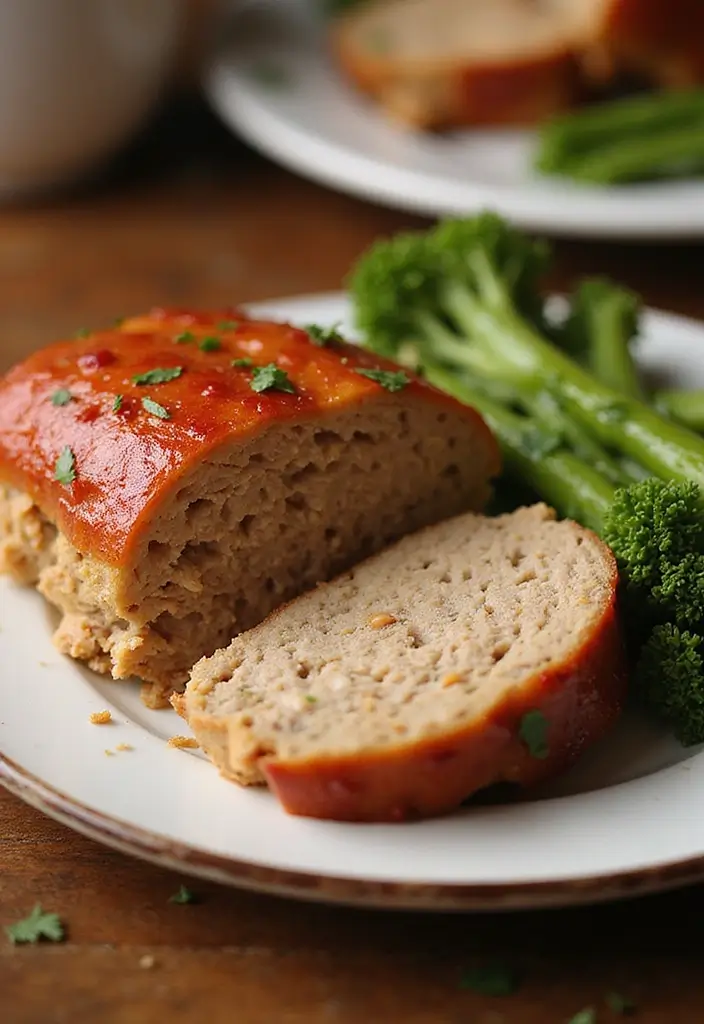
Turkey meatloaf offers a healthier spin on a beloved comfort food. This dish combines lean ground turkey with colorful veggies, making it both nutritious and filling. The mix of spices and herbs gives it a delightful flavor that your family will rave about. Plus, it’s budget-friendly and perfect for meal prep, allowing you to whip up a big batch for the week ahead. Pair it with steamed vegetables or a fresh salad for a wholesome meal.
Recipe Overview:
– Servings: 6
– Prep Time: 15 minutes
– Cook Time: 1 hour
– Total Time: 1 hour 15 minutes
– Calories: 280 per serving
Nutrition Information: Calories 280, Protein 25g, Carbs 10g, Fat 15g
Ingredients:
– 1 lb ground turkey
– 1 cup grated zucchini
– 1/2 cup onion, diced
– 2 eggs
– 1/4 cup almond flour
– 2 tablespoons ketchup (sugar-free)
– Salt and pepper to taste
Instructions:
1. Preheat your oven to 350°F (175°C).
2. In a large bowl, combine the ground turkey, grated zucchini, diced onion, eggs, almond flour, salt, and pepper. Mix until everything is well blended.
3. Spoon the mixture into a loaf pan. Spread the ketchup on top for a tangy finish.
4. Bake for 60 minutes, or until the meatloaf is cooked through and golden on top.
5. Let it rest for a few minutes before slicing to keep it juicy.
Tips: Serve your meatloaf with creamy mashed cauliflower for a satisfying twist on comfort food.
Frequently Asked Questions:
1. Can I use other ground meats? Yes, both ground chicken and beef work well too.
2. How do I store leftovers? Place them in an airtight container in the fridge for up to 4 days.
Turkey Meatloaf
Editor’s Choice

Blue Diamond Almonds Almond Flour, Gluten Free, Blanched, Finely Sifted,…
 Amazon$9.91
8 Pack 36oz Large Glass Meal Prep Containers with lids, Glass Food Stora…
 Amazon$30.39
30. Apple Cinnamon Snack Bars
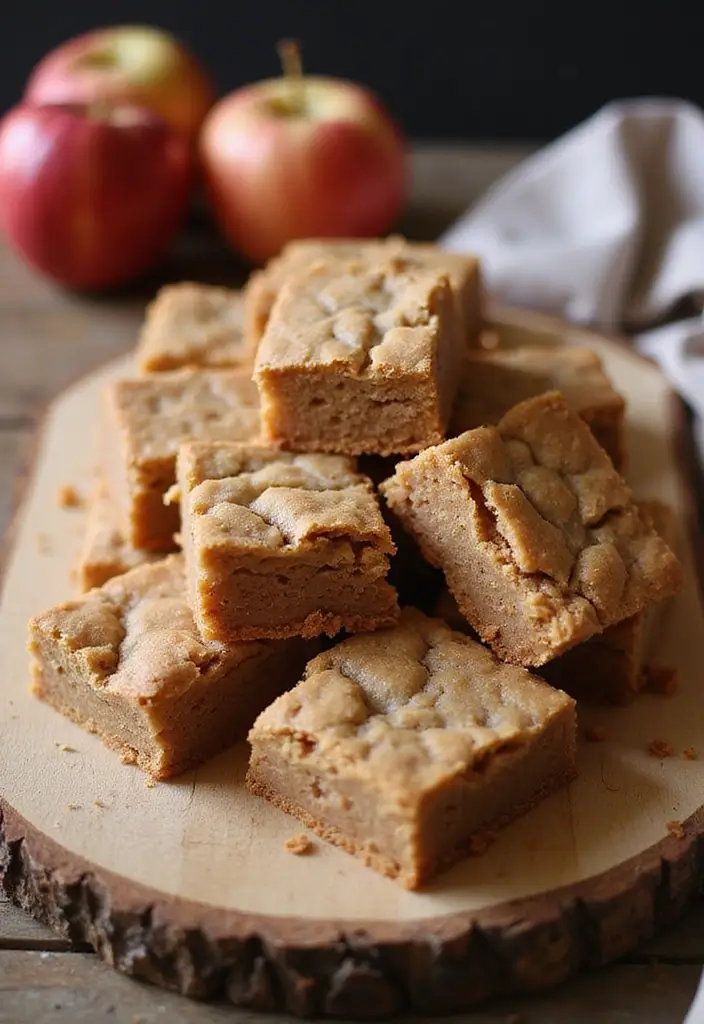
Apple cinnamon snack bars are the perfect solution for your busy mornings or mid-afternoon cravings. These delightful bars combine the sweetness of fresh apples with the warm spice of cinnamon, creating a treat that feels like a hug in a bite. Plus, they are made with wholesome almond flour, making them a nutritious option for your family. You can easily batch them ahead of time, ensuring a healthy snack is always within reach.
Recipe Overview:
– Servings: 12
– Prep Time: 15 minutes
– Cook Time: 30 minutes
– Total Time: 45 minutes
– Calories: 150 per bar
Nutrition Information:
Calories 150, Protein 5g, Carbs 12g, Fat 10g
Ingredients:
– 2 cups almond flour
– 1 cup fresh apples, chopped
– 2 eggs
– 1/4 cup honey
– 1 teaspoon cinnamon
– 1 teaspoon baking soda
Instructions:
1. Start by preheating your oven to 350°F (175°C). Line a baking dish with parchment paper for easy removal later.
2. In a mixing bowl, combine the almond flour, chopped apples, eggs, honey, cinnamon, and baking soda. Stir until everything is well mixed.
3. Pour the mixture into your prepared baking dish and spread it evenly.
4. Bake in the oven for 30 minutes or until the bars are golden brown and firm to the touch.
5. Let the bars cool before slicing them into squares.
Tips:
– Freeze extra bars for quick snacks later on.
– Feel free to experiment with other fruits like bananas or pears for different flavors.
– Store leftovers in an airtight container in the fridge for up to a week.
These apple cinnamon snack bars are not just tasty; they’re a nutritious choice you can feel good about serving. Enjoy the cozy flavors and the comfort of knowing you have a healthy treat ready whenever you need it!
Fun fact: Batch-cooking paleo comfort food recipes like apple cinnamon bars can cut weekly food costs by up to 30%, while keeping meals gluten-free and family-friendly. Batch-made bars mean quick, healthy breakfasts for busy mornings you’ll actually enjoy.
Apple Cinnamon Snack Bars
Editor’s Choice

Blue Diamond Almonds Almond Flour, Gluten Free, Blanched, Finely Sifted,…
 AmazonCheck Price
Rubbermaid Brilliance Food Storage Containers BPA Free Airtight Lids Ide…
 Amazon$34.99
Conclusion

These 30+ Paleo comfort food recipes show that you can indulge in delicious meals without sacrificing health or your wallet.
Each dish is designed to be nutritious, budget-friendly, and family-approved, proving that comfort food can be both satisfying and wholesome.
Whether you’re cooking for a family dinner or meal prepping for the week, these recipes will help you enjoy the best of both worlds.
Note: We aim to provide accurate product links, but some may occasionally expire or become unavailable. If this happens, please search directly on Amazon for the product or a suitable alternative.
This post contains Amazon affiliate links, meaning I may earn a small commission if you purchase through my links, at no extra cost to you.
Frequently Asked Questions
What Are Some Easy Paleo Comfort Food Recipes for Families on a Budget?
Cooking on a budget doesn’t mean sacrificing flavor or nutrition! You can whip up easy Paleo comfort food recipes like sweet potato shepherd’s pie or zucchini lasagna that are both filling and wallet-friendly. Using seasonal vegetables and bulk proteins like ground beef or chicken can help keep costs down while still providing delicious and healthy meals for your family. Don’t forget to check out the recipes in our article for tasty ideas!
Are Paleo Comfort Foods Really Healthy and Gluten-Free?
Absolutely! Paleo comfort food recipes are designed to be both healthy and gluten-free, focusing on whole, unprocessed ingredients. You can enjoy favorites like cauliflower mac and cheese or chicken pot pie without any grains or gluten. These dishes not only satisfy cravings but also pack a nutritious punch, making them perfect for families looking for health-conscious options.
Can I Find Paleo Recipes That Are Kid-Friendly?
Definitely! Many Paleo recipes are kid-friendly and designed to appeal to younger taste buds. Think of Paleo chicken tenders or banana pancakes that can make meal times fun and enjoyable for kids. By introducing these healthy comfort foods early on, you’re setting your family up for a lifetime of healthy eating habits. Explore the recipes in our article for some great options!
What Are Some Quick and Easy Paleo Dishes for Busy Weeknights?
For those busy weeknights, you’ll love how quick and easy Paleo comfort food recipes can be! Dishes like slow-cooker pulled pork or one-pan lemon garlic chicken require minimal prep and time, allowing you to enjoy a delicious, healthy meal without the hassle. Check out our article for more easy Paleo dishes that fit into your hectic schedule!
How Can I Make Grain-Free Recipes More Flavorful?
Making grain-free recipes flavorful is all about the seasoning and technique! Use fresh herbs, spices, and healthy fats like olive oil or coconut oil to enhance the taste of your dishes. Incorporating ingredients like nut butters or coconut milk can add richness and depth. Our article features a variety of delicious Paleo comfort food recipes that showcase these techniques, ensuring every meal is bursting with flavor!
Related Topics
paleo recipes
comfort food
gluten free
easy paleo
family meals
budget friendly
grain free
healthy comfort food
weeknight dinners
cooking on a budget
simple recipes
meal prep

