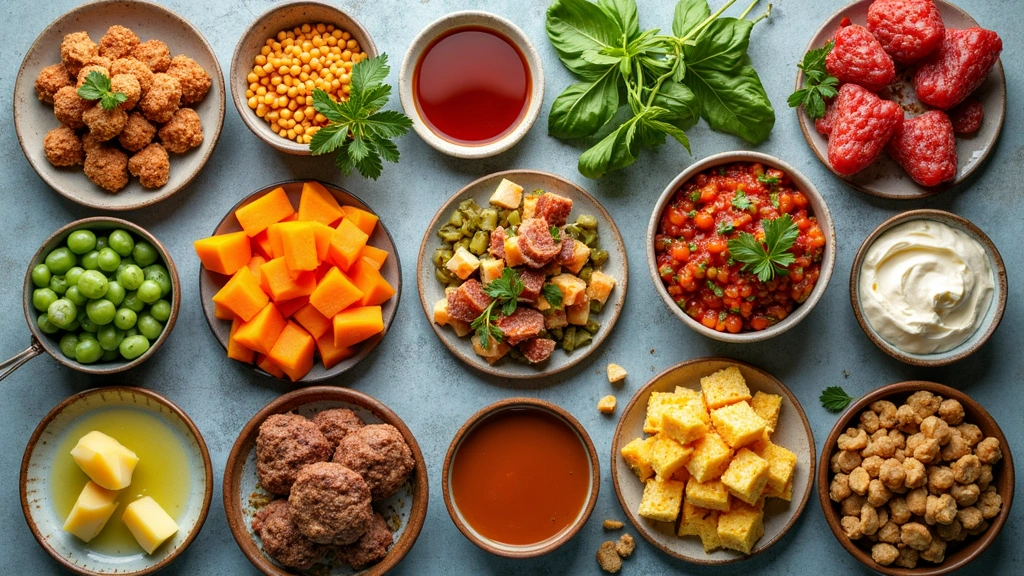
Are you tired of meals that leave you feeling unsatisfied and sluggish? I totally get that. It can be tough to find healthy recipes that actually hit the spot. That’s why I created this post featuring 30+ Paleo Whole 30 recipes that are not only good for you but also downright delicious. We all deserve to enjoy our food while sticking to our health goals.
If you’re someone who cares about eating clean, or perhaps you’re trying to follow a specific diet, this post is for you. Whether you’re doing Whole 30, looking for Paleo options, or just want to eat healthier, I’ve got you covered. You want meals that nourish your body without sacrificing flavor, and I understand that struggle all too well.
What can you expect? A collection of recipes that are easy to follow, satisfying, and packed with nutrients. These dishes will help you stay on track with your dietary choices while still enjoying every bite. From quick breakfasts to hearty dinners, you’ll find something here for every meal of the day.
Imagine digging into a warm bowl of hearty chili or enjoying a crispy salad without worrying about what’s in it. You can feel good about your choices and love what you’re eating at the same time. Let’s dive into these recipes and discover how healthy eating can be both simple and satisfying!
1. Zesty Lemon Garlic Chicken
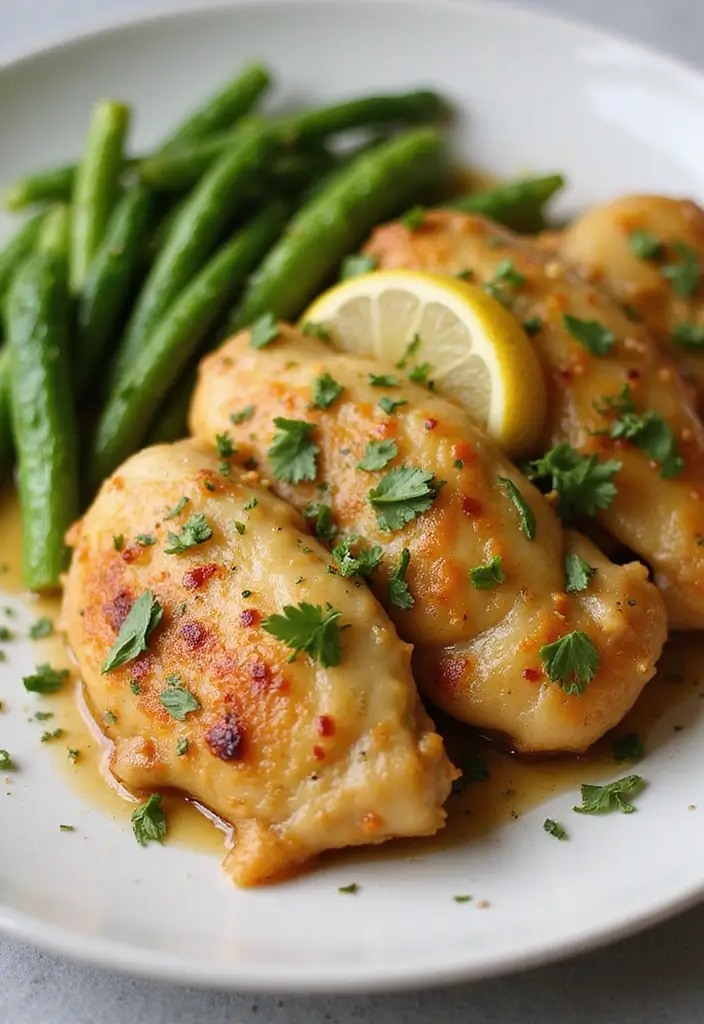
Looking for a quick and delicious meal? This Zesty Lemon Garlic Chicken is the answer! It’s packed with flavor and fits perfectly into your Whole 30 journey. The bright zing of lemon combined with the aromatic garlic makes this dish a standout. You can enjoy it simply as a main course or toss it into salads for a protein boost. Plus, it’s a fantastic choice for meal prep!
Here’s how to make it:
Recipe Overview:
– Servings: 4
– Prep Time: 15 minutes
– Cook Time: 25 minutes
– Total Time: 40 minutes
– Calories: 280 per serving
Nutrition Information:
– Protein: 35g
– Fat: 12g
– Carbohydrates: 2g
Ingredients:
– 4 chicken breasts
– 2 lemons (juiced)
– 4 cloves garlic (minced)
– 2 tablespoons olive oil
– Salt and pepper to taste
Instructions:
1. Start by whisking together the lemon juice, minced garlic, olive oil, salt, and pepper in a bowl.
2. Marinate the chicken in this mixture for at least 30 minutes. For even better flavor, let it marinate overnight!
3. Preheat your oven to 375°F (190°C).
4. Place the marinated chicken in a baking dish and pour the rest of the marinade over it.
5. Bake for about 25 minutes or until the chicken is fully cooked.
6. Let the chicken rest for 5 minutes before slicing it.
For added flavor, consider mixing in herbs like rosemary or thyme. This chicken pairs wonderfully with steamed broccoli or a fresh bed of greens, making your meal both healthy and satisfying.
FAQs:
– Can I use other meats? Absolutely! This marinade is delicious on fish or pork too!
– What side dishes work well? Think about roasted vegetables or a fresh salad to round out your meal.
This Zesty Lemon Garlic Chicken is perfect for busy weeknights or meal prep Sundays. Give it a try, and you’ll see just how easy and delightful healthy eating can be!
Zesty Lemon Garlic Chicken
Editor’s Choice

Organic Extra Virgin Olive Oil – Premium Single-Source Greek EVOO with C…
 AmazonCheck Price
50 Pack (100-Piece) 32 oz Meal Prep Containers Reusable with Lids 3-Comp…
 Amazon$21.99
2. Sweet Potato and Bacon Hash
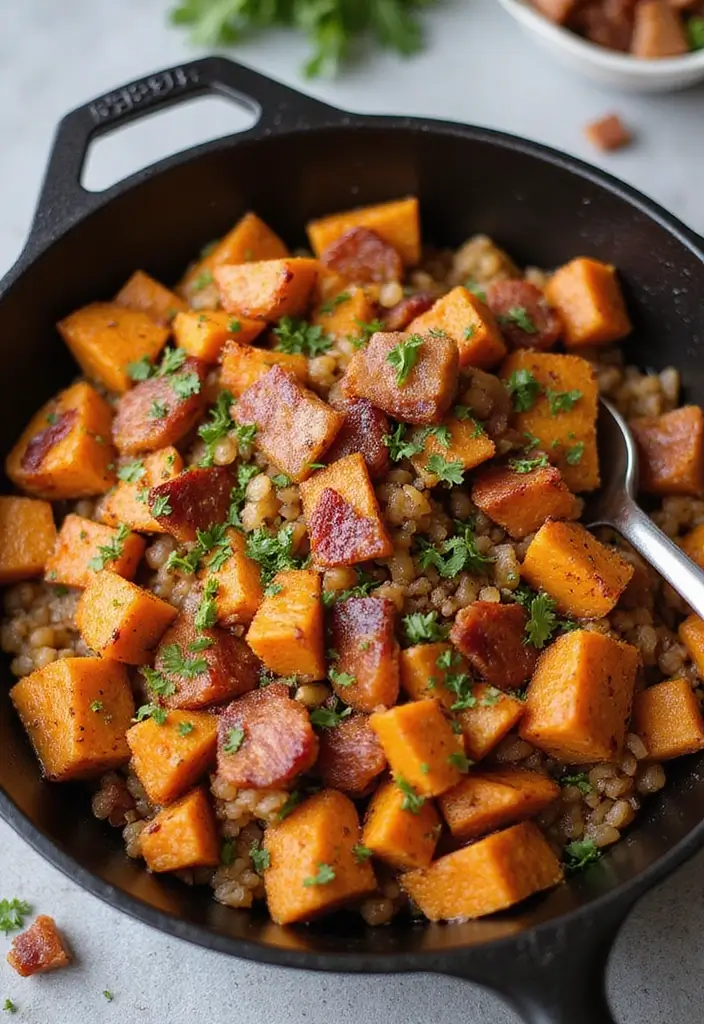
Looking for a breakfast or lunch that truly hits the spot? Try this Sweet Potato and Bacon Hash! It’s not just filling; it’s a delightful mix of sweet and savory flavors. The creamy sweet potatoes pair perfectly with the crispy, salty bacon. You can whip it up in no time, making it ideal for busy mornings or meal prep for the week ahead.
Let’s dive into how to make this dish.
Recipe Overview:
– Servings: 3
– Prep Time: 10 minutes
– Cook Time: 20 minutes
– Total Time: 30 minutes
– Calories: 350 per serving
Nutritional Highlights:
– Protein: 16g
– Fat: 20g
– Carbohydrates: 30g
Ingredients:
– 2 large sweet potatoes, diced
– 6 slices of bacon, chopped
– 1 onion, chopped
– 2 bell peppers, diced
– Salt and pepper to taste
Instructions:
1. Start by cooking the chopped bacon in a large skillet over medium heat until it’s crispy. Once done, take it out and set aside.
2. In that same skillet, toss in the onions and bell peppers. Sauté them until they soften.
3. Add the diced sweet potatoes. Season everything with salt and pepper. Cook until the potatoes are tender, about 15 minutes.
4. Finally, stir in the crispy bacon and cook for another 2 minutes to heat through.
5. Serve hot and enjoy! Don’t forget—adding sliced avocado on top gives it a creamy finish. A poached egg also makes this dish even more delicious!
FAQ:
– Want to make it vegetarian? Just skip the bacon and load up on more veggies instead!
This dish is not just tasty; it’s a great way to start your day or energize your lunch. Enjoy the balance of flavors while staying on track with your Paleo or Whole 30 goals!
Sweet Potato and Bacon Hash
Editor’s Choice

SENSARTE Nonstick Frying Pan Skillet, Swiss Granite Coating Omelette Pan…
 Amazon$17.99
3. Spicy Shrimp Tacos with Pineapple Salsa
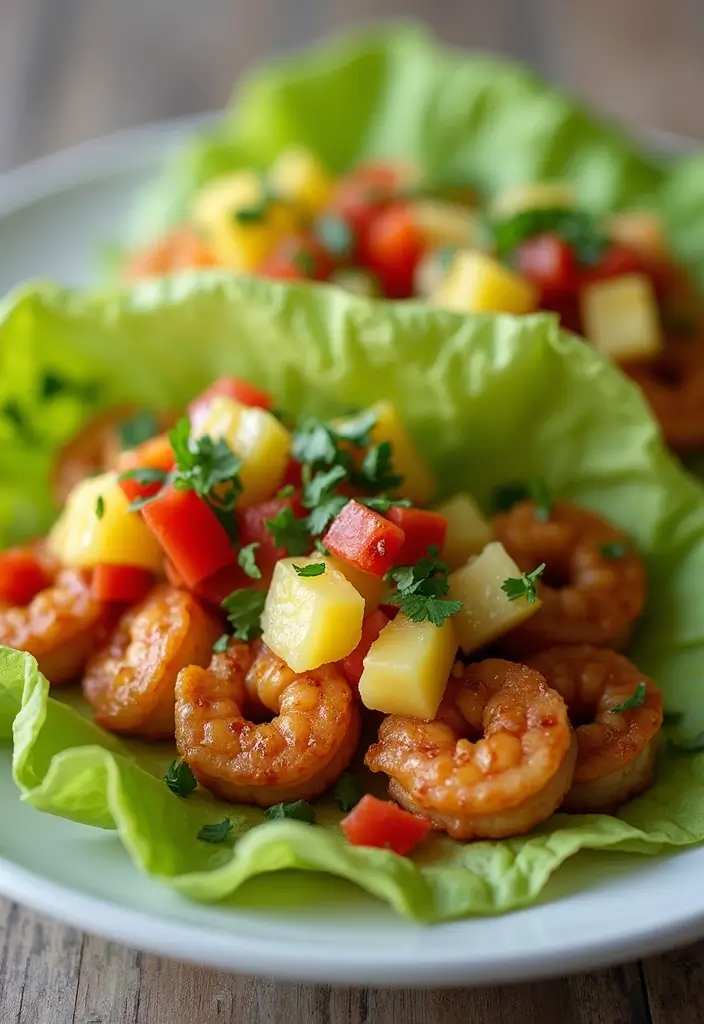
Who says you can’t enjoy tacos while sticking to a healthy diet? These Spicy Shrimp Tacos with Pineapple Salsa are a delicious way to indulge without the guilt. Imagine sinking your teeth into perfectly seasoned shrimp paired with a fresh, zesty pineapple salsa that adds a tropical flair to your meal. This dish is not only vibrant and fun but also simple enough for a weeknight dinner or a speedy lunch.
Ready to whip up this flavorful feast? Let’s break down the recipe. You’ll be amazed at how quickly you can prepare it, making it perfect for busy days. Plus, with just 220 calories per serving, you can enjoy a satisfying meal without compromising your health goals.
Recipe Overview:
– Servings: 4
– Prep Time: 15 minutes
– Cook Time: 10 minutes
– Total Time: 25 minutes
– Calories: 220 per serving
Nutrition Information:
– Protein: 21g
– Fat: 8g
– Carbohydrates: 15g
Ingredients:
– 1 lb shrimp (peeled and deveined)
– 2 teaspoons chili powder
– 1 teaspoon paprika
– 1 teaspoon cumin
– 1 tablespoon olive oil
– 1 cup pineapple (diced)
– 1/4 cup red onion (finely chopped)
– 1 tablespoon cilantro (chopped)
– Lettuce leaves (for serving)
Instructions:
1. Start by mixing the shrimp with chili powder, paprika, cumin, salt, and pepper in a bowl.
2. Heat olive oil in a skillet over medium-high heat. Add the shrimp and cook for 2-3 minutes on each side until they turn opaque.
3. In another bowl, combine diced pineapple, red onion, cilantro, and a squeeze of lime juice to make your salsa.
4. Serve the shrimp in lettuce leaves and generously top with the pineapple salsa.
Want to add even more crunch? Try these tips:
– Add sliced radishes for an extra crunch.
– Squeeze lime juice over the tacos for an extra burst of flavor.
FAQ:
– Can I use frozen shrimp? Absolutely! Just make sure to thaw them before cooking.
Enjoy these delightful tacos that bring a taste of the tropics right to your kitchen! They’re perfect for anyone looking to eat healthy while still enjoying bold flavors.
Spicy Shrimp Tacos with Pineapple Salsa
Editor’s Choice
Practical Paleo, 2nd Edition (Updated And Expanded): A Customized Approa…
 Amazon$19.08
CAROTE Nonstick Frying Pan Skillet,Non Stick Granite Fry Pan Egg Pan Ome…
 Amazon$14.99
Toadfish Shrimp Deveiner Tool – Prawn & Seafood Peeler – Frogmore Shrimp…
 Amazon$18.40
4. Creamy Avocado and Chicken Salad
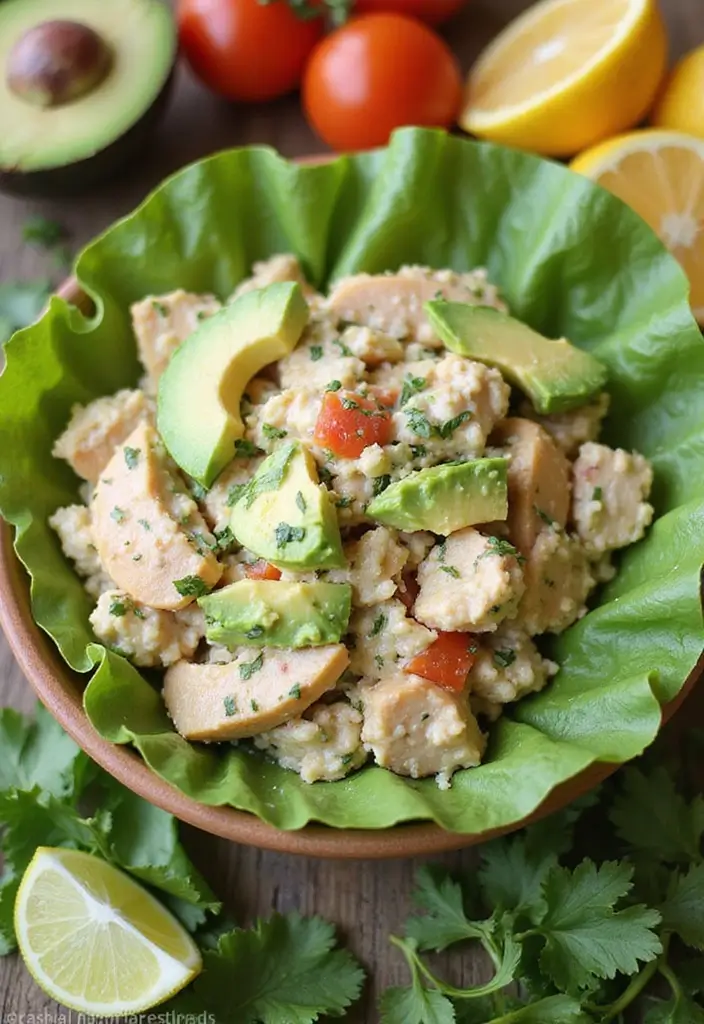
Looking for a quick, healthy meal that doesn’t skimp on flavor? Try this Creamy Avocado and Chicken Salad! It’s a fantastic way to use up leftover chicken while treating yourself to a nutritious dish. The star of this salad is ripe avocado, which adds a luscious, creamy texture without the junk found in traditional mayo. You can serve it in crisp lettuce wraps or alongside crunchy veggies for a refreshing lunch that fuels your day.
Recipe Overview:
– Servings: 4
– Prep Time: 10 minutes
– Cook Time: 0 minutes
– Total Time: 10 minutes
– Calories: 300 per serving
Nutrition Information:
– Protein: 25g
– Fat: 20g
– Carbohydrates: 5g
Ingredients:
– 2 cups cooked chicken, shredded
– 2 ripe avocados, mashed
– 1/4 cup red onion, finely chopped
– 1/4 cup cilantro, chopped
– Lime juice, to taste
– Salt and pepper, to taste
Instructions:
1. In a large bowl, combine the shredded chicken, mashed avocado, red onion, cilantro, lime juice, salt, and pepper.
2. Mix everything well until it’s nicely combined.
3. Serve your salad in fresh lettuce wraps or with veggie sticks for dipping.
Feel free to add chopped tomatoes or other veggies for extra flavor and crunch. You can store any leftovers in the fridge for up to two days, making this a perfect make-ahead meal!
FAQ:
– Can I use canned chicken? Yes, just drain and shred it before using!
This salad is not just easy to make; it’s also packed with nutrients. You get a good dose of protein from the chicken and healthy fats from the avocado, making it a satisfying meal that keeps you full. Enjoy your delicious, wholesome lunch!
Creamy Avocado and Chicken Salad
Editor’s Choice


Organic Extra Virgin Olive Oil – Premium Single-Source Greek EVOO with C…
 AmazonCheck Price
5. Cauliflower Fried Rice
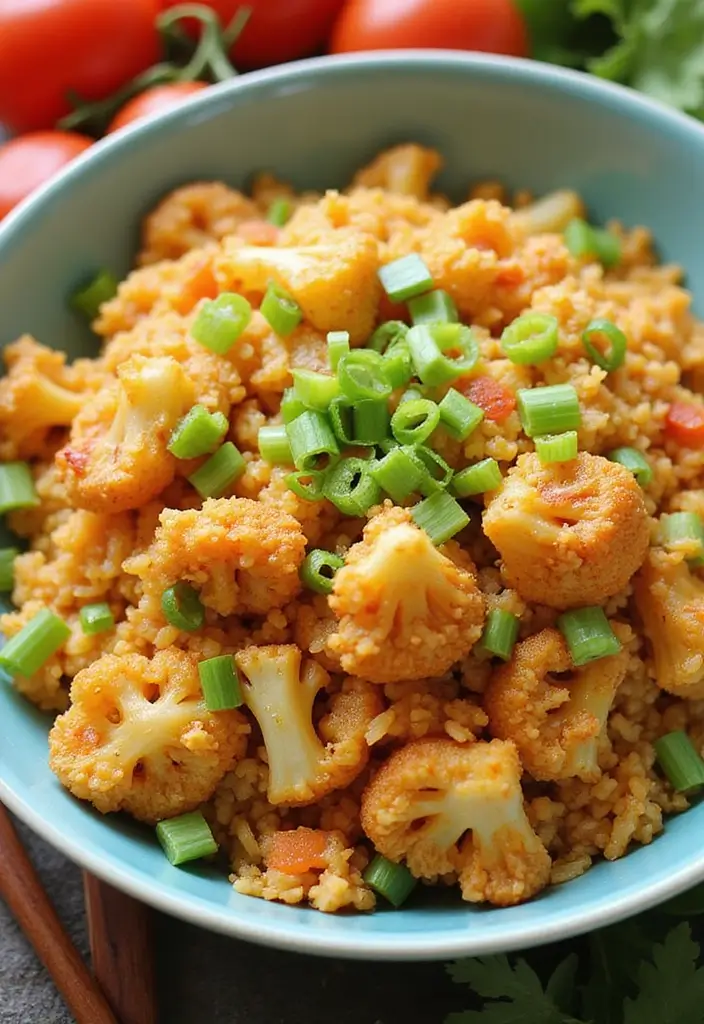
Craving a quick, nutritious meal? Look no further than this Cauliflower Fried Rice! This dish swaps traditional rice for cauliflower, giving you a tasty and satisfying option that’s low in carbs but high in flavor. Packed with colorful veggies and delightful seasonings, it’s a fresh spin on the classic stir-fry. Plus, it’s simple to customize with your favorite proteins like chicken or shrimp, making it perfect for meal prep.
Imagine the crunch of fresh carrots and bell peppers mixed with soft, riced cauliflower. The aroma of coconut oil sizzling in your skillet will have your mouth watering in no time. This dish is not just a healthy alternative; it’s also versatile enough to fit into any meal plan.
Recipe Overview:
– Servings: 4
– Prep Time: 10 minutes
– Cook Time: 15 minutes
– Total Time: 25 minutes
– Calories: 150 per serving
Nutrition Information:
– Protein: 5g
– Fat: 7g
– Carbohydrates: 15g
Ingredients:
– 1 head of cauliflower (riced)
– 2 tablespoons of coconut oil
– 1 cup of mixed vegetables (like carrots, peas, and bell peppers)
– 2 eggs (beaten)
– 2 green onions (sliced)
– Salt and pepper to taste
Instructions:
1. Heat coconut oil in a large skillet over medium heat.
2. Add the riced cauliflower and mixed vegetables. Stir occasionally for about 5 minutes until tender.
3. Push the cauliflower to one side of the skillet. Pour in the beaten eggs and scramble until fully cooked.
4. Mix everything together. Add green onions, salt, and pepper, cooking for another 2-3 minutes.
Want to amp up the flavor? Add soy sauce or coconut aminos for a savory kick. You can also toss in leftover chicken or shrimp for a filling meal.
FAQ:
– Can I use frozen cauliflower rice? Yes! Just thaw it and drain any excess water before you start cooking.
This easy, delicious Cauliflower Fried Rice will not only satisfy your cravings but also support your healthy eating goals. Enjoy!
Fun fact: swapping rice for cauliflower drops carbs by up to 60-70% in meals, and you still get that satisfying bite. For paleo whole 30 recipes, this trick makes weeknight dinners fast, tasty, and meal-prep friendly—protein optional, flavor guaranteed.
Cauliflower Fried Rice
Editor’s Choice

Palmini Rice | Low-Carb, Low-Calorie Hearts of Palm Rice | Keto, Gluten …
 Amazon$17.99
PURA D’OR 16 Oz ORGANIC Fractionated Coconut Oil – MCT Oil – 100% Pure &…
 Amazon$15.99
Bragg Organic Coconut Aminos – 16oz, Soy-Free Alternative, Gluten-Free, …
 Amazon$8.49
6. Butternut Squash Soup
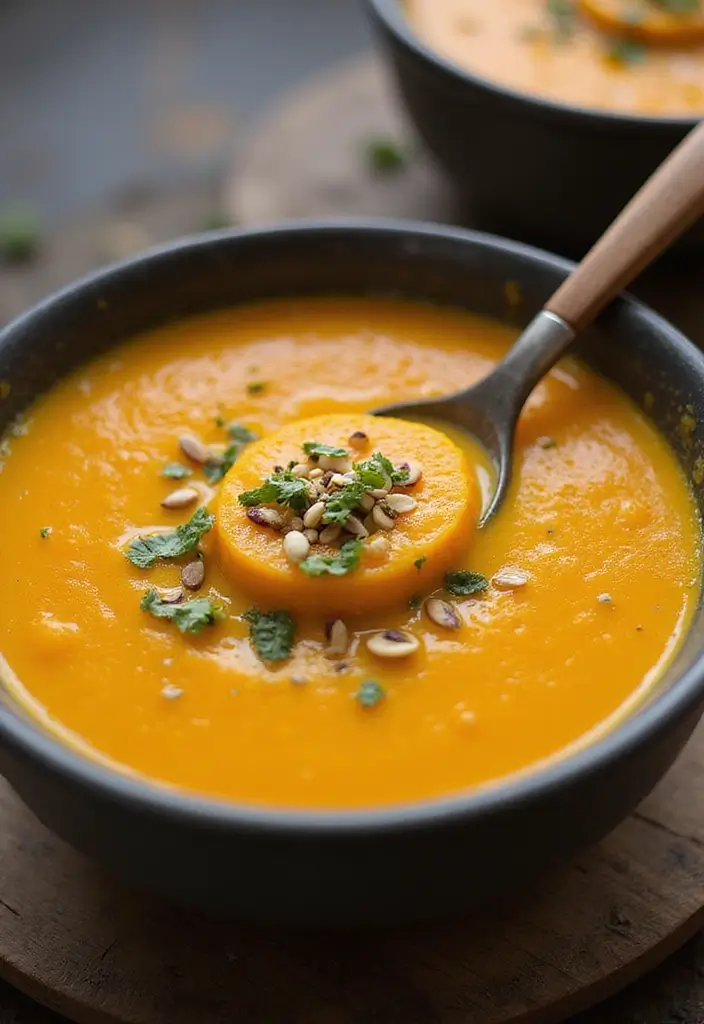
Cozy up with a bowl of Butternut Squash Soup that warms your soul. This creamy delight is not only dairy-free but also showcases the natural sweetness of butternut squash, enhanced with a splash of coconut milk for that luscious texture. It’s the kind of recipe that’s perfect for any time of year, whether you’re meal prepping for the week or enjoying it fresh. Pair it with a crisp salad, and you’ve got a satisfying lunch that feels indulgent yet healthy.
Here’s a simple overview of the recipe:
– Servings: 6
– Prep Time: 10 minutes
– Cook Time: 40 minutes
– Total Time: 50 minutes
– Calories: About 200 per serving
Nutrition-wise, each serving packs:
– Protein: 3g
– Fat: 10g
– Carbohydrates: 30g
Ready to make it? Here’s what you’ll need:
Ingredients:
– 2 lbs butternut squash (peeled and cubed)
– 1 onion (chopped)
– 4 cups vegetable broth
– 1 can coconut milk
– 2 cloves garlic (minced)
– Salt and pepper to taste
Instructions:
1. In a large pot, heat a drizzle of oil and sauté the onion and garlic until they are soft and fragrant.
2. Add the cubed butternut squash and vegetable broth. Bring it to a boil, then reduce the heat and let it simmer for about 30 minutes, or until the squash is tender.
3. Blend the soup using an immersion blender or a standard blender until it’s silky smooth. Stir in the coconut milk, and season with salt and pepper.
4. Serve the soup warm, garnished with fresh herbs or toasted seeds for an extra crunch.
This soup not only tastes amazing, but it also freezes beautifully. Make a big batch and save it for those busy days when you need a quick, nutritious meal.
FAQ:
– Can I use other types of squash? Absolutely! Pumpkin or acorn squash will work just as well.
Butternut Squash Soup
Editor’s Choice

Thai Kitchen Gluten Free Unsweetened Coconut Milk, 13.66 fl oz (Pack of 12)
 Amazon$10.62
7. Grilled Lemon Herb Salmon
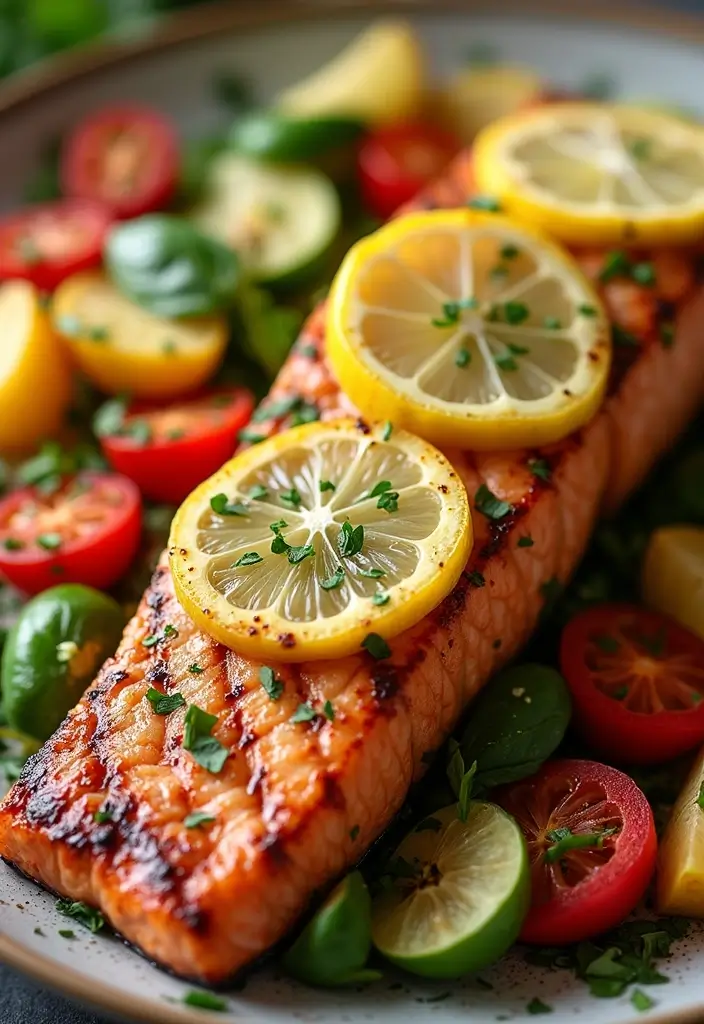
Savor the bright flavors of Grilled Lemon Herb Salmon, a dish that transforms a simple meal into a culinary delight. You’ll love how the zesty lemon and fragrant herbs enhance the rich taste of salmon. This recipe not only aligns perfectly with your Paleo and Whole 30 goals, but it also makes a stunning centerpiece for any dinner table. Plus, it’s quick to prepare—ideal for those busy weeknights when you still want something delicious.
Recipe Overview:
– Servings: 4
– Prep Time: 10 minutes
– Cook Time: 15 minutes
– Total Time: 25 minutes
– Calories: 350 per serving
Nutrition Information:
– Protein: 30g
– Fat: 22g
– Carbohydrates: 0g
Ingredients:
– 4 salmon fillets
– 2 lemons (juiced and zested)
– 3 tablespoons olive oil
– 2 teaspoons dried oregano
– Salt and pepper to taste
Instructions:
1. In a bowl, combine lemon juice, zest, olive oil, oregano, salt, and pepper. Mix well.
2. Place the salmon fillets in the marinade and let them soak for at least 15 minutes. This step infuses the fish with flavor.
3. Preheat your grill to medium-high heat. Once ready, grill the salmon for about 5-6 minutes on each side, or until it flakes easily with a fork.
4. Serve your grilled salmon alongside grilled vegetables or a fresh garden salad for a complete meal.
For an extra burst of flavor, top with a squeeze of fresh lemon just before serving. If grilling isn’t an option, you can easily bake the salmon at 400°F for about 12-15 minutes.
Using fresh herbs can elevate this dish even further, giving it a vibrant taste that’s hard to resist. This meal is not just healthy; it’s also an impressive way to showcase your cooking skills. Enjoy every bite!
“Fun fact: Grilled Lemon Herb Salmon can go from pantry to plate in under 20 minutes, a win for busy professionals chasing paleo whole 30 recipes. Bright lemon, fragrant herbs, and quick prep prove that healthy meals can be deliciously effortless.”
Grilled Lemon Herb Salmon
Editor’s Choice

Atlas 1 LT Cold Press Extra Virgin Olive Oil in Glass Bottle, Polyphenol…
 Amazon$27.42
9 Herb Indoor Garden Kit – Unique Kitchen Gift for Women, Men, Mom, Frie…
 Amazon$29.95
Renook Grill Mat Set of 6-100% Non-Stick Reusable Mats for Gas, Charcoal…
 Amazon$9.99
8. Mediterranean Stuffed Peppers
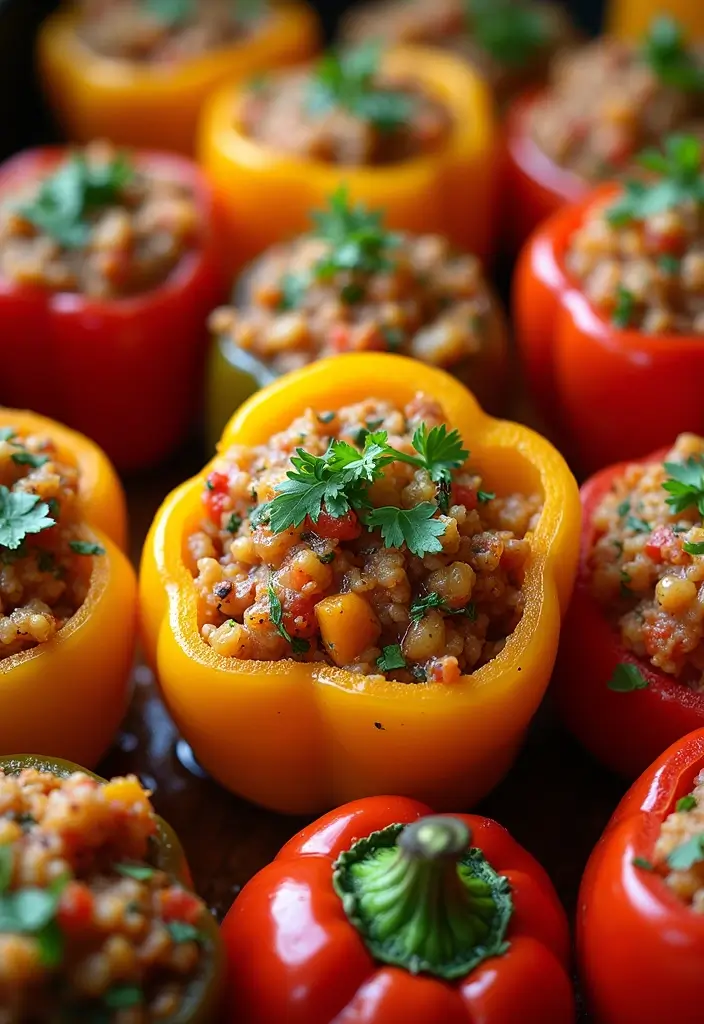
Get ready to savor the flavors of the Mediterranean with these delightful Stuffed Peppers. Bursting with vibrant colors and rich tastes, they offer a satisfying meal that’s both healthy and filling. The combination of seasoned ground meat and fresh vegetables makes these peppers a go-to dish for any occasion. Plus, they’re fantastic for meal prep. You can easily reheat them for a quick lunch or a cozy dinner.
Let’s break down this simple recipe that serves four. You’ll only need about 15 minutes to prep and 30 minutes to cook. Each serving packs a punch with 280 calories, making them a nutritious choice.
Recipe Overview:
– Servings: 4
– Prep Time: 15 minutes
– Cook Time: 30 minutes
– Total Time: 45 minutes
– Calories: 280 per serving
Nutrition Information:
– Protein: 25g
– Fat: 15g
– Carbohydrates: 10g
Ingredients:
– 4 bell peppers (halved and seeded)
– 1 lb ground meat (beef, turkey, or chicken)
– 1 cup diced tomatoes
– 1 onion (chopped)
– 2 cloves garlic (minced)
– 1 teaspoon oregano
– Salt and pepper to taste
Instructions:
1. Preheat your oven to 375°F (190°C).
2. In a skillet, sauté the chopped onion and minced garlic until soft. Add the ground meat and cook until browned.
3. Mix in the diced tomatoes, oregano, salt, and pepper. Stir well.
4. Spoon the meat mixture into the halved bell peppers until they are generously filled.
5. Arrange the stuffed peppers in a baking dish and bake them for 30 minutes.
6. Serve hot, garnished with fresh parsley for a pop of color.
Want to elevate the flavor? Add slices of avocado or a drizzle of balsamic glaze on top. These stuffed peppers also freeze well, making them perfect for batch cooking.
FAQ:
– Can I use quinoa instead of meat? Absolutely! For a vegetarian twist, swap the meat for quinoa or lentils.
Enjoy the warmth and taste of the Mediterranean right in your home with this easy and delicious recipe!
Mediterranean Stuffed Peppers
Editor’s Choice

Lodge 10.25 Inch Cast Iron Skillet – Pre-Seasoned Frying Pan with Teardr…
 Amazon$24.90
9. Coconut Curry Chicken

Coconut Curry Chicken is not just a meal; it’s a warm hug in a bowl. This dish combines tender chicken with a creamy coconut milk curry sauce, creating a symphony of flavors that dance on your palate. You’ll love how easy it is to make and how comforting it feels, especially on a chilly evening. Serve it alongside steamed veggies for a nutritious, Whole 30-approved feast that will leave you feeling satisfied.
Let’s get cooking! Here’s what you’ll need:
Ingredients:
– 1 lb boneless, skinless chicken thighs
– 1 can coconut milk
– 2 tablespoons red curry paste
– 1 bell pepper, sliced
– 1 cup spinach
– Salt and pepper to taste
Instructions:
1. In a large skillet, heat a splash of oil over medium heat. Add the chicken thighs and cook until they turn golden brown.
2. Stir in the red curry paste and coconut milk. Bring the mixture to a gentle simmer.
3. Toss in the sliced bell pepper and spinach. Cook until the vegetables are tender and the chicken is fully cooked, about 10 minutes.
4. Serve the dish hot, garnished with fresh cilantro for an extra pop of flavor.
Want to make it low-carb? Serve it over cauliflower rice. You can also spice things up by adjusting the amount of curry paste to fit your taste.
FAQ:
– Can I use other proteins? Absolutely! Shrimp or tofu works wonderfully in this recipe.
This Coconut Curry Chicken is not only simple to prepare but also a fantastic way to enjoy a hearty meal without breaking your Whole 30 plan. You’ll find yourself craving it again and again!
Coconut Curry Chicken
Editor’s Choice

Thai Kitchen Organic Unsweetened Coconut Milk, 13.66 fl oz (Pack of 12)
 Amazon$25.98
Kitchen & Love Organic Riced Cauliflower 8 oz (6 Pack) | Low Carb, Low C…
 Amazon$27.59
10. Apple Cinnamon Chia Pudding
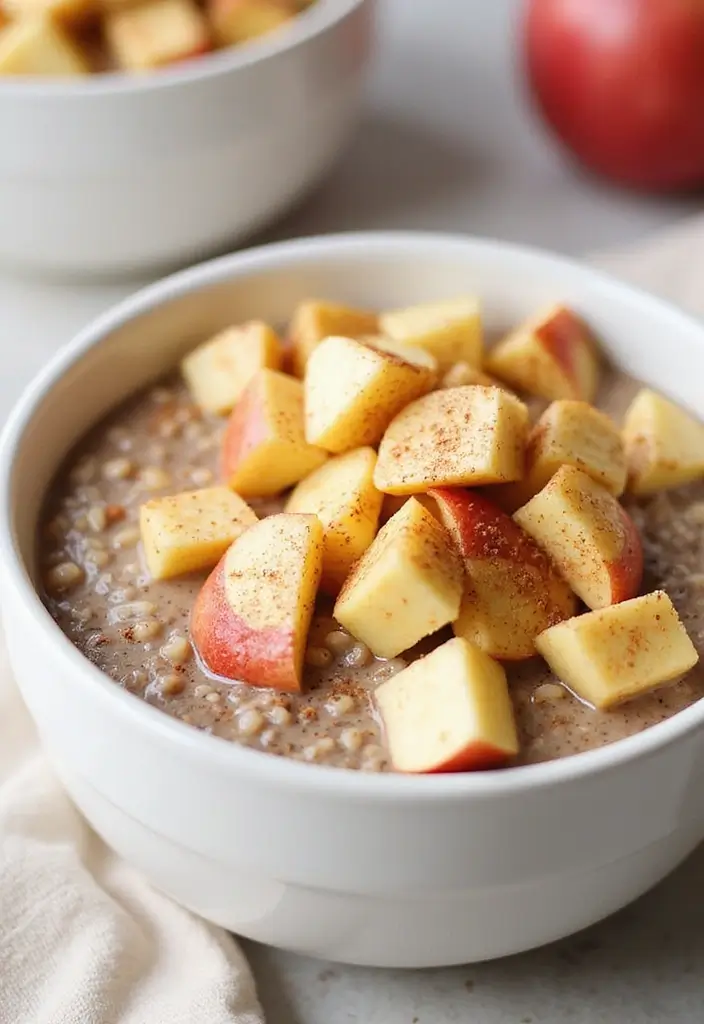
Indulge your sweet tooth with a healthy twist by making Apple Cinnamon Chia Pudding. This delightful treat is perfect for breakfast or dessert. The combination of juicy apples and warm cinnamon creates a cozy flavor you’ll love. Plus, chia seeds pack a nutritional punch, loaded with omega-3 fatty acids and fiber, making this pudding both satisfying and good for you.
Are you ready to whip this up? Here’s what you need to know:
Recipe Overview:
– Servings: 2
– Prep Time: 10 minutes
– Cook Time: 0 minutes
– Total Time: 10 minutes + chilling
– Calories: 200 per serving
Nutritional Information:
– Protein: 5g
– Fat: 8g
– Carbohydrates: 30g
Ingredients:
– 1/2 cup chia seeds
– 2 cups almond milk (or your favorite non-dairy milk)
– 1 apple, diced (choose your favorite variety for added flavor)
– 1 teaspoon cinnamon
– Maple syrup, to taste (for natural sweetness)
Instructions:
1. In a mixing bowl, whisk together chia seeds, almond milk, cinnamon, and maple syrup until well combined.
2. Let the mixture sit for about 5 minutes, then whisk again to break up clumps.
3. Cover the bowl and refrigerate for at least 2 hours or overnight. This chilling time helps the pudding thicken.
4. When you’re ready to serve, scoop into bowls and top with diced apples and an extra sprinkle of cinnamon.
This pudding keeps well in the fridge, lasting up to 5 days, making it a great choice for meal prep. Want a little crunch? Add nuts or seeds on top for extra texture!
FAQs:
– Can I substitute coconut milk? Yes! Any non-dairy milk works well.
Enjoy this simple, delicious, and nutritious treat any time of day. You’ll love how easy it is to make and how good it is for you!
Apple Cinnamon Chia Pudding
Editor’s Choice

BetterBody Foods Organic Chia Seeds 2 lbs, 32 Oz, with Omega-3, Non-GMO,…
 Amazon$11.97
Silk Shelf-Stable Almond Milk, Unsweetened Vanilla, Dairy-Free, Vegan, N…
 Amazon$11.27
365 by Whole Foods Market, Organic Ground Cinnamon, 1.9 Ounce (Pack of 2)
 AmazonCheck Price
11. Broccoli and Beef Stir-Fry
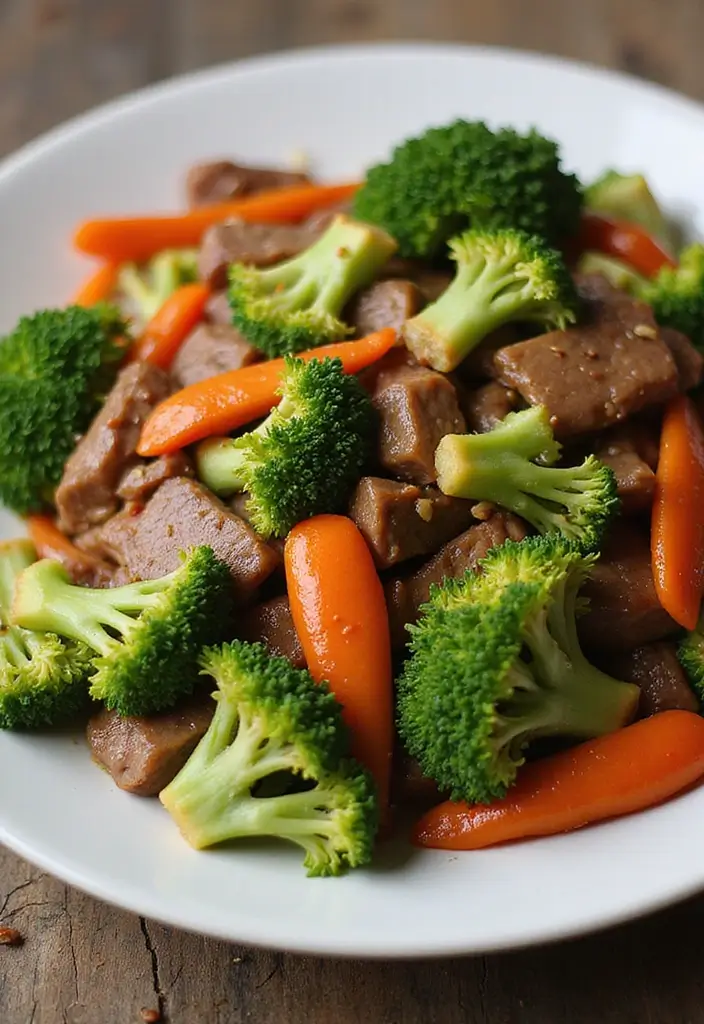
Looking for a quick and tasty dinner? You’ll love this Broccoli and Beef Stir-Fry! It’s the ideal solution for busy nights when you still want something healthy. This dish is not only packed with protein but also colorful veggies that bring life to your plate. The savory taste of the beef combined with the satisfying crunch of broccoli makes it a meal you’ll crave. Plus, it fits perfectly within the Paleo and Whole 30 guidelines.
Let’s dive into the recipe!
Recipe Overview:
– Servings: 4
– Prep Time: 10 minutes
– Cook Time: 15 minutes
– Total Time: 25 minutes
– Calories: 320 per serving
Nutrition Information:
– Protein: 30g
– Fat: 19g
– Carbohydrates: 10g
Ingredients:
– 1 lb flank steak, sliced thin
– 4 cups broccoli florets
– 2 tablespoons coconut aminos
– 1 tablespoon garlic, minced
– 1 tablespoon ginger, grated
– Salt and pepper to taste
Instructions:
1. Heat a skillet over medium-high heat. Add the flank steak and season with salt and pepper.
2. Cook until the steak is browned, then remove it from the pan.
3. In the same skillet, toss in the broccoli, garlic, and ginger. Stir-fry until the broccoli is tender-crisp.
4. Return the beef to the pan, add the coconut aminos, and mix everything well.
5. Serve immediately and enjoy!
Want to make it even heartier? Serve it over cauliflower rice. You can also throw in other veggies like bell peppers or carrots for extra flavor and nutrients!
FAQ:
– Can I use chicken instead? Absolutely! This recipe is versatile and works with any protein you enjoy.
With this quick stir-fry, you’ll have a satisfying meal that’s easy to whip up. Enjoy your delicious and healthy dinner!
Broccoli and Beef Stir-Fry
Editor’s Choice

Bragg Organic Coconut Aminos – 16oz, Soy-Free Alternative, Gluten-Free, …
 Amazon$8.49
Lundberg Value Size Regenerative Jasmine Rice 17.3 OZ
 AmazonCheck Price
12. Egg and Spinach Breakfast Cups

Kickstart your morning with delightful Egg and Spinach Breakfast Cups! These tasty little bites are not only quick to whip up but also perfect for meal prepping. Imagine having a protein-packed, nutritious breakfast ready to go. You can easily customize them with your favorite veggies or meats, making them satisfying for any palate.
With just a few ingredients, you can create a wholesome meal that’s as convenient as it is delicious. Busy mornings don’t mean you have to skip breakfast anymore; these cups are the ideal solution for anyone on the go!
Here’s how to make your own:
Recipe Overview:
– Servings: 6
– Prep Time: 10 minutes
– Cook Time: 15 minutes
– Total Time: 25 minutes
– Calories: 150 per serving
Nutritional Information:
– Protein: 12g
– Fat: 9g
– Carbohydrates: 2g
Ingredients:
– 6 eggs
– 2 cups spinach, chopped
– 1/2 cup diced tomatoes
– Salt and pepper to taste
Instructions:
1. Preheat your oven to 350°F (175°C).
2. In a mixing bowl, whisk together the eggs, spinach, tomatoes, salt, and pepper until well combined.
3. Grease a muffin tin and pour the egg mixture evenly into each cup.
4. Bake for 15 minutes, or until the eggs are fully set.
5. Allow them to cool for a few minutes before gently removing from the tin.
These breakfast cups store beautifully in the fridge and reheat in seconds. Feel free to experiment by adding different veggies or proteins like bell peppers or cooked sausage for variety.
FAQs:
– Can I make these dairy-free? Yes, this recipe is naturally dairy-free!
Now you can enjoy a healthy breakfast that fuels your day while fitting into your busy schedule. Grab your ingredients and start baking these delicious cups today!
Egg and Spinach Breakfast Cups
Editor’s Choice

2Pack Silicone Muffin Pan for Baking with Metal Reinforced Frame, 12 Cup…
 Amazon$19.99
Stainless Steel Egg Whisk, Hand Push Rotary Whisk Blender, Versatile Mil…
 Amazon$7.15
Bentgo Prep – 20-Piece 3-Compartment Reusable Meal Prep Containers with …
 Amazon$14.99
13. Spaghetti Squash with Meat Sauce
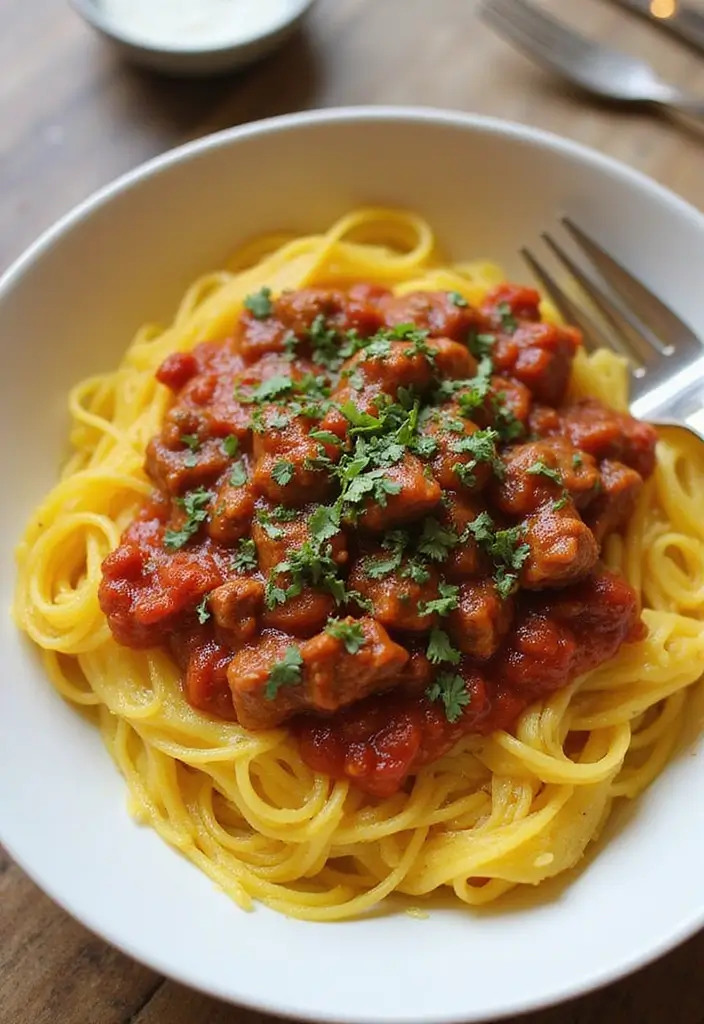
Imagine enjoying a comforting plate of spaghetti without the carbs. You can do just that with Spaghetti Squash with Meat Sauce. This delicious dish uses spaghetti squash as a twist on traditional pasta, soaking up the savory flavors of a hearty meat sauce. It’s a satisfying way to indulge your cravings while sticking to your Whole 30 goals.
This recipe serves four and packs in about 300 calories per serving. It’s easy to prepare, taking just 50 minutes from start to finish, making it a great option for busy weeknights. Plus, with 25 grams of protein, you won’t leave the table feeling hungry.
Recipe Overview:
– Servings: 4
– Prep Time: 10 minutes
– Cook Time: 40 minutes
– Total Time: 50 minutes
– Calories: 300 per serving
Nutritional Information:
– Protein: 25g
– Fat: 15g
– Carbohydrates: 18g
Ingredients:
– 1 medium spaghetti squash
– 1 lb ground beef
– 1 can diced tomatoes
– 1 onion, chopped
– 2 cloves garlic, minced
– Salt and pepper to taste
Instructions:
1. Preheat your oven to 400°F (200°C).
2. Cut the spaghetti squash in half and scoop out the seeds. Place the halves cut side down on a baking sheet and roast for about 40 minutes.
3. While the squash cooks, heat a skillet over medium heat. Sauté the chopped onion and minced garlic until they soften. Then, add the ground beef and cook until browned.
4. Mix in the canned diced tomatoes, and season with salt and pepper. Let the sauce simmer for a few minutes.
5. After the squash is done, scrape the insides with a fork to create noodle-like strands. Combine these strands with your meat sauce.
6. Serve warm, and add a sprinkle of fresh basil or parsley for a burst of flavor.
Feel free to swap the ground beef for turkey if you want a lighter option. This dish is perfect for meal prep, too. You can make a big batch and enjoy it throughout the week, keeping your Whole 30 journey deliciously on track.
FAQ:
– Can I use regular pasta? This recipe is designed for Whole 30, so stick with the squash for the best results!
Spaghetti Squash with Meat Sauce
Editor’s Choice


StarWalker Regenerative Organic Ground® Beef, 20 lbs – 50+ Years Organic…
 Amazon$240.00
14. Roasted Brussels Sprouts with Bacon
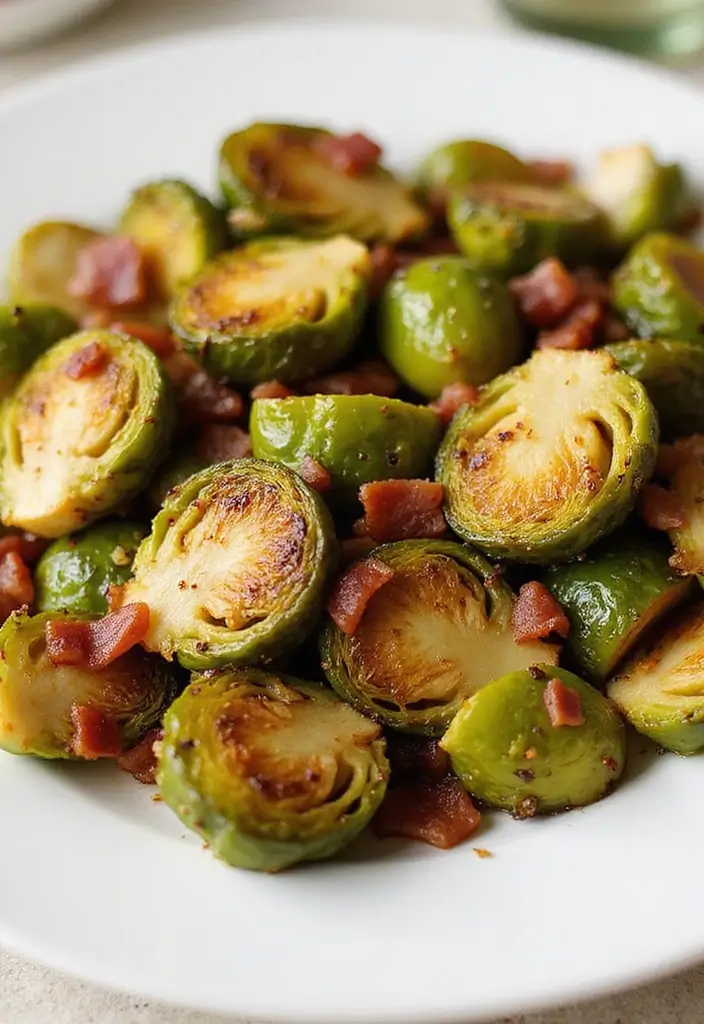
Looking for a delicious way to spice up your meal? Try Roasted Brussels Sprouts with Bacon. This dish combines crispy Brussels sprouts with savory bacon, creating a flavor explosion that will leave your taste buds dancing. It’s a simple side that pairs well with any main dish or serves as a tasty snack. Plus, it’s quick to whip up, making it perfect for busy evenings.
Here’s what you need to make this dish:
Recipe Overview:
– Servings: 4
– Prep Time: 10 minutes
– Cook Time: 20 minutes
– Total Time: 30 minutes
– Calories: 180 per serving
Nutritional Information:
– Protein: 8g
– Fat: 15g
– Carbohydrates: 10g
Ingredients:
– 1 lb Brussels sprouts, halved
– 6 slices bacon, chopped
– 2 tablespoons olive oil
– Salt and pepper to taste
Instructions:
1. Preheat your oven to 400°F (200°C).
2. In a large bowl, combine the Brussels sprouts, chopped bacon, olive oil, salt, and pepper. Toss everything together until the sprouts are well coated.
3. Spread the mixture evenly on a baking sheet.
4. Roast in the oven for about 20 minutes, or until the sprouts are crispy and the bacon is browned.
5. Serve hot. For a gourmet twist, drizzle with balsamic glaze right before serving.
Want to know a little secret? This dish is not just best when fresh. You can reheat leftovers, making it a great option for meal prep. And if you’re looking for a healthier version, feel free to use turkey bacon instead of regular bacon. It still gives you that satisfying crunch without the extra fat.
Quick Tips:
– Add balsamic glaze for a touch of sweetness.
– Use turkey bacon for a lighter option.
– Store leftovers in an airtight container in the fridge for up to 3 days.
– Pair with grilled chicken or fish for a complete meal.
Enjoy this easy and flavorful dish that’s sure to impress!
Roasted Brussels Sprouts with Bacon
Editor’s Choice

Nordic Ware Naturals Half Sheet – USA Made Aluminum Commercial Quality S…
 AmazonCheck Price
Pompeian Robust Extra Virgin Olive Oil, Contains Polyphenols, First Cold…
 Amazon$15.64
HOMBERKING 24pc Borosilicate Glass Food Storage Containers with Lids, Gl…
 Amazon$30.99
15. Garlic Herb Zucchini Noodles
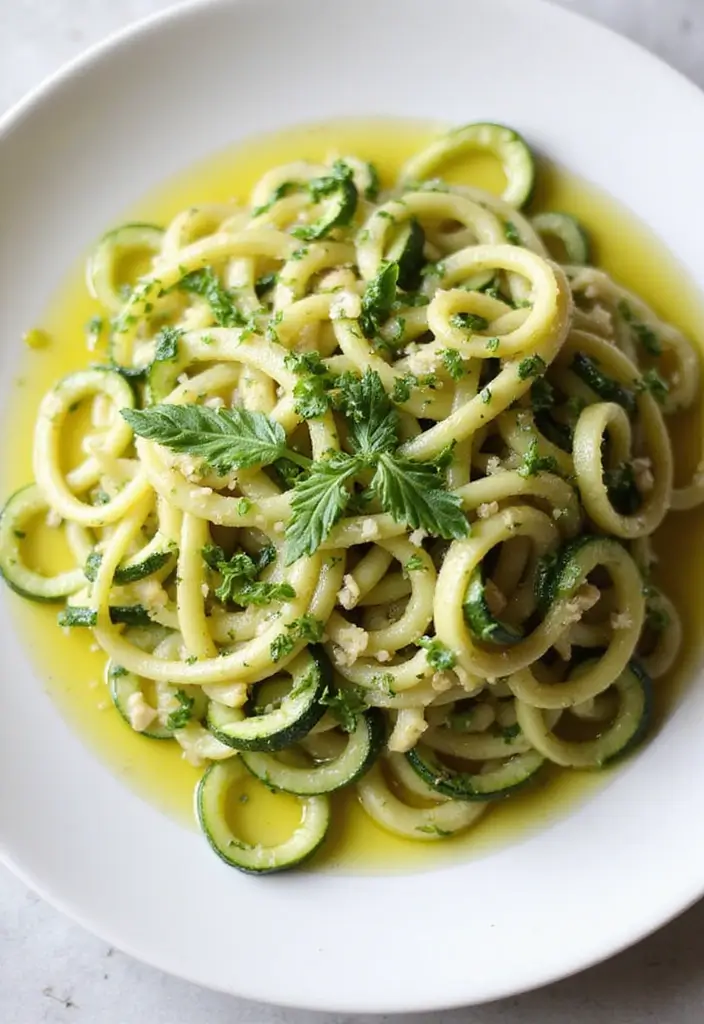
Are you craving a light and healthy meal that satisfies without the carbs? Look no further than these Garlic Herb Zucchini Noodles—a delicious twist on traditional pasta. This dish shines with fresh flavors and is packed with nutrients. Plus, it’s super quick to whip up, making it ideal for your busy schedule.
The beauty of zoodles lies in their versatility. Spiralized zucchini serves as a fantastic pasta substitute. When tossed with garlic and fresh herbs, it transforms into a satisfying meal that’s both tasty and nutritious.
Recipe Overview:
– Servings: 2
– Prep Time: 10 minutes
– Cook Time: 5 minutes
– Total Time: 15 minutes
– Calories: 100 per serving
Nutrition Information:
– Protein: 3g
– Fat: 7g
– Carbohydrates: 8g
Ingredients:
– 2 medium zucchinis (spiralized)
– 2 tablespoons olive oil
– 3 cloves garlic (minced)
– 1 teaspoon Italian seasoning
– Salt and pepper to taste
Instructions:
1. Heat the olive oil in a skillet over medium heat. Add the minced garlic and sauté until it’s fragrant.
2. Toss in the spiralized zucchini and sprinkle with Italian seasoning, salt, and pepper.
3. Cook for 3-5 minutes until the zucchini is tender but still has a slight crunch.
4. Serve immediately, garnished with extra herbs for a pop of color and flavor.
For a protein boost, consider adding grilled chicken or shrimp to your zoodles. This dish is best enjoyed fresh, but you can store leftovers in the fridge for up to a day.
FAQ:
– Can I use a vegetable peeler? Yes! You can create wide ribbons for a delicious pasta alternative.
Enjoy making this vibrant dish that’s not only easy but also a perfect fit for your Paleo Whole 30 lifestyle! It’s a great way to eat healthily while still feeling satisfied.
Garlic Herb Zucchini Noodles
Editor’s Choice

Organic Extra Virgin Olive Oil – Premium Single-Source Greek EVOO with C…
 AmazonCheck Price
Bragg Organic Sprinkle Seasoning with 24 Herbs and Spices – 1.5 oz – Sal…
 Amazon$6.99
16. Spicy Cauliflower Wings

Are you looking for a snack that’s both crunchy and packed with flavor? Try these Spicy Cauliflower Wings! They make a perfect appetizer for game day or a cozy night in with friends. Baked to crispy perfection and tossed in a zesty sauce, these wings are a guilt-free treat. Serve them up with a homemade dipping sauce for an extra burst of flavor.
Recipe Overview:
– Servings: 4
– Prep Time: 15 minutes
– Cook Time: 30 minutes
– Total Time: 45 minutes
– Calories: 150 per serving
Nutrition Information:
– Protein: 5g
– Fat: 8g
– Carbohydrates: 10g
Ingredients:
– 1 head cauliflower (cut into florets)
– 1 cup almond flour
– 1/2 cup almond milk
– 1 tablespoon hot sauce (or to taste)
– Salt and pepper to taste
Instructions:
1. Preheat your oven to 450°F (230°C).
2. In a mixing bowl, combine the almond flour, salt, and pepper. In another bowl, mix the almond milk and hot sauce.
3. Dip each cauliflower floret into the milk mixture, then roll it in the almond flour mixture until well coated.
4. Spread the coated florets on a baking sheet. Bake for 30 minutes, flipping them halfway through, until they’re golden and crispy.
For a delicious dip, pair these wings with a creamy, dairy-free ranch dressing. If you like it spicy, feel free to adjust the hot sauce to your taste.
FAQ:
– Can I use whole wheat flour? Almond flour keeps this recipe Paleo-friendly, but you can experiment if you wish!
These Spicy Cauliflower Wings are not just a dish; they’re a delicious way to satisfy your cravings while sticking to your healthy eating goals. Enjoy every crunchy bite!
Spicy Cauliflower Wings
Editor’s Choice

Blue Diamond Almonds Almond Flour, Gluten Free, Blanched, Finely Sifted,…
 Amazon$9.91
TABASCO Brand Habanero Sauce, Spicy & Fruity Habanero Hot Sauce, Glass B…
 AmazonCheck Price
Mom’s Place Gluten-Free Ranch Dressing Mix, Perfect for Salads & Dips, N…
 Amazon$4.99
17. Honey Mustard Chicken Thighs
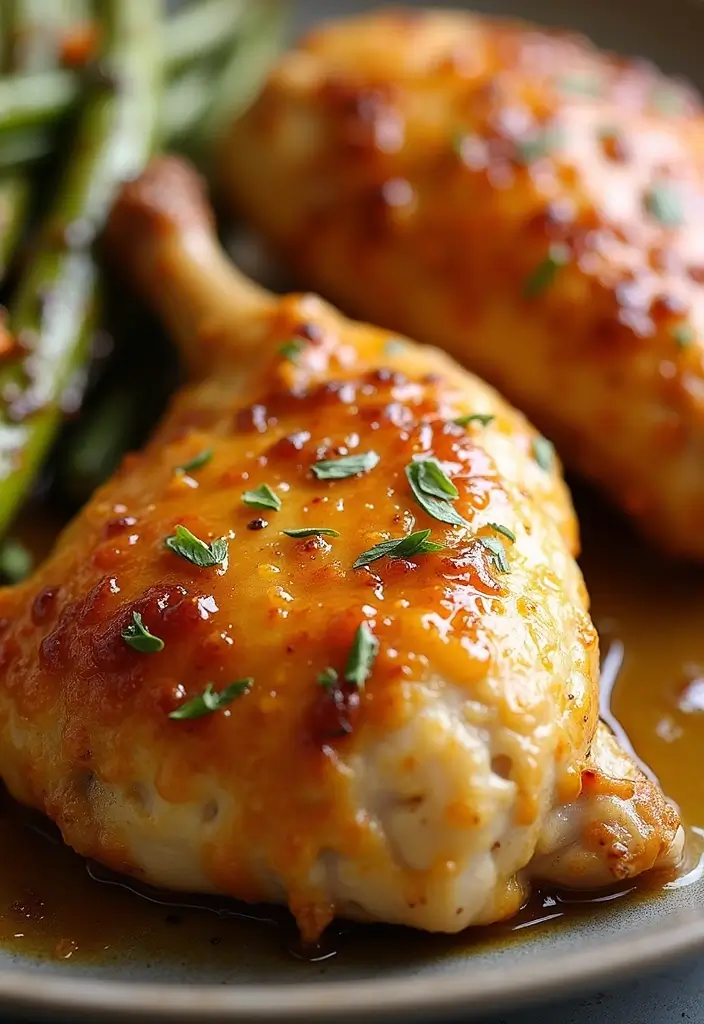
Craving a quick and tasty dinner? Try these Honey Mustard Chicken Thighs. This dish blends sweet honey with tangy mustard, creating a delicious glaze that keeps the chicken juicy and bursting with flavor. It’s simple to prepare and filled with wholesome ingredients, making it an instant hit at your dinner table.
Here’s what you need to know to whip this up for your next meal:
Recipe Overview:
– Servings: 4
– Prep Time: 10 minutes
– Cook Time: 30 minutes
– Total Time: 40 minutes
– Calories: 290 per serving
Nutrition Information:
– Protein: 25g
– Fat: 18g
– Carbohydrates: 6g
Ingredients:
– 4 chicken thighs (bone-in and skin-on)
– 1/4 cup honey
– 2 tablespoons Dijon mustard
– Salt and pepper to taste
Instructions:
1. Preheat your oven to 375°F (190°C).
2. In a bowl, mix together the honey, Dijon mustard, salt, and pepper until well combined.
3. Place the chicken thighs in a baking dish and pour the honey mustard mixture over them, ensuring they are fully coated.
4. Bake for 30-35 minutes, or until the chicken is cooked through and the juices run clear.
5. Serve these thighs with roasted vegetables or a fresh salad for a complete meal.
Feel free to swap chicken thighs for breasts if you want a leaner option. And don’t worry about leftovers; they work wonderfully in salads or wraps the next day!
FAQ:
– Can I use maple syrup instead of honey? Yes, that will give a unique twist to the flavor!
Honey Mustard Chicken Thighs
Editor’s Choice

Lodge 12 Inch Cast Iron Skillet with Red Silicone Hot Handle Holder – Pr…
 Amazon$39.90
Stainless Steel Shaft, Glass Honey Dispenser, Chrome-Plated ABS Lid – No…
 Amazon$18.95
365 by Whole Foods Market, Organic Dijon Mustard, 8 Ounce
 Amazon$3.29
18. Ratatouille
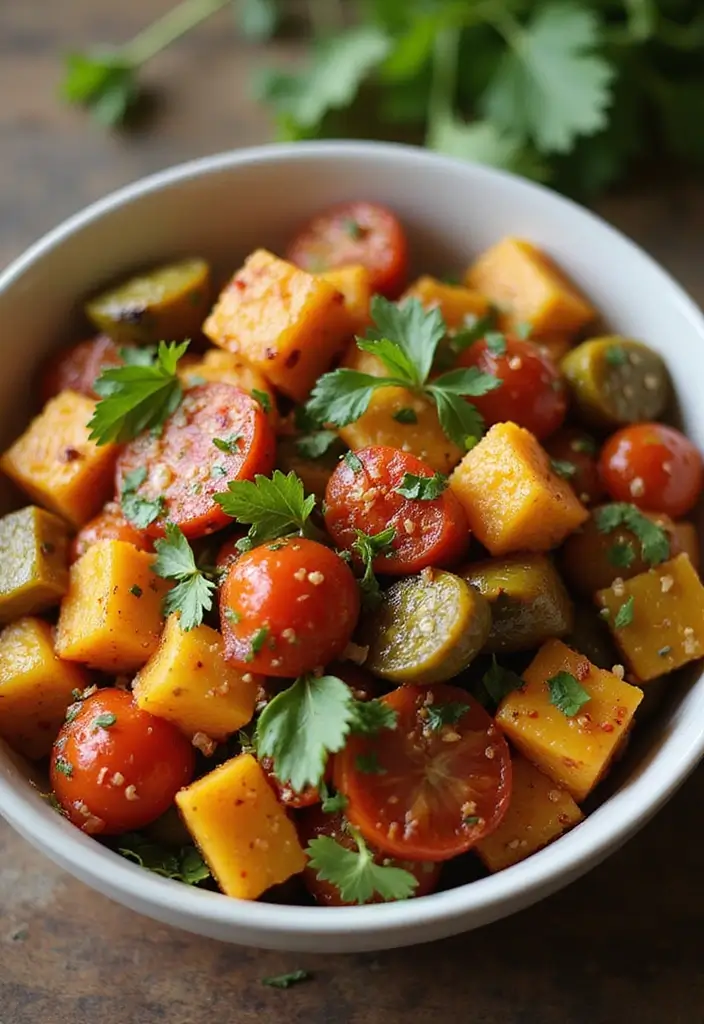
Bring a taste of France to your kitchen with this delightful Ratatouille. This dish showcases a vibrant mix of summer vegetables, creating a feast for the eyes and the palate. It’s healthy, colorful, and easy to whip up for any gathering. Enjoy it as a stand-alone main course, a side dish, or served over cauliflower rice for a wholesome meal that satisfies.
Let’s dive into the details so you can make your own Ratatouille!
Recipe Overview:
– Servings: 6
– Prep Time: 15 minutes
– Cook Time: 40 minutes
– Total Time: 55 minutes
– Calories: 180 per serving
Nutrition Information:
– Protein: 4g
– Fat: 7g
– Carbohydrates: 30g
Ingredients:
– 1 eggplant, diced
– 1 zucchini, sliced
– 1 bell pepper, chopped
– 1 onion, chopped
– 2 cups diced tomatoes
– Olive oil, salt, and pepper to taste
Instructions:
1. In a large pot, heat olive oil over medium heat. Add the chopped onions and sauté until they turn translucent.
2. Toss in the diced eggplant, zucchini, and bell pepper. Cook until these veggies soften, stirring occasionally.
3. Stir in the diced tomatoes, along with salt and pepper. Let it simmer for about 30 minutes, stirring occasionally to blend the flavors.
4. Serve your Ratatouille hot or cold. Garnish it with fresh herbs like basil or parsley for an extra touch of flavor.
This dish is known for tasting even better the next day as the flavors meld together. It’s perfect for meal prep! Pair it with grilled chicken or fish for a complete, satisfying dinner.
FAQ:
– Can I add other veggies? Absolutely! Feel free to mix in any seasonal vegetables you have on hand, like carrots or mushrooms. Customize it to your taste!
Now you have a flavorful, nutritious dish that’s easy to make and perfect for any occasion. Enjoy your cooking adventure!
Ratatouille
Editor’s Choice
Pompeian USDA Organic Smooth Extra Virgin Olive Oil, Contains Polyphenol…
 Amazon$24.48

Fullstar The Original Pro Chopper – Vegetable Chopper and Spiralizer, Fo…
 Amazon$29.99
Lodge 12 Inch Cast Iron Skillet with Red Silicone Hot Handle Holder – Pr…
 Amazon$39.90
19. Coconut Flour Pancakes

Wake up to a plate of warm, fluffy Coconut Flour Pancakes that will make your mornings brighter! These pancakes are not just a treat; they’re a healthy choice for anyone following a Paleo or Whole 30 diet. Gluten-free and low in carbs, these pancakes offer a delightful balance of flavor and nutrition. Imagine sinking your fork into a stack that’s both filling and subtly sweet. It’s the perfect way to kick-start your day!
Let’s get straight into making these delicious pancakes. You’ll need just a few simple ingredients that you probably already have in your pantry. Plus, this recipe is quick and easy, so you can whip it up even on busy mornings!
Recipe Overview:
– Servings: 4
– Prep Time: 5 minutes
– Cook Time: 10 minutes
– Total Time: 15 minutes
– Calories: 150 per serving
Nutrition Information:
– Protein: 5g
– Fat: 9g
– Carbohydrates: 12g
Ingredients:
– 1/2 cup coconut flour
– 4 eggs
– 1/2 cup almond milk
– 1 tablespoon honey (optional)
– 1/4 teaspoon baking powder
– Pinch of salt
Instructions:
1. In a mixing bowl, whisk together the coconut flour, eggs, almond milk, honey, baking powder, and salt until the batter is smooth.
2. Heat a non-stick skillet over medium heat. Pour the batter into the skillet to form pancakes.
3. Cook until you see bubbles forming on the surface, then flip and cook until golden brown.
4. Serve warm with fresh fruit, a drizzle of maple syrup, or your favorite toppings!
Want to elevate the flavor? Add a splash of vanilla extract to the batter. These pancakes also freeze beautifully, making them a quick breakfast option for any day. Just pop them in the toaster when you’re ready to enjoy!
FAQ:
– Can I use regular flour? This recipe is tailored for coconut flour to keep it Paleo-friendly. Enjoy the unique texture and flavor that coconut flour brings!
Now you’re all set to enjoy a delightful breakfast! Indulge in these Coconut Flour Pancakes and feel good knowing you’re nourishing your body with every bite.
Coconut Flour Pancakes
Editor’s Choice


Silk Shelf-Stable Almond Milk, Unsweetened Vanilla, Dairy-Free, Vegan, N…
 Amazon$11.27
Tramontina Professional 14-Inch Non Stick Extra Large Frying Pan, Heavy-…
 Amazon$44.84
20. Grilled Veggie Skewers
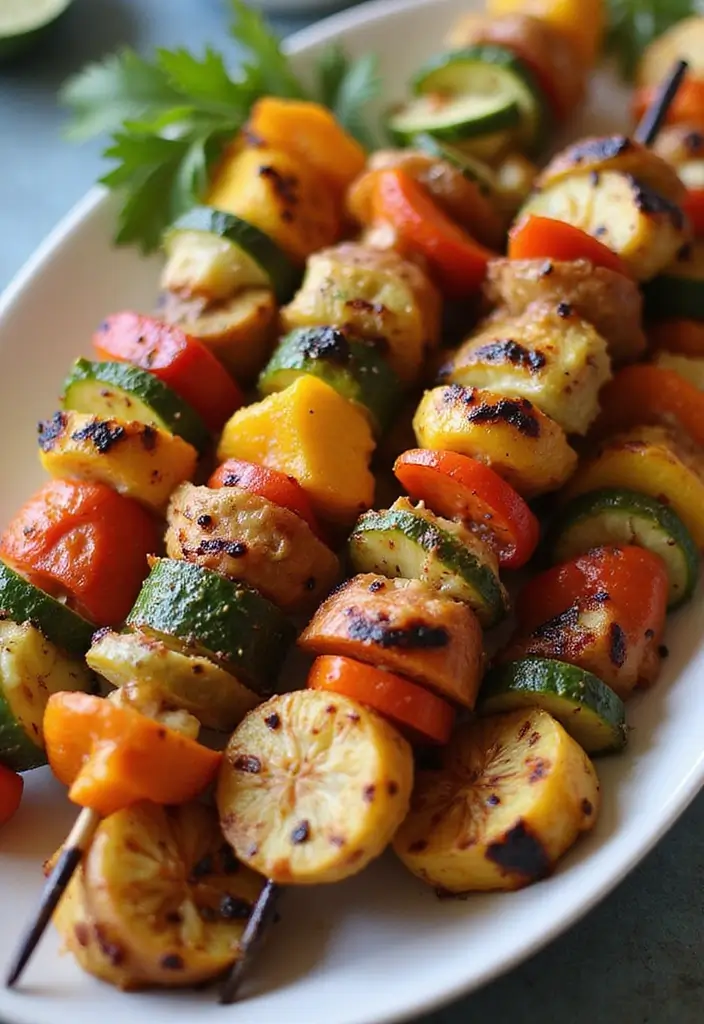
Grilled Veggie Skewers are a delightful way to enjoy fresh vegetables while adding color to your meals. They’re perfect for summer BBQs or as a tasty side dish for any occasion. You can customize these skewers with seasonal veggies you love, making them both versatile and satisfying. Imagine juicy bell peppers, vibrant cherry tomatoes, and tender zucchini dancing over the grill, filling the air with mouthwatering aromas.
Ready to whip up this easy dish? Let’s get into the details! You only need a few ingredients and about 25 minutes. Plus, this recipe is a great way to sneak in more veggies into your diet without sacrificing flavor.
Recipe Overview:
– Servings: 4
– Prep Time: 15 minutes
– Cook Time: 10 minutes
– Total Time: 25 minutes
– Calories: 120 per serving
Nutrition Information:
– Protein: 3g
– Fat: 5g
– Carbohydrates: 18g
Ingredients:
– 2 bell peppers, cut into chunks
– 1 zucchini, sliced
– 1 red onion, cut into wedges
– 1 cup cherry tomatoes
– Olive oil, salt, and pepper to taste
Instructions:
1. Preheat your grill to medium-high heat.
2. In a mixing bowl, toss the veggies with olive oil, salt, and pepper until evenly coated.
3. Thread the veggies onto skewers, alternating colors for a beautiful presentation.
4. Grill the skewers for about 10 minutes, turning occasionally until the veggies are tender and slightly charred.
5. Serve warm as a colorful side dish or light meal.
Want to elevate the flavor? Add fresh herbs, like basil or parsley, right before serving for a burst of freshness. You can also make these skewers ahead of time and keep them in the fridge for an easy meal option later.
FAQ:
– Can I add protein to these skewers? Yes! Shrimp or chicken work wonderfully and can make this dish even more satisfying.
Enjoy your delicious Grilled Veggie Skewers and relish in the ease of a healthy dish that looks as good as it tastes!
Grilled Veggie Skewers
Editor’s Choice

Metal Skewer for Grilling,Kabob Skewer,Flat BBQ Barbecue Skewer,Grilling…
 Amazon$7.99
TrendPlain 16oz/470ml Glass Olive Oil Sprayer for Cooking – 2 in 1 Olive…
 Amazon$8.99
21. Lemon Herb Quinoa Salad
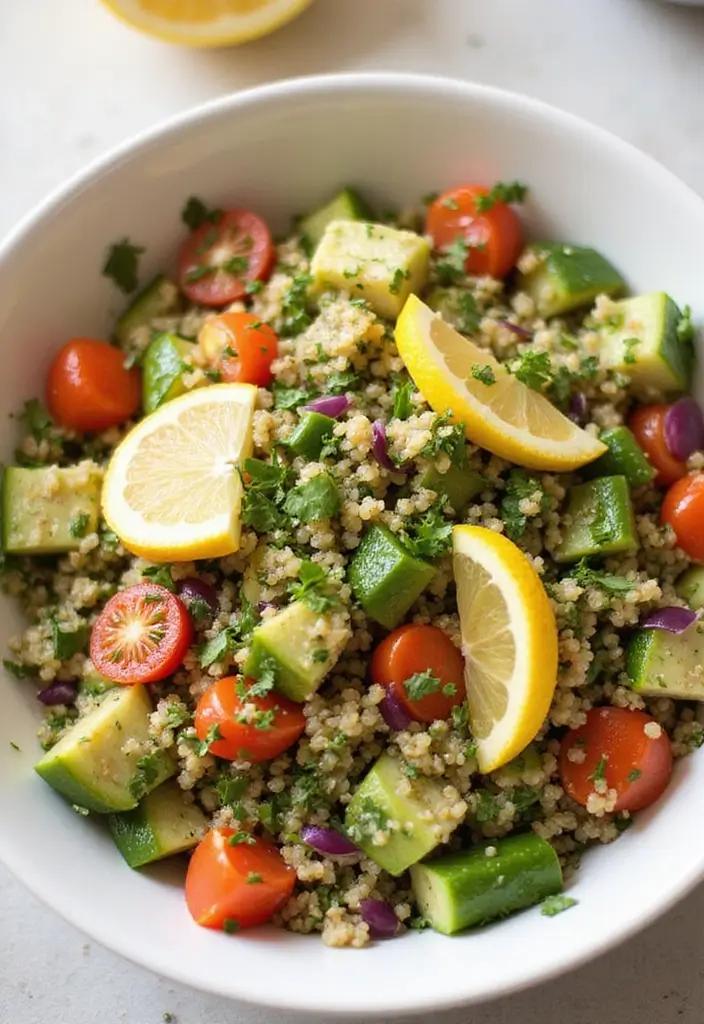
Brighten your summer days with a refreshing Lemon Herb Quinoa Salad. This dish is not just a salad; it’s a burst of vibrant flavors and colors on your plate. Quinoa, a protein-packed super grain, serves as the perfect base. Toss in some crunchy vegetables and drizzle with a zesty lemon dressing, and you’ve got a meal that’s both satisfying and healthy.
Whether you need a light side dish for a barbecue or a hearty standalone meal, this salad fits the bill. You can even customize it by adding your favorite proteins like grilled chicken or chickpeas for an extra boost. It’s quick to make, too, taking only about 25 minutes from start to finish.
Recipe Overview:
– Servings: 4
– Prep Time: 10 minutes
– Cook Time: 15 minutes
– Total Time: 25 minutes
– Calories: 250 per serving
Nutrition Information:
– Protein: 8g
– Fat: 8g
– Carbohydrates: 38g
Ingredients:
– 1 cup quinoa, rinsed
– 2 cups water
– 1 cucumber, diced
– 1 bell pepper, diced
– 1/4 cup parsley, chopped
– Juice of 1 lemon
– Olive oil, salt, and pepper to taste
Instructions:
1. In a pot, bring the quinoa and water to a boil. Reduce the heat, cover, and let it simmer for about 15 minutes until the quinoa is fluffy.
2. In a large bowl, combine the cooked quinoa with the cucumber, bell pepper, parsley, lemon juice, olive oil, salt, and pepper.
3. Gently toss everything together until mixed well.
4. Serve it cold or at room temperature for a delightful experience!
You can store leftovers in the fridge for up to 3 days. Enjoy this salad as a light lunch or as a side to your favorite meal. Just remember, quinoa isn’t Whole 30 compliant, so if you’re following that plan, consider using cauliflower rice instead!
• Use fresh herbs for the best flavor
• Add grilled chicken or chickpeas for protein
• Serve chilled for a refreshing taste
• Store leftovers in an airtight container
Lemon Herb Quinoa Salad
Editor’s Choice

Viva Naturals Organic Quinoa, 4 lb – Pre-Washed Whole Grain, Plant Prote…
 Amazon$17.99
Pompeian Robust Extra Virgin Olive Oil, Contains Polyphenols, First Cold…
 Amazon$15.64
Rubbermaid Brilliance 16-Cup Airtight Food Storage Container with Lid Cl…
 Amazon$13.29
22. Paleo Chocolate Chip Cookies

Treat yourself to a batch of warm, gooey Paleo Chocolate Chip Cookies that are as healthy as they are delicious. These cookies hit the sweet spot without the guilt. Made from almond flour and naturally sweetened, they provide a satisfying dessert for any occasion. Imagine enjoying them fresh from the oven, paired perfectly with a cool glass of almond milk. It’s a snack that feels indulgent but is packed with wholesome ingredients.
Ready to make your own? Here’s how:
Recipe Overview:
– Servings: 12
– Prep Time: 15 minutes
– Cook Time: 12 minutes
– Total Time: 27 minutes
– Calories: 120 per cookie
Nutrition Information:
– Protein: 4g
– Fat: 8g
– Carbohydrates: 9g
Ingredients:
– 2 cups almond flour
– 1/4 cup coconut oil (melted)
– 1/4 cup honey or maple syrup
– 1 teaspoon vanilla extract
– 1/2 teaspoon baking soda
– 1/4 teaspoon salt
– 1/2 cup dark chocolate chips (dairy-free)
Instructions:
1. Preheat your oven to 350°F (175°C).
2. In a mixing bowl, combine almond flour, melted coconut oil, honey (or maple syrup), and vanilla extract. Stir until the mixture is smooth.
3. Add in baking soda, salt, and dark chocolate chips. Mix thoroughly.
4. Scoop tablespoons of the dough onto a parchment-lined baking sheet, spacing them about 2 inches apart.
5. Bake for 10-12 minutes, or until the edges turn golden brown.
6. Let them cool for a few minutes before digging in.
These cookies store well in an airtight container, keeping their freshness for days. Want to jazz them up? Feel free to add your favorite nuts or dried fruits for extra flavor and crunch!
FAQ:
– Can I use a different flour? Stick with almond flour for the best results. Other flours might change the texture.
These cookies are perfect for satisfying your sweet cravings while sticking to your Paleo or Whole30 diet. Enjoy baking and savor every bite!
Paleo Chocolate Chip Cookies
Editor’s Choice

Blue Diamond Almonds Almond Flour, Gluten Free, Blanched, Finely Sifted,…
 Amazon$9.91
Viva Naturals Organic Coconut Oil – Unrefined, Cold-Pressed Extra Virgin…
 Amazon$9.99
GHIRARDELLI Non-Dairy Dark Chocolate Chips for Baking, Premium Baking Ch…
 Amazon$8.49
23. Thai Coconut Shrimp
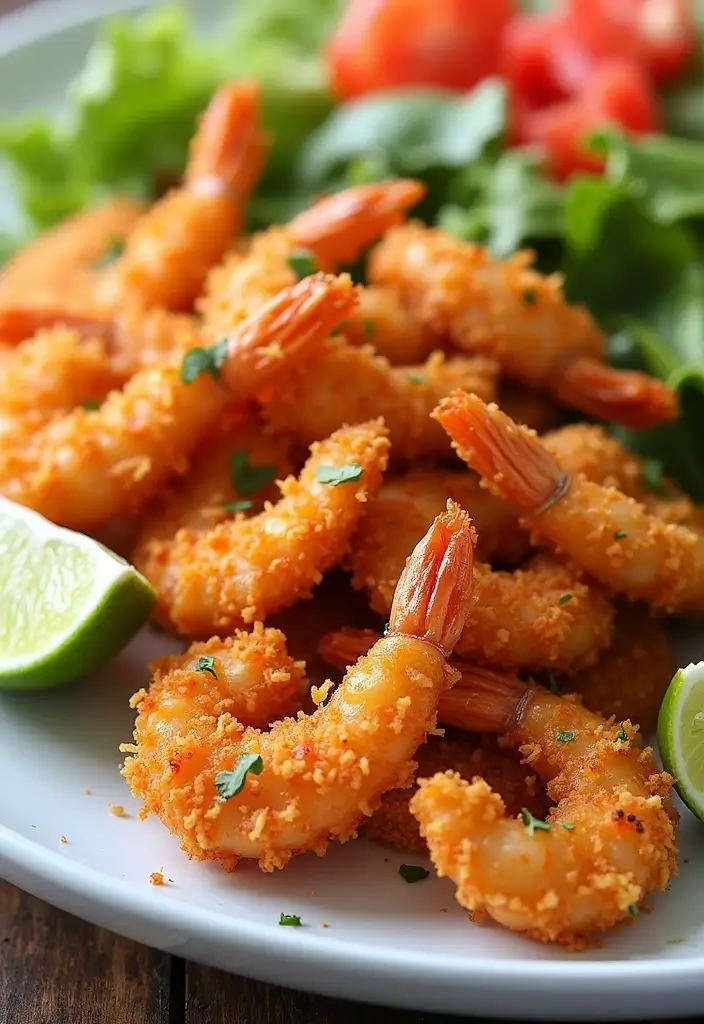
Treat yourself to a delightful dish with Thai Coconut Shrimp. This recipe bursts with tropical flavors and is sure to wow your guests. Imagine crispy, golden shrimp coated in a sweet coconut crunch. Serve these as a light meal or a stunning appetizer that fits perfectly into your Paleo journey.
Here’s a quick overview of what you need to know:
– Servings: 4
– Prep Time: 20 minutes
– Cook Time: 10 minutes
– Total Time: 30 minutes
– Calories: 300 per serving
Nutrition Information:
– Protein: 25g
– Fat: 18g
– Carbohydrates: 12g
Ingredients:
– 1 lb shrimp (peeled and deveined)
– 1/2 cup coconut flour
– 1 cup shredded coconut
– 2 eggs (beaten)
– Salt and pepper to taste
– Lime wedges (for serving)
Instructions:
1. Preheat your oven to 375°F (190°C).
2. Create a breading station: Use one bowl for coconut flour, one for the beaten eggs, and one for shredded coconut.
3. Dip each shrimp in coconut flour, then in the egg, and finally coat with shredded coconut.
4. Arrange the shrimp on a baking sheet and bake for 10-12 minutes until golden brown.
5. Serve with lime wedges to add a zesty punch.
Want a crunchier texture? Try frying the shrimp in coconut oil instead of baking. Pair these tasty bites with a fresh salad for a wholesome meal that feels indulgent yet healthy.
FAQs:
– Can I use frozen shrimp? Yes! Just be sure to thaw them before cooking.
These Thai Coconut Shrimp make every meal feel special. Enjoy the crispy texture and tropical flavor that will keep you coming back for more!
Thai Coconut Shrimp
Editor’s Choice

Viva Naturals Organic Coconut Flour (4 lbs) – Gluten Free Flour Substitu…
 Amazon$13.99
Anthony’s Organic Shredded Coconut, 2 lb, Unsweetened, Gluten Free, Non …
 Amazon$18.29
Viva Naturals Organic Coconut Oil – Unrefined, Cold-Pressed Extra Virgin…
 Amazon$9.99
24. Mushroom and Spinach Stuffed Chicken
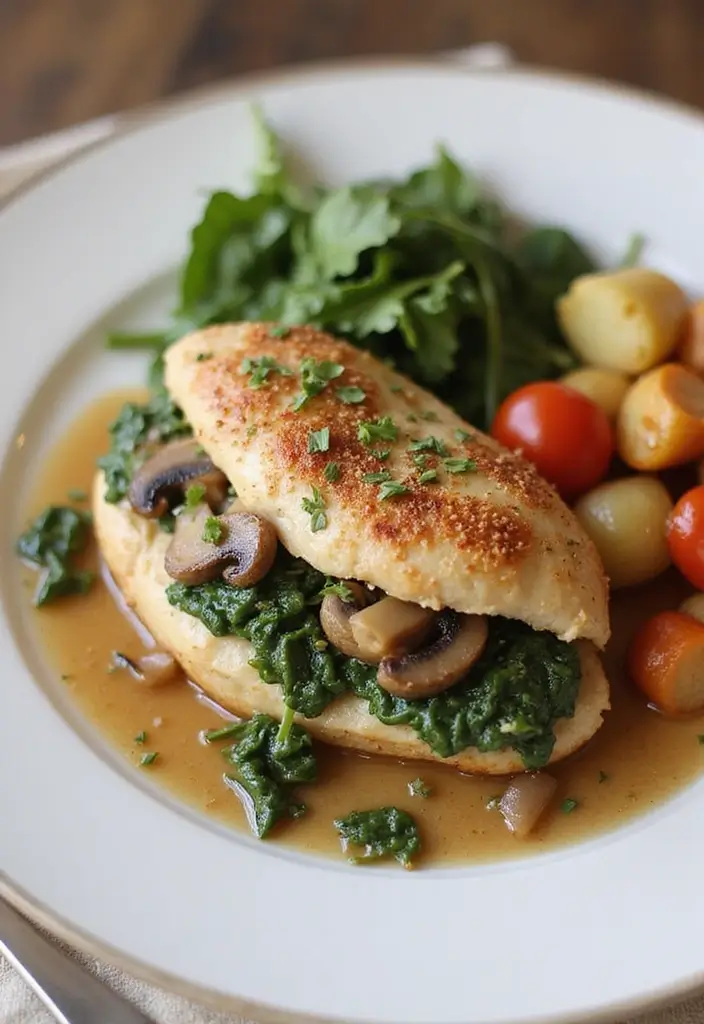
Discover a delightful twist on your dinner with Mushroom and Spinach Stuffed Chicken. This dish is not only tasty but also packed with nutrients, making it a perfect option for both impressing guests and enjoying a cozy weeknight meal. Imagine juicy chicken breasts filled with a savory blend of mushrooms and fresh spinach, all baked to perfection. The aroma alone will have everyone flocking to the table!
Let’s break down the recipe so you can whip this up easily. You won’t need to spend all day in the kitchen. With just 15 minutes of prep time and 25 minutes of cooking, you can serve a delicious meal in under an hour. Plus, it’s healthy! Each serving contains about 320 calories, while delivering a hearty 30 grams of protein.
Recipe Overview:
– Servings: 4
– Prep Time: 15 minutes
– Cook Time: 25 minutes
– Total Time: 40 minutes
– Calories: 320 per serving
Nutrition Information:
– Protein: 30g
– Fat: 20g
– Carbohydrates: 4g
Ingredients:
– 4 chicken breasts
– 1 cup spinach, chopped
– 1 cup mushrooms, sliced
– 2 cloves garlic, minced
– 2 tablespoons olive oil
– Salt and pepper to taste
Instructions:
1. Preheat your oven to 375°F (190°C).
2. In a skillet, heat the olive oil. Sauté the garlic, mushrooms, and spinach until soft. Season with salt and pepper.
3. Cut a pocket in each chicken breast and stuff them with the mushroom-spinach mixture.
4. Place the stuffed chicken in a baking dish. Bake for 25-30 minutes until the chicken is cooked through.
5. Serve warm, and feel free to garnish with fresh herbs for an extra touch!
This dish pairs wonderfully with roasted vegetables or a fresh salad. If you have leftovers, they make great additions to salads or wraps, keeping your meals exciting throughout the week!
FAQ:
– Can I add cheese to the stuffing? Sure! If you’re not strictly adhering to Paleo, feel free to sprinkle in some cheese for extra creaminess. Enjoy the delicious flavors of this stuffed chicken, and make your dinner memorable!
Mushroom and Spinach Stuffed Chicken
Editor’s Choice

Lodge 12 Inch Cast Iron Skillet with Red Silicone Hot Handle Holder – Pr…
 Amazon$39.90
Pompeian USDA Organic Smooth Extra Virgin Olive Oil, Contains Polyphenol…
 Amazon$24.48
8 Pack 36oz Large Glass Meal Prep Containers with lids, Glass Food Stora…
 Amazon$30.39
25. Berry Coconut Smoothie
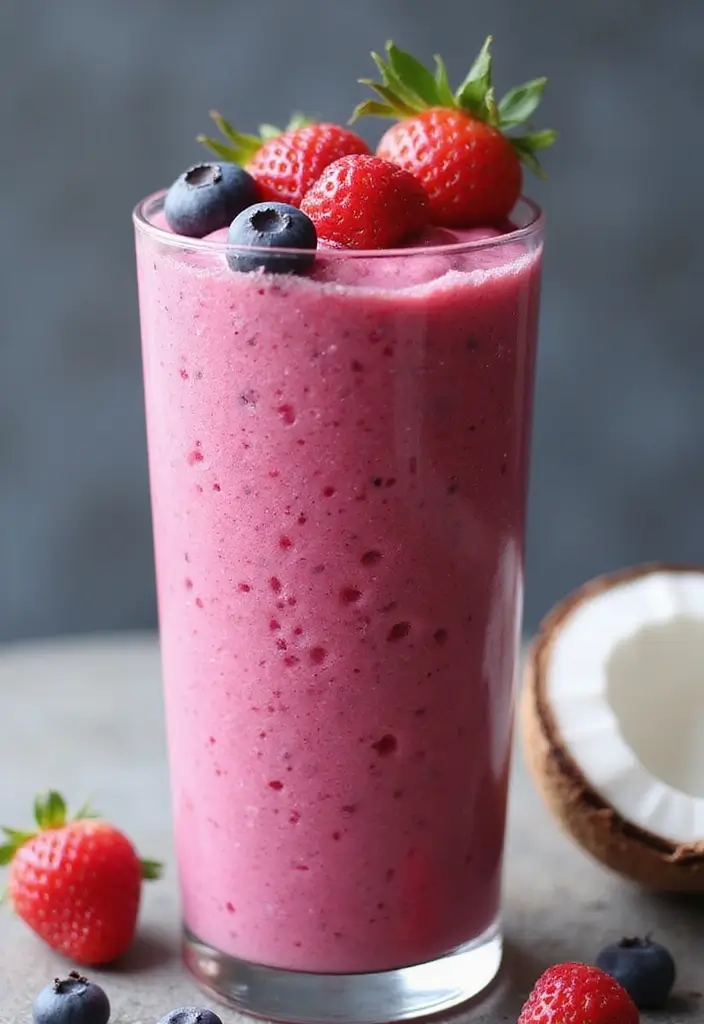
Kickstart your morning with a delightful Berry Coconut Smoothie! This refreshing drink is not only delicious but also loaded with nutrients that will energize your day. Imagine blending together frozen mixed berries, creamy coconut milk, and a ripe banana. The result is a naturally sweet and satisfying smoothie that’s perfect for breakfast or a quick snack.
Plus, this smoothie is Whole 30 compliant, making it a great choice for your healthy eating journey. It’s a fun way to sneak in more fruits, and you can even customize it to your liking!
Recipe Overview:
– Servings: 2
– Prep Time: 5 minutes
– Cook Time: 0 minutes
– Total Time: 5 minutes
– Calories: 150 per serving
Nutrition Information:
– Protein: 3g
– Fat: 8g
– Carbohydrates: 20g
Ingredients:
– 1 cup frozen mixed berries
– 1 ripe banana
– 1 cup coconut milk
– 1 tablespoon honey (optional)
Instructions:
1. Grab your blender and add the frozen berries, banana, and coconut milk. If you like it sweeter, toss in the honey.
2. Blend everything until it’s smooth and creamy. You want a nice, thick texture!
3. Pour the smoothie into glasses and enjoy it cold.
For an extra boost of nutrients, consider adding a handful of spinach. You won’t even taste it! If you prefer a different flavor, almond milk works beautifully too.
FAQ:
– Can I use fresh fruit? Absolutely! Just add a handful of ice to keep it chilled and refreshing.
This Berry Coconut Smoothie is not just a treat; it’s your new go-to for a healthy start. Enjoy every sip and feel great knowing you’re fueling your body with wholesome ingredients!
Did you know a Berry Coconut Smoothie can power your morning in under 5 minutes? With just 3 ingredients, this Whole 30–compliant shake fuels busy professionals with paleo whole 30 recipes energy and focus.
Berry Coconut Smoothie
Editor’s Choice

365 by Whole Foods Market, Organic Berry Blend, 32 Ounce
 Amazon$7.79
Thai Kitchen Gluten Free Unsweetened Coconut Milk, 13.66 fl oz (Pack of 12)
 Amazon$10.62
26. Balsamic Glazed Chicken
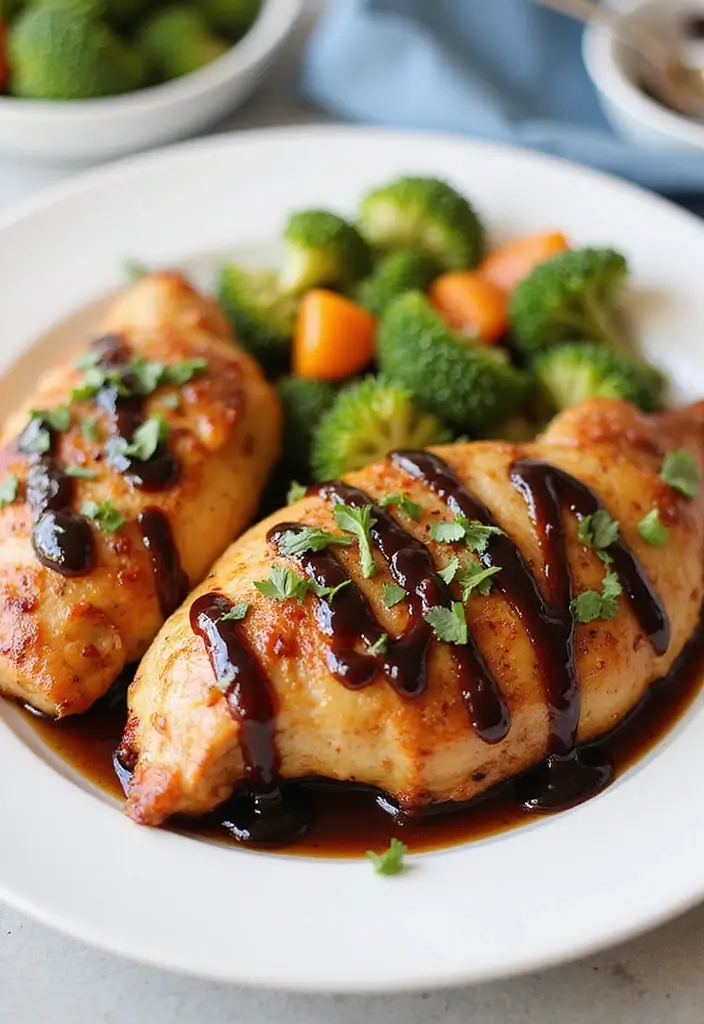
Looking for a quick and tasty dinner that won’t derail your healthy eating? Try this Balsamic Glazed Chicken. It’s a delightful dish that combines a sweet and tangy balsamic glaze with juicy chicken. This recipe is not only easy to make but also perfect for those busy weeknights when you want something satisfying without spending hours in the kitchen. Pair it with a fresh salad or some roasted veggies, and you’ve got a meal that’s as nutritious as it is delicious!
Let’s dive into the details. You’ll need just a few ingredients, and the prep time is only 10 minutes! With a total cooking time of about 20 minutes, you can whip this up in no time. Here’s a quick overview of the recipe:
Recipe Overview:
– Servings: 4
– Prep Time: 10 minutes
– Cook Time: 20 minutes
– Total Time: 30 minutes
– Calories: 280 per serving
Nutritional Information:
– Protein: 35g
– Fat: 10g
– Carbohydrates: 6g
Ingredients:
– 4 chicken breasts
– 1/2 cup balsamic vinegar
– 3 tablespoons honey
– 2 tablespoons olive oil
– Salt and pepper to taste
Instructions:
1. In a mixing bowl, whisk together the balsamic vinegar, honey, olive oil, salt, and pepper. This combination creates a lovely marinade.
2. Add the chicken breasts to the bowl and let them soak up those flavors for at least 30 minutes.
3. Preheat your grill or skillet to medium heat. Cook the chicken for about 6-7 minutes on each side or until it’s fully cooked.
4. Drizzle any remaining glaze over the chicken before serving.
If you prefer, you can also bake the chicken at 375°F for 25-30 minutes. Leftovers are fantastic, too! Use them in salads or wraps for a quick lunch.
FAQ:
– Can I use a different vinegar? Yes, red wine vinegar works beautifully as a substitute!
This Balsamic Glazed Chicken is not just a meal; it’s a way to enjoy a healthy lifestyle while indulging in rich flavors. So, gear up and treat yourself to this easy and satisfying dish tonight!
Balsamic Glazed Chicken
Editor’s Choice

Pompeian Gourmet Organic Balsamic Vinegar, Perfect for Salad Dressings, …
 AmazonCheck Price
Pompeian Robust Extra Virgin Olive Oil, Contains Polyphenols, First Cold…
 Amazon$15.64
27. Kale and Sweet Potato Salad
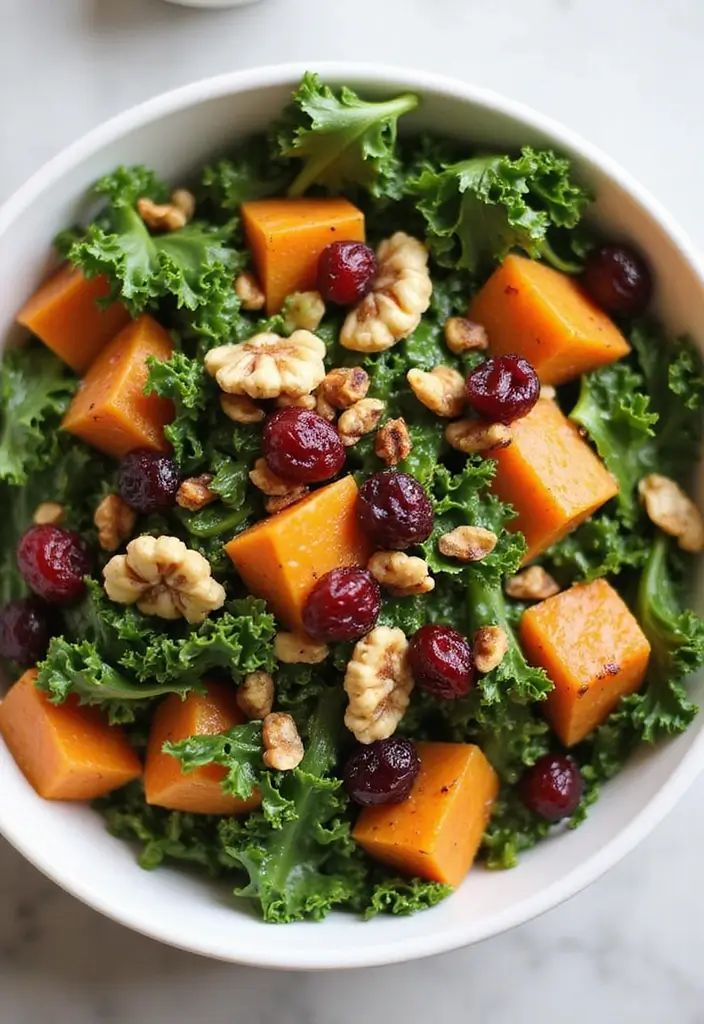
Looking for a nourishing dish that packs a flavorful punch? Try this Kale and Sweet Potato Salad. It’s a vibrant mix of textures and tastes, perfect for a filling lunch or a delightful side at dinner. The sweetness of roasted sweet potatoes complements the earthy kale beautifully. To top it off, a zesty dressing ties everything together, making each bite satisfying and delicious.
This salad is not only tasty but also easy to prepare. It’s a great way to sneak in some veggies while enjoying a hearty meal. Plus, it’s perfect for meal prep, keeping well in the fridge for up to three days.
Recipe Overview:
– Servings: 4
– Prep Time: 15 minutes
– Cook Time: 30 minutes
– Total Time: 45 minutes
– Calories: 250 per serving
Nutrition Information:
– Protein: 5g
– Fat: 10g
– Carbohydrates: 40g
Ingredients:
– 2 cups kale, torn into bite-sized pieces
– 1 medium sweet potato, peeled and cubed
– 1/4 cup dried cranberries
– 1/4 cup walnuts, chopped
– Olive oil, salt, and pepper to taste
Instructions:
1. Preheat your oven to 400°F (200°C). Toss the sweet potato cubes with olive oil, salt, and pepper.
2. Spread them on a baking sheet and roast for 20-30 minutes, until they’re tender and slightly caramelized.
3. In a large bowl, mix the kale, cranberries, and walnuts.
4. Once the sweet potatoes are warm, add them to the salad. Drizzle with your favorite dressing and toss everything together.
5. Serve it warm or let it sit at room temperature for a bit.
Storage Tip: This salad keeps well in the fridge for up to three days, making it a great option for meal prep.
Protein Boost: Want to add more protein? Toss in some grilled chicken or chickpeas!
FAQ:
– Can I use other greens? Absolutely! Spinach or arugula work wonderfully as substitutes.
This Kale and Sweet Potato Salad is not only a feast for your taste buds but also a healthy option that fits perfectly into your Paleo or Whole30 lifestyle. Enjoy every bite!
Kale and Sweet Potato Salad
Editor’s Choice

OXO Good Grips Salad Spinner | Lettuce Spinner | Fruit Washer | Fruit Wa…
 Amazon$28.99
Rubbermaid Brilliance Food Storage Containers BPA Free Airtight Lids Ide…
 Amazon$34.99
AOZITA 17oz Glass Olive Oil Bottle Dispenser – 500ml Green Oil and Vineg…
 AmazonHKD 77.70
28. Fajita-Style Chicken Lettuce Wraps
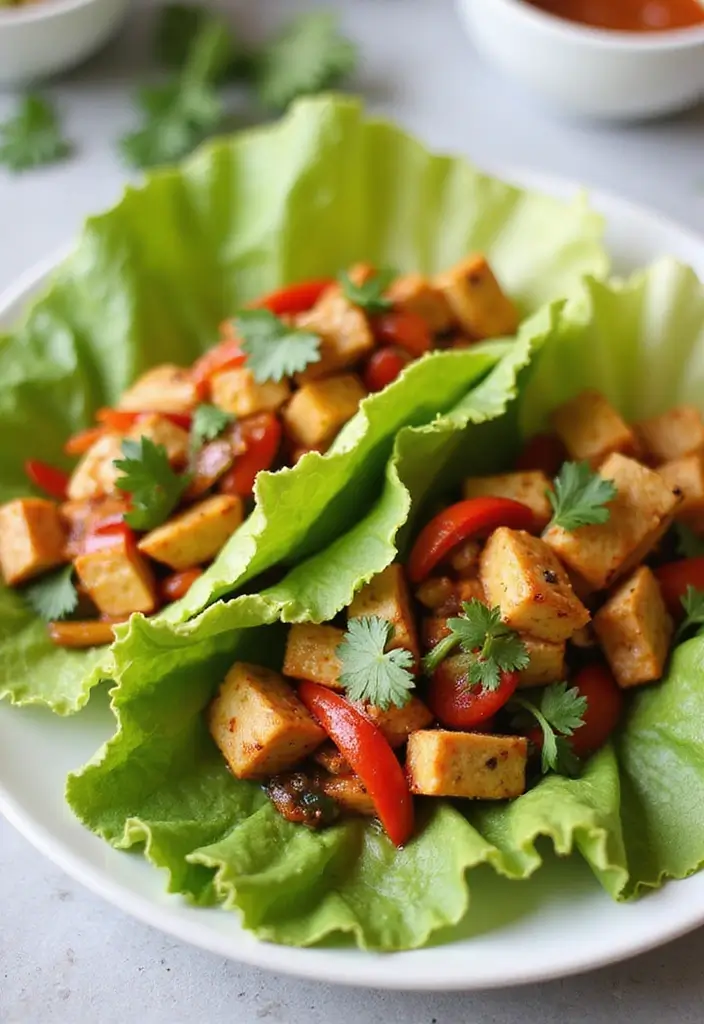
Imagine enjoying a fresh and flavorful meal that’s also healthy. These Fajita-Style Chicken Lettuce Wraps are just that! They take the classic fajita flavor and wrap it in crisp lettuce leaves. This twist makes them light yet satisfying, perfect for lunch or a quick dinner. You can whip them up in no time, making them a go-to option for busy days.
Not only are these wraps delicious, but they’re also packed with protein and nutrients. The seasoned chicken mixed with colorful veggies gives you a burst of flavor in every bite. Plus, you can customize them with your favorite toppings like avocado or salsa for an extra zing.
Recipe Overview:
– Servings: 4
– Prep Time: 15 minutes
– Cook Time: 10 minutes
– Total Time: 25 minutes
– Calories: 200 per serving
Nutrition Information:
– Protein: 25g
– Fat: 10g
– Carbohydrates: 6g
Ingredients:
– 1 lb chicken breast, sliced
– 1 bell pepper, sliced
– 1 onion, sliced
– 2 tablespoons fajita seasoning
– Lettuce leaves for wrapping
Instructions:
1. Heat a little oil in a skillet over medium heat.
2. Add the sliced chicken, bell pepper, and onion.
3. Sprinkle the fajita seasoning over the top.
4. Cook until the chicken is no longer pink and the veggies are tender, about 10 minutes.
5. Serve the mixture in lettuce leaves.
Tips for Extra Flavor:
– Add sliced avocado or fresh salsa on top.
– These wraps are perfect for meal prep! Make a batch in advance and enjoy them throughout the week.
FAQ:
– Can I use ground meat? Absolutely! Ground turkey or beef works great in this recipe.
Enjoy these wraps as a quick, healthy meal that doesn’t compromise on taste. Make them your own by experimenting with different vegetables or toppings. You’ll love how easy they are to prepare and how satisfying they taste!
Fajita-Style Chicken Lettuce Wraps
Editor’s Choice
Kosmos Q Taco Seasoning, Bold Natural Fajita & Taco Spice Mix for Beef, …
 Amazon$14.95
1000-Pack Lettuce Wraps – Clear Vented Sheets for Produce Freshness – Id…
 Amazon$34.17
29. Garlic Butter Shrimp
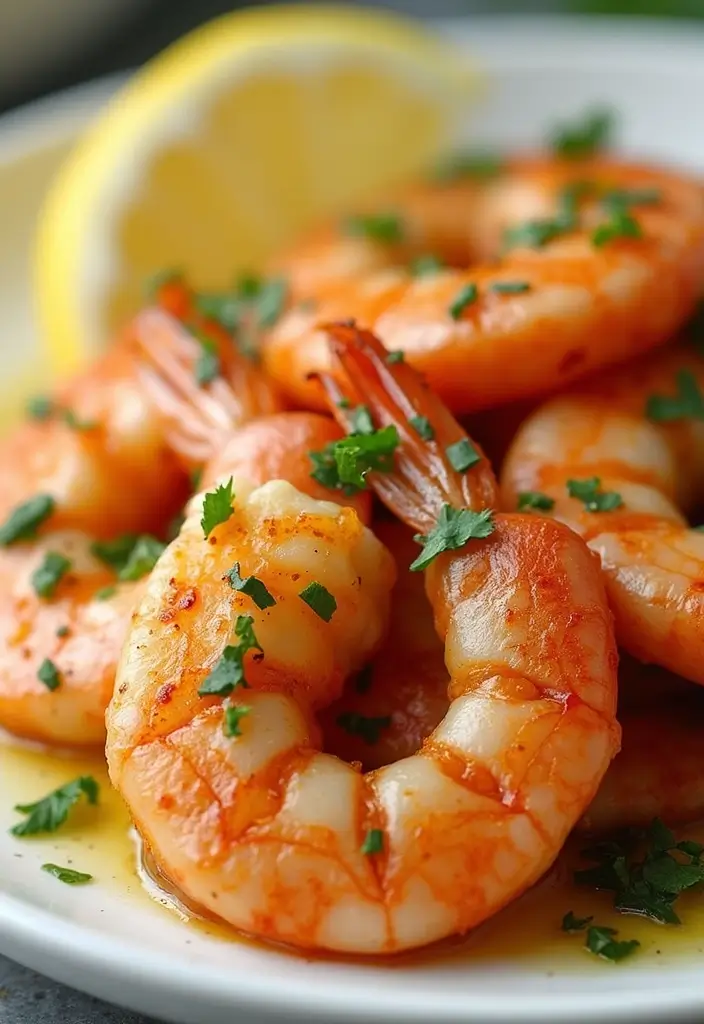
Dive into the delightful world of Garlic Butter Shrimp, a dish that pairs simplicity with mouthwatering flavor. Imagine savoring tender shrimp, perfectly cooked and bathed in a rich garlic butter sauce. This recipe is your go-to for those busy evenings when you crave something special but don’t want to spend hours in the kitchen. Serve it over zoodles or cauliflower rice for a fresh, healthy twist.
Here’s what you need to know:
– Servings: 4
– Prep Time: 5 minutes
– Cook Time: 10 minutes
– Total Time: 15 minutes
– Calories: 280 per serving
Nutrition Information:
– Protein: 25g
– Fat: 18g
– Carbohydrates: 1g
Ingredients:
– 1 lb shrimp (peeled and deveined)
– 4 tablespoons butter or ghee
– 4 cloves garlic (minced)
– Lemon juice (to taste)
– Salt and pepper (to taste)
Instructions:
1. Heat a skillet over medium heat and melt the butter.
2. Add the minced garlic and sauté until it becomes fragrant, about 1 minute.
3. Toss in the shrimp, seasoning with salt and pepper. Cook them for 3-4 minutes until they turn pink and opaque.
4. Squeeze fresh lemon juice over the shrimp just before serving.
5. Enjoy this dish over zoodles, cauliflower rice, or straight from the skillet.
Tips:
– Garnish with fresh parsley for that extra pop of flavor.
– Pair your shrimp with a light salad to make a complete meal.
FAQ:
– Can I use frozen shrimp? Absolutely! Just make sure to thaw them before cooking.
This Garlic Butter Shrimp recipe is not just a meal; it’s an experience. Enjoy the comforting aroma and the rich taste that will make you feel like a gourmet chef in your own kitchen. Perfect for any night of the week!
Garlic Butter Shrimp
Editor’s Choice

Spiralizer for Veggies, 4 in 1 Zoodles Zucchini Noodle Maker, Zucchini S…
 Amazon$8.76
Organic Extra Virgin Olive Oil – Premium Single-Source Greek EVOO with C…
 AmazonCheck Price
Kitessensu High Effective Garlic Press With Studs, Heavy Duty Garlic Min…
 Amazon$11.99
30. Chocolate Avocado Mousse
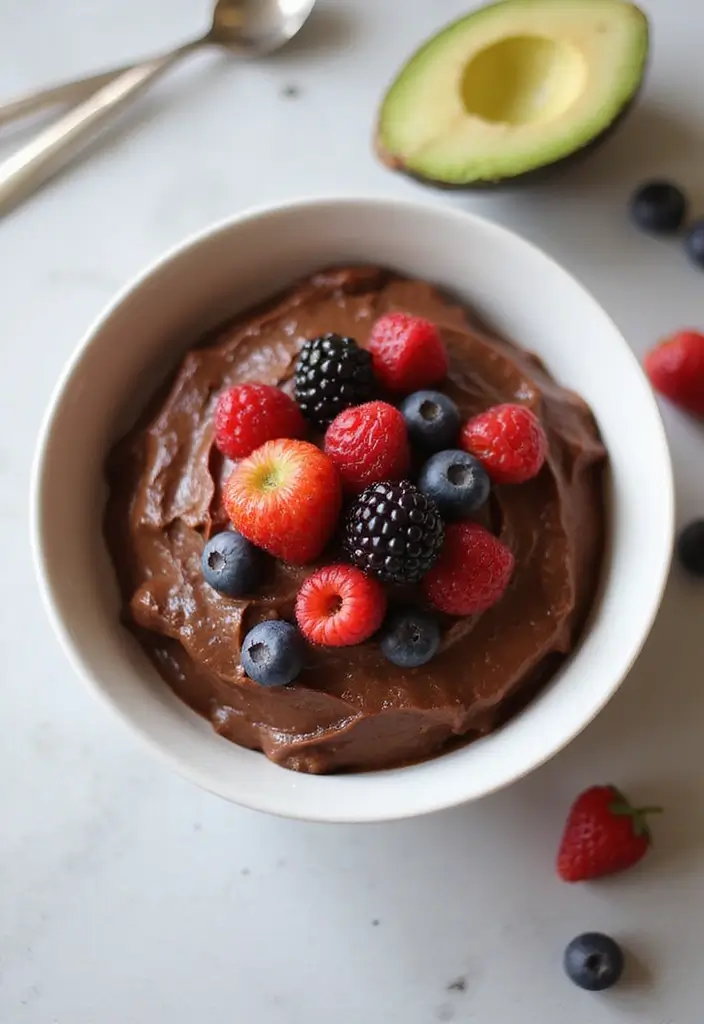
Indulge your sweet tooth without the guilt with a delightful Chocolate Avocado Mousse. This dessert is rich and creamy, yet it uses wholesome ingredients to keep it healthy. Made with ripe avocados, it’s a perfect treat for anyone on a Paleo or Whole 30 diet. You’ll enjoy the deep chocolate flavor while satisfying your cravings in a nutritious way.
Let’s dive into making this simple yet decadent mousse. It takes just 10 minutes to prepare, so it’s a great option for quick desserts or when you want to impress guests. Plus, you won’t need to turn on the oven! Just blend, chill, and serve for a refreshing finish to any meal.
Recipe Overview:
– Servings: 4
– Prep Time: 10 minutes
– Cook Time: 0 minutes
– Total Time: 10 minutes
– Calories: 200 per serving
Nutrition Information:
– Protein: 3g
– Fat: 12g
– Carbohydrates: 26g
Ingredients:
– 2 ripe avocados
– 1/4 cup cocoa powder
– 1/4 cup honey or maple syrup
– 1 teaspoon vanilla extract
– Pinch of salt
Instructions:
1. In a blender, add the avocados, cocoa powder, honey, vanilla extract, and salt.
2. Blend until you reach a smooth and creamy texture, scraping down the sides as necessary.
3. Spoon the mousse into serving dishes and chill for at least 30 minutes before enjoying.
4. For an extra treat, garnish with fresh berries or a dollop of coconut whipped cream!
Feel free to keep any leftovers in the fridge for up to three days. If you want to enhance the chocolate flavor, you can swap cocoa powder for cacao powder. This mousse is not just a dessert; it’s an experience of creamy delight that supports your healthy eating goals.
Enjoy this satisfying treat that balances sweetness with nutrition and lets you indulge without compromise!
Chocolate Avocado Mousse
Editor’s Choice

Viva Naturals Organic Cacao Powder, 1lb – Unsweetened Cacao Powder With …
 Amazon$18.42
Ninja BL660 Professional Compact Smoothie & Food Processing Blender, 110…
 Amazon$99.99
Libbey Baker’s Basics 3-Piece Glass Casserole Baking Dish Set with Glass…
 Amazon$44.98
Conclusion
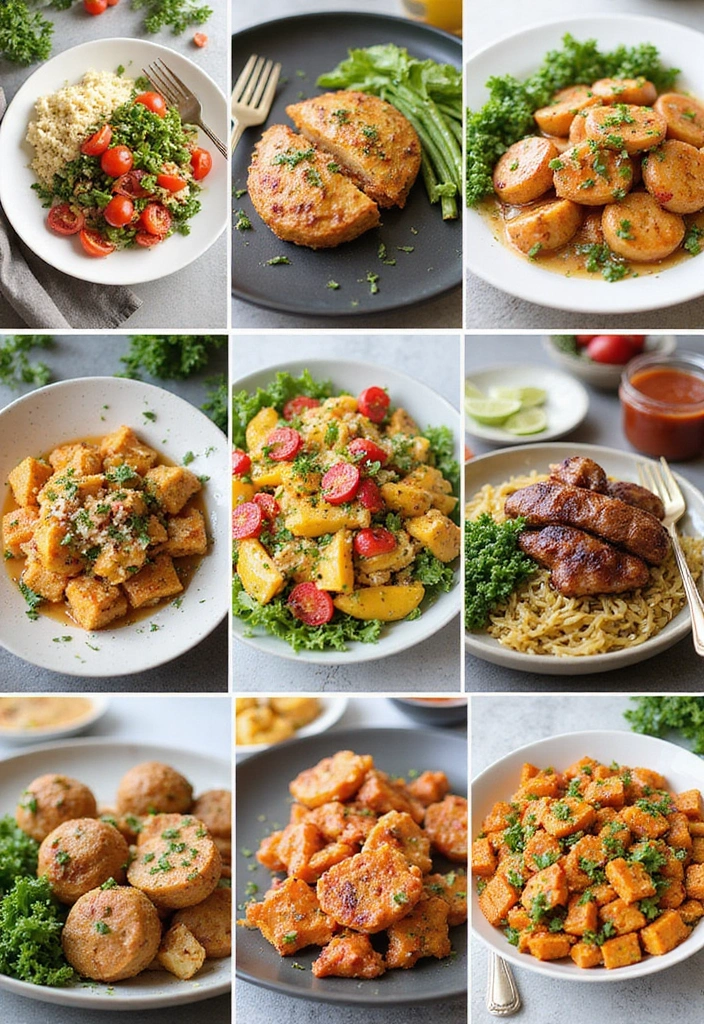
Embracing a Paleo or Whole 30 lifestyle doesn’t mean you have to compromise on flavor or satisfaction.
With these 30+ recipes, you can enjoy a variety of delicious, healthy meals that fit perfectly into your busy schedule. From vibrant salads to hearty mains and even delectable desserts, there’s something here for everyone.
Explore these dishes and make them a part of your culinary repertoire, ensuring you nourish your body while keeping mealtimes exciting and enjoyable.
Note: We aim to provide accurate product links, but some may occasionally expire or become unavailable. If this happens, please search directly on Amazon for the product or a suitable alternative.
This post contains Amazon affiliate links, meaning I may earn a small commission if you purchase through my links, at no extra cost to you.
Frequently Asked Questions
What Are Paleo Whole 30 Recipes and Why Are They Popular?
Paleo Whole 30 recipes focus on whole, unprocessed foods that our ancestors would have eaten, such as lean meats, fish, vegetables, fruits, nuts, and seeds. They’re popular because they promote clean eating and can help eliminate cravings for sugar and processed foods. Plus, these recipes are often simple and satisfying for busy professionals looking to maintain a healthy lifestyle!
How Can I Meal Prep with Paleo Whole 30 Recipes for a Busy Week?
Meal prepping with Paleo Whole 30 recipes is a game-changer for busy professionals! Start by planning your meals for the week, selecting easy paleo recipes that can be made in batches. Cook proteins and veggies in advance, and store them in portion-sized containers. Don’t forget to include Whole30 compliant snacks, like nuts or homemade energy bars, to keep you fueled throughout the day!
Are There Any Quick and Easy Paleo Whole 30 Recipe Ideas?
Absolutely! Some quick and easy Paleo Whole 30 recipe ideas include a zucchini noodle stir-fry with your choice of protein, or a chicken salad with avocado and mixed greens. You can also whip up a delicious egg and vegetable frittata for breakfast. These dishes are not only fast to prepare but also highly nutritious!
What Are Some Healthy Paleo Dinners I Can Make for My Family?
Healthy Paleo dinners are a fantastic way to nourish your family! Consider dishes like grilled salmon with asparagus, or a hearty beef and vegetable stew. You can also try spaghetti squash with homemade meat sauce for a family favorite that fits the Paleo guidelines. These meals are satisfying, nutritious, and loved by both adults and kids alike!
How Do I Ensure My Snacks Are Whole30 Compliant?
To ensure your snacks are Whole30 compliant, focus on whole foods without added sugars or processed ingredients. Great options include fresh fruits and vegetables, nuts, or homemade snacks like paleo energy balls. Always read labels carefully if you’re buying packaged food, and remember that healthy snacking can keep you energized and on track with your Paleo Whole 30 journey!
Related Topics
paleo whole 30 recipes
healthy meal prep
Whole30 compliant snacks
easy paleo recipes
clean eating meals
quick paleo dinners
healthy lifestyle
meal prep for busy professionals
satisfying paleo meals
low-carb recipes
family-friendly paleo
30-day challenge

