If you’ve ever found yourself feeling the sting of a food sensitivity, you know just how tough it can be to find meals that not only fit your needs but also satisfy your cravings. This struggle has led me to create this post. I wanted to offer a collection of recipes that make it easier to enjoy delicious, nourishing meals without worrying about nightshades.
This post is for anyone who is on a Paleo diet but also has sensitivities or allergies to nightshade vegetables. If you’ve been frustrated trying to navigate your way through meal planning while avoiding tomatoes, peppers, and eggplants, you’re not alone. Many of us want to stick to clean eating while finding a way to make it enjoyable and fulfilling.
In this blog post, you’ll discover 25 Paleo nightshade-free recipes that are not only safe but also full of flavor. Each recipe is carefully crafted to be both satisfying and nourishing, giving you the chance to enjoy your meals without the worry of triggering any sensitivities. You’ll find dishes that are hearty, light, and everything in between, perfect for lunch, dinner, or even snacks.
These recipes are here to inspire you and remind you that eating right doesn’t have to feel limiting. With these ideas in hand, you can explore new flavors and textures while sticking to your dietary needs. So, whether you’re prepping for a family dinner or just need a quick meal for yourself, these recipes will help you create something special.
Get ready to dive into a world of delicious possibilities. Let’s transform your meal planning and make it fun again!
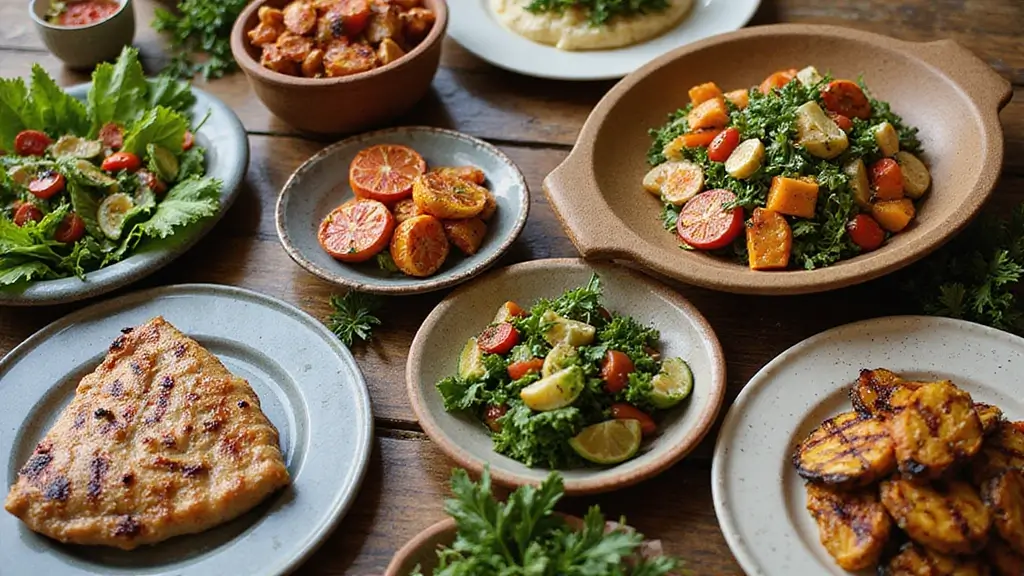
1. Herb-Crusted Chicken Thighs

Dive into a flavorful experience with these Herb-Crusted Chicken Thighs. Perfectly juicy and bursting with flavor, this dish features a delightful blend of fresh herbs like rosemary, thyme, and parsley, all infused with a hint of garlic. It’s an easy way to impress at dinner while sticking to your Paleo nightshade-free needs.
Imagine serving these chicken thighs alongside roasted sweet potatoes and crisp green beans. This combination not only satisfies your hunger but also warms your soul. It’s comfort food at its finest!
Here’s how to prepare this tasty meal. Grab your ingredients and follow these steps for a delicious dinner:
Ingredients:
– 4 chicken thighs
– 2 tablespoons olive oil
– 1 tablespoon fresh rosemary, chopped
– 1 tablespoon fresh thyme, chopped
– 1 tablespoon fresh parsley, chopped
– 1 teaspoon garlic powder
– Salt and pepper to taste
Instructions:
1. Preheat your oven to 400°F (200°C).
2. In a small bowl, mix the olive oil, rosemary, thyme, parsley, garlic powder, salt, and pepper.
3. Rub this aromatic blend all over the chicken thighs.
4. Place the thighs on a baking sheet lined with parchment paper.
5. Roast for 25-30 minutes until the chicken reaches an internal temperature of 165°F (74°C).
6. Let it rest for 5 minutes before serving.
For an extra crispy skin, broil the chicken for the last few minutes of cooking.
FAQs:
Can I use chicken breasts instead? Yes! Just remember that breasts cook faster, so adjust your cooking time accordingly.
Enjoy this simple yet delightful dish that ticks all the boxes for health and flavor!
Herb-Crusted Chicken Thighs
Editor’s Choice
![COOL KNIGHT Herb Grinder [large capacity/fast/Electric ]-Spice Herb Coff...](https://m.media-amazon.com/images/I/61ds5SPU0rL._AC_UL320_.jpg "25 Paleo Nightshade Free Recipes for Sensitive Diets 2")
COOL KNIGHT Herb Grinder [large capacity/fast/Electric ]-Spice Herb Coff…
2. Cauliflower Rice Stir-Fry

Craving rice but sticking to a Paleo diet? Try Cauliflower Rice Stir-Fry! This dish swaps traditional grains for grated cauliflower, making it a low-carb, nutrient-packed meal. It’s perfect for weeknights when you want something quick yet satisfying. You can throw in your favorite vegetables like carrots, peas, and broccoli, making it colorful and delicious. Add gluten-free soy sauce or coconut aminos for a burst of umami flavor that will excite your taste buds.
Creating this stir-fry is simple and customizable. You can easily make it your own by adding proteins like chicken or shrimp. Plus, it’s budget-friendly since cauliflower and seasonal veggies are often affordable. This meal not only fills you up but also leaves you feeling good about what you’re eating.
Servings: 4
Prep Time: 15 min
Cook Time: 10 min
Total Time: 25 min
Calories: 150
Nutrition Information:
Protein: 5g
Fat: 8g
Carbohydrates: 12g
Fiber: 4g
Ingredients:
– 1 medium cauliflower
– 2 tablespoons coconut oil
– 1 cup diced carrots
– 1 cup peas
– 1 cup broccoli florets
– 2 tablespoons coconut aminos
– Salt and pepper to taste
Instructions:
1. Grate the cauliflower using a food processor or box grater until it looks like rice.
2. In a large skillet, heat the coconut oil over medium heat.
3. Add the diced carrots and cook for 3-4 minutes until they soften.
4. Stir in the cauliflower rice, peas, and broccoli. Cook for another 5-6 minutes, stirring occasionally.
5. Pour in the coconut aminos, season with salt and pepper, and stir-fry for an additional 2 minutes.
6. Serve warm and enjoy!
Curious if you can prepare cauliflower rice ahead of time? You sure can! Store it in the fridge for up to four days, making meal prep even easier. Enjoy this dish packed with flavor and nutrients, and feel good about your choice!
Cauliflower Rice Stir-Fry
Editor’s Choice

Hamilton Beach Food Processor & Vegetable Chopper for Slicing, Shredding…

Bragg Organic Coconut Aminos – 16oz, Soy-Free Alternative, Gluten-Free, …

Rubbermaid Brilliance Food Storage Containers BPA Free Airtight Lids Ide…
3. Zucchini Noodles with Pesto

Zucchini Noodles with Pesto are a game-changer for anyone on a nightshade-free diet. This dish brings together fresh zucchini and flavorful pesto, creating a colorful and satisfying meal. Not only is it visually appealing, but it’s also gluten-free and low in carbs. You’ll love how the zucchini noodles soak up the rich taste of the pesto, making every bite delightful.
For a crunchy finish, sprinkle some toasted pine nuts on top. This adds texture and enhances the overall taste. Imagine a plate full of green noodles topped with a glossy layer of pesto and scattered nuts. It’s a feast for the eyes and the palate!
Here’s how you can whip up this delicious meal in just 15 minutes:
Servings: 4
Prep Time: 10 min
Cook Time: 5 min
Total Time: 15 min
Calories: 190
Nutrition Information:
– Protein: 6g
– Fat: 15g
– Carbohydrates: 9g
– Fiber: 2g
Ingredients:
– 4 medium zucchinis
– 1 cup basil pesto (nightshade-free)
– 2 tablespoons olive oil
– 1/4 cup pine nuts, toasted
– Salt to taste
Instructions:
1. Spiralize the zucchinis using a spiralizer to create noodle shapes.
2. Heat olive oil in a large skillet over medium heat.
3. Add the zucchini noodles and sauté for 2-3 minutes until they soften slightly.
4. Remove from heat and toss the noodles with pesto until they’re well-coated.
5. Serve topped with toasted pine nuts and a sprinkle of salt.
Keep the zucchini slightly crunchy for a perfect bite!
FAQs: What can I use instead of pesto? Try a homemade avocado sauce for creaminess.
Enjoy this quick, healthy meal that’s perfect for a busy weeknight. You’ll feel good knowing you’re nourishing your body with fresh ingredients while sticking to your dietary needs.
Zucchini Noodles with Pesto
Editor’s Choice

Brieftons 5-Blade Vegetable Spiralizer: Strongest-Heaviest Spiral Slicer…

4. Savory Sweet Potato Mash

Create a delightful experience with Savory Sweet Potato Mash, a dish that brings warmth and comfort to your table. This creamy, rich side pairs beautifully with grilled meats or fish, making it an ideal choice for any nightshade-free meal. Sweet potatoes shine here, offering not just taste but a treasure trove of vitamins and minerals. You’ll love how easy it is to prepare!
Here’s how to whip up this tasty mash: start by boiling sweet potatoes until they’re tender. Then, mash them up with creamy coconut milk and fragrant garlic. You’ll find you won’t even miss butter in this dish!
Ingredients:
– 4 medium sweet potatoes
– 1/4 cup coconut milk
– 2 cloves garlic, minced
– Salt and pepper to taste
Instructions:
1. Peel and chop the sweet potatoes into equal chunks.
2. Boil them in salted water until fork-tender, about 15 minutes.
3. Drain the sweet potatoes and return them to the pot.
4. Mix in the coconut milk, minced garlic, salt, and pepper.
5. Mash everything together until you achieve a smooth and creamy consistency.
6. Serve warm and enjoy!
For a fresh twist, try adding chopped herbs like chives or parsley to elevate the flavor. This little extra step makes it even more vibrant!
Quick Tips:
– Use different sweet potato varieties for unique flavors.
– Choose organic sweet potatoes for better quality and taste.
– Add spices like cinnamon or nutmeg for a warm hint of sweetness.
– Try it with a drizzle of olive oil for a gourmet touch.
Enjoy this comforting dish that not only satisfies your cravings but also supports your nightshade-free lifestyle!
Savory Sweet Potato Mash
Editor’s Choice


Simply Asia Unsweetened Coconut Milk, 13.66 fl oz – One 13.66 Ounce Can …

Zulay Kitchen Stainless Steel Garlic Press Rocker Set – Premium Garlic M…
5. Grilled Lemon Garlic Shrimp

Enjoy a meal that’s both simple and gourmet with Grilled Lemon Garlic Shrimp! This dish takes only 15 minutes to prepare, making it perfect for busy weeknights or last-minute dinner parties. The shrimp marinate in a refreshing blend of lemon juice, minced garlic, and olive oil, resulting in a burst of flavor that’s sure to impress. Picture juicy shrimp, lightly charred and served with a hint of citrus—delicious!
To create a stunning presentation, serve your shrimp on a bed of mixed greens or alongside colorful roasted vegetables. This not only makes your plate look appealing but also adds nutritional value. Your guests will think you spent hours in the kitchen!
Servings: 4
Prep Time: 10 min
Cook Time: 5 min
Total Time: 15 min
Calories: 220
Nutrition Information:
– Protein: 25g
– Fat: 10g
– Carbohydrates: 2g
– Fiber: 0g
Ingredients:
– 1 lb large shrimp, peeled and deveined
– 3 tablespoons olive oil
– 3 cloves garlic, minced
– Juice of 2 lemons
– Salt and pepper to taste
Instructions:
1. In a mixing bowl, whisk together the olive oil, minced garlic, lemon juice, salt, and pepper.
2. Add the shrimp to the bowl and toss to coat them in the marinade. Let them sit for 10 minutes to soak up those flavors.
3. While the shrimp marinate, preheat your grill or grill pan over medium-high heat.
4. Grill the shrimp for about 2-3 minutes on each side until they turn pink and opaque.
5. Serve the shrimp hot, garnished with lemon wedges for an extra punch of flavor.
Make sure your grill is nice and hot for the perfect sear on the shrimp.
FAQs:
Can I cook this in the oven? Yes, you can broil the shrimp on high for a similar tasty result!
With this easy recipe, you’ll have a delightful dish ready in no time. Enjoy your flavorful creation and the compliments that follow!
Grilled Lemon Garlic Shrimp
Editor’s Choice

AOZITA 17oz Glass Olive Oil Bottle Dispenser – 500ml Green Oil and Vineg…
Zulay Kitchen Stainless Steel Garlic Press Rocker Set – Premium Garlic M…
6. Coconut Flour Pancakes

Enjoy a scrumptious breakfast with Coconut Flour Pancakes, perfect for anyone on a Paleo nightshade-free diet. These pancakes are not just fluffy; they’re also light and slightly sweet, making them a delightful start to your day. Serve them up with fresh berries or a drizzle of pure maple syrup, and you’ll feel like you’re indulging without any guilt.
Want to whip these up? You’ll need just a few simple ingredients. Coconut flour gives these pancakes their unique texture, while eggs and almond milk bind everything together beautifully. Plus, they’re quick to make, taking only about 30 minutes from start to finish!
Here’s what you’ll need:
Ingredients:
– 1/2 cup coconut flour
– 4 eggs
– 1 cup almond milk
– 1 tablespoon honey or maple syrup
– 1 teaspoon baking soda
– Pinch of salt
Instructions:
1. In a bowl, combine the coconut flour, baking soda, and salt.
2. In another bowl, whisk together the eggs, almond milk, and honey or maple syrup until smooth.
3. Mix the wet and dry ingredients until you have a smooth batter.
4. Heat a non-stick skillet over medium heat and pour in the batter to form pancakes. Cook until bubbles appear on the surface, then flip and cook for another minute.
5. Let the batter rest for a few minutes before cooking for extra fluffiness. Serve warm with fresh berries or syrup.
Curious if you can swap ingredients? Absolutely! Feel free to use coconut sugar in place of honey for a different flavor profile. These pancakes are versatile, healthy, and guaranteed to satisfy your morning cravings.
• Choose coconut flour for a light texture
• Pair with berries or syrup for sweetness
• Let batter rest for fluffier pancakes
• Experiment with different sweeteners for variety
Coconut Flour Pancakes
Editor’s Choice

Viva Naturals Organic Coconut Flour (4 lbs) – Gluten Free Flour Substitu…

Tramontina Professional 14-Inch Non Stick Extra Large Frying Pan, Heavy-…
7. Roasted Brussels Sprouts with Bacon

Indulge in the delightful combination of Roasted Brussels Sprouts with Bacon, a dish that will surely become a favorite on your dinner table. The crispy, salty bacon pairs perfectly with the nutty flavor of the roasted sprouts, creating a mouthwatering experience. This recipe is not only simple but also quick, making it a fantastic option for busy weeknights when you crave something delicious yet effortless.
As the Brussels sprouts roast, they turn golden brown and develop a tender texture while retaining a satisfying crunch. The bacon’s savory richness enhances every bite, making it a dish that satisfies all palates. Serve this alongside your choice of protein for a well-rounded meal that’s full of flavor and nutrition.
Recipe Details
Servings: 4
Prep Time: 10 min
Cook Time: 25 min
Total Time: 35 min
Calories: 250
Nutrition Information:
– Protein: 15g
– Fat: 20g
– Carbohydrates: 12g
– Fiber: 4g
Ingredients:
– 1 lb Brussels sprouts, halved
– 6 slices of bacon, chopped
– 2 tablespoons olive oil
– Salt and pepper to taste
Instructions:
1. Preheat your oven to 400°F (200°C).
2. On a large baking sheet, mix the halved Brussels sprouts, chopped bacon, olive oil, salt, and pepper until well coated.
3. Spread the mixture evenly on the baking sheet.
4. Roast in the oven for 20-25 minutes. Stir halfway through to ensure even cooking. The sprouts should be golden and the bacon crispy.
5. Serve warm, and enjoy the delightful flavors!
Want to elevate the taste even further? Try adding a splash of balsamic vinegar just before serving for a tangy twist.
FAQs:
Can I use turkey bacon instead?
Absolutely! Turkey bacon works well, but remember it may need less cooking time.
What can I serve this with?
These roasted Brussels sprouts pair wonderfully with grilled chicken, steak, or even a hearty quinoa salad for a complete meal.
Make your weeknight dinners exciting with this easy, flavorful dish. You won’t regret giving it a try!
Roasted Brussels Sprouts with Bacon
Editor’s Choice

TrendPlain 16oz/470ml Glass Olive Oil Sprayer for Cooking – 2 in 1 Olive…

365 by Whole Foods Market, Organic Balsamic Vinegar of Modena, 16.9 Fl Oz
8. Eggplant-Free Ratatouille

Make your meals exciting with an Eggplant-Free Ratatouille! This dish bursts with vibrant colors and fresh flavors. You’ll enjoy a delightful mix of zucchini, bell peppers, and onions, all slow-cooked to perfection. It’s a fantastic nightshade-free twist on the classic dish, making it a wholesome choice for anyone with dietary sensitivities. Serve it as a cozy side or a light main course, and it’s sure to impress at any gathering.
You can enjoy this dish warm or at room temperature, making it perfect for any occasion. Imagine sitting down to a hearty plate of this colorful ratatouille. The blend of herbs and vegetables creates a comforting aroma that fills your kitchen. Plus, it’s simple to prepare, allowing you to savor every bite without spending hours in the kitchen.
Here’s how to make it:
Servings: 4
Prep Time: 10 min
Cook Time: 30 min
Total Time: 40 min
Calories: 120
Nutrition Information:
– Protein: 3g
– Fat: 4g
– Carbohydrates: 18g
– Fiber: 5g
Ingredients:
– 2 zucchinis, diced
– 1 bell pepper, diced
– 1 onion, chopped
– 2 cloves garlic, minced
– 1 can diced tomatoes (no additives)
– 2 tablespoons olive oil
– 1 teaspoon dried thyme
– Salt and pepper to taste
Instructions:
1. Heat olive oil in a large saucepan over medium heat.
2. Sauté the onion and garlic until fragrant.
3. Add the zucchini and bell pepper, cooking for 5-7 minutes until they soften slightly.
4. Stir in the diced tomatoes, thyme, salt, and pepper.
5. Let it simmer for 20 minutes, stirring occasionally until all the vegetables are tender.
6. Serve warm and enjoy!
This ratatouille pairs wonderfully with grilled chicken or fish, making it a versatile addition to your dinner table.
FAQs:
Can I make this ahead of time? Yes! It keeps well in the fridge for up to three days, allowing you to enjoy it later.
Get ready to enjoy a healthy, flavorful dish that everyone will love!
Eggplant-Free Ratatouille
Editor’s Choice
Brieftons 5-Blade Vegetable Spiralizer: Strongest-Heaviest Spiral Slicer…

Lodge 12 Inch Cast Iron Skillet with Red Silicone Hot Handle Holder – Pr…

Cole & Mason Fresh Herb Keeper – Acrylic Storage Container for Refrigera…
9. Beet and Carrot Salad

The Beet and Carrot Salad brings a burst of color and flavor to your table. This dish pairs the sweetness of earthy beets with the crispness of fresh carrots. The result is not only beautiful but also loaded with vitamins. Perfect as a side dish or even a light lunch, it’s best served chilled, making it refreshing on warm days.
You can whip this salad up in just 15 minutes, allowing you to enjoy a healthy meal without spending hours in the kitchen. Plus, it’s a fantastic way to impress guests with minimal effort.
Ingredients:
– 2 medium beets, cooked and diced
– 2 large carrots, grated
– 1/4 cup olive oil
– 2 tablespoons apple cider vinegar
– Salt and pepper to taste
– Optional: 1/4 cup chopped nuts (like walnuts or pecans)
Instructions:
1. Start by combining the diced beets and grated carrots in a large bowl.
2. In a separate bowl, whisk together the olive oil, apple cider vinegar, salt, and pepper.
3. Pour the dressing over the beet and carrot mixture, tossing gently to combine.
4. If you like, sprinkle the chopped nuts on top for added crunch. Serve the salad chilled.
This salad is versatile. If you enjoy cheese and can tolerate it, adding feta can elevate the flavors even more.
FAQs:
– Can I use canned beets? Yes, canned beets are a quick option, just choose those without added sugars.
Enjoy this salad as a nutritious addition to your meals! It’s simple, quick, and full of flavor, making it an easy choice for anyone with dietary sensitivities.
Fun fact: this beet and carrot salad shows how quick color and nutrition come together—it’s ready in 15 minutes, perfect for paleo nightshade free recipes. Enjoy a refreshing, vitamin-packed side that satisfies without hours in the kitchen.
Beet and Carrot Salad
Editor’s Choice

NUTRIUPS 6 Inch Glass Bowls, Small Glass Bowl Set, 6 Pack Clear Tempered…
10. Coconut Curry Cauliflower

Craving something warm and flavorful that’s also nightshade-free? Look no further than Coconut Curry Cauliflower! This delightful dish features tender cauliflower florets swimming in a creamy coconut milk sauce, infused with aromatic spices like turmeric and cumin. It’s perfect for those cold evenings when you want something hearty yet nutritious. Pair it with grilled chicken or fish for a well-rounded meal that satisfies.
Recipe Overview:
– Servings: 4
– Prep Time: 10 min
– Cook Time: 20 min
– Total Time: 30 min
– Calories: 160
Nutritional Information:
– Protein: 4g
– Fat: 12g
– Carbohydrates: 14g
– Fiber: 5g
Ingredients:
– 1 medium cauliflower, chopped into florets
– 1 can coconut milk
– 1 tablespoon curry powder
– 1 teaspoon turmeric
– 1 tablespoon olive oil
– Salt to taste
Instructions:
1. Heat olive oil in a large skillet over medium heat.
2. Add the cauliflower florets and sauté for about 5 minutes, stirring occasionally.
3. Pour in the coconut milk and sprinkle in the curry powder, turmeric, and salt.
4. Let it simmer for 15 minutes, or until the cauliflower is tender.
5. Serve warm and garnish with fresh cilantro if you like.
Want a nutrition boost? Add spinach or kale during the simmering stage for extra greens. Enjoy a dish that not only warms you up but also nourishes your body!
FAQs:
– Is curry powder nightshade-free? Most brands are, but always check the label for any hidden ingredients.
This Coconut Curry Cauliflower is not just a recipe; it’s a comforting hug in a bowl. You’ll love how easy it is to prepare and how much flavor it packs!
Coconut Curry Cauliflower
Editor’s Choice

Thai Kitchen Gluten Free Unsweetened Coconut Milk, 13.66 fl oz (Pack of 12)
11. Spinach and Bacon Frittata

Looking for a simple yet delicious meal? Try the Spinach and Bacon Frittata! This dish is perfect for breakfast, brunch, or even a light dinner. With protein-packed eggs and crispy bacon, this frittata is not only tasty but also loaded with nutrients. The bright green spinach brings a fresh touch and adds plenty of vitamins to your plate. Enjoy it warm or cold; either way, it’s sure to please your taste buds!
Here’s how to whip up this easy frittata at home. It’s budget-friendly and you can customize it with your favorite veggies if you’d like. Plus, this dish makes for great leftovers, allowing you to enjoy it throughout the week. You’ll love how quick and satisfying it is!
Ingredients:
– 6 eggs
– 1 cup fresh spinach, chopped
– 4 slices bacon, cooked and crumbled
– 1/4 cup almond milk
– Salt and pepper to taste
Instructions:
1. Preheat your oven to 350°F (175°C).
2. In a mixing bowl, whisk together the eggs, almond milk, salt, and pepper until well combined.
3. Stir in the chopped spinach and crumbled bacon.
4. Pour the mixture into an oven-safe skillet and cook on the stove for 2-3 minutes, or until the edges start to set.
5. Transfer the skillet to the oven and bake for about 20 minutes, or until the frittata is fully cooked and slightly golden.
6. Let it cool for a few minutes before slicing. Serve warm or at room temperature.
Feel free to add cheese if your diet allows it—it melts beautifully!
FAQs:
– Can I add other vegetables? Yes, feel free to customize with your favorite veggies like bell peppers or mushrooms.
– How do I store leftovers? Keep them in an airtight container in the fridge for up to 3 days.
This Spinach and Bacon Frittata is a delicious way to enjoy a healthy meal that fits your dietary needs. Enjoy cooking!
Spinach and Bacon Frittata
Editor’s Choice

Blue Diamond 10″ Nonstick Frying Pan Skillet, Diamond Infused PFAS & PTF…

Califia Farms – Organic Unsweetened Almond Milk, 48 Oz, Dairy Free, Keto…

50 Pack (100-Piece) 32 oz Meal Prep Containers Reusable with Lids 3-Comp…
12. Lemon Garlic Green Beans

Lemon Garlic Green Beans are a delightful addition to your dinner table. This side dish bursts with flavor and is incredibly easy to whip up. The fresh green beans shine when sautéed with garlic and finished off with a zesty squeeze of lemon. You’ll love how the bright flavor enhances their natural sweetness.
Perfect for busy weeknights or special occasions, this dish can elevate any meal. You can make it in just 15 minutes, leaving you more time to enjoy your family or guests.
Ingredients:
– 1 lb fresh green beans
– 2 tablespoons olive oil
– 2 cloves garlic, minced
– Juice of 1 lemon
– Salt and pepper to taste
Instructions:
1. Heat the olive oil in a large skillet over medium heat.
2. Add the minced garlic and sauté for about 1 minute until it becomes fragrant.
3. Toss in the green beans, along with salt and pepper. Sauté for 5-7 minutes until they’re tender yet crisp.
4. Remove the skillet from the heat and stir in the lemon juice. Serve warm.
Want a twist? Add a sprinkle of toasted almonds for a crunchy texture that complements the beans perfectly.
FAQs:
– Can I use frozen green beans? Yes, but they will take a bit longer to cook.
This simple recipe makes your meal not only healthier but also more enjoyable. Enjoy the fresh flavors and the ease of preparation, making it a go-to side dish for any occasion.
Lemon Garlic Green Beans
Editor’s Choice

Pompeian USDA Organic Robust Extra Virgin Olive Oil, Contains Polyphenol…

Vegetable Steamer Basket, Premium Stainless Steel Veggie Steamer Basket …
13. Almond Flour Cookies

Craving something sweet but need to skip nightshades? Try Almond Flour Cookies. These treats are not only delicious but also fit perfectly into your Paleo diet. With a nutty taste and chewy texture, they can satisfy your sweet cravings without any guilt.
You can easily customize these cookies to suit your taste. Want a chocolatey kick? Toss in some dark chocolate chips. Prefer something fruity? Dried fruits work wonderfully too! Whether you enjoy them as a snack or a dessert, these cookies are sure to delight.
Recipe Details:
– Servings: 12 cookies
– Prep Time: 10 min
– Cook Time: 15 min
– Total Time: 25 min
– Calories: 150 per cookie
Nutritional Information:
– Protein: 4g
– Fat: 10g
– Carbohydrates: 8g
– Fiber: 2g
Ingredients:
– 2 cups almond flour
– 1/2 cup honey or maple syrup
– 1/4 cup coconut oil, melted
– 1 egg
– 1 teaspoon vanilla extract
– 1 teaspoon baking soda
– Pinch of salt
Instructions:
1. Preheat your oven to 350°F (175°C).
2. In a bowl, mix the almond flour, baking soda, and salt together.
3. In another bowl, whisk the melted coconut oil, honey (or maple syrup), egg, and vanilla extract until smooth.
4. Combine the wet and dry mixtures until everything is blended well.
5. Drop spoonfuls of dough onto a baking sheet lined with parchment paper.
6. Bake for 12-15 minutes, or until the cookies are golden brown.
7. Let them cool on a wire rack before enjoying!
Want to switch things up? Add in chopped nuts or your favorite dried fruits for extra flavor.
FAQs: How long can you store these cookies? They stay fresh for up to a week in an airtight container. Enjoy your guilt-free treat!
Almond Flour Cookies
Editor’s Choice

Blue Diamond Almonds Almond Flour, Gluten Free, Blanched, Finely Sifted,…

Viva Naturals Organic Coconut Oil – Unrefined, Cold-Pressed Extra Virgin…

Enjoy Life Baking Dark Chocolate Morsels, Dairy Free, Soy Free, Nut Free…
14. Grilled Salmon with Dill Sauce

Grilled Salmon with Dill Sauce is a delightful meal that hits the spot! It’s light, packed with omega-3 fatty acids, and can be made in just 15 minutes. The fresh dill, zesty lemon, and rich olive oil create a sauce that amplifies the natural flavors of the salmon. Whether it’s a busy weeknight or a special gathering, this dish is sure to impress.
Pair your grilled salmon with steamed veggies or a fresh salad for a balanced meal. The bright colors and flavors will make your dinner table feel vibrant and inviting.
Here’s how to make it:
Servings: 4
Prep Time: 5 min
Cook Time: 10 min
Total Time: 15 min
Calories: 300
Nutrition Information:
– Protein: 25g
– Fat: 22g
– Carbohydrates: 1g
– Fiber: 0g
Ingredients:
– 4 salmon fillets
– 1/4 cup olive oil
– 1/4 cup fresh dill, chopped
– Juice of 1 lemon
– Salt and pepper to taste
Instructions:
1. Preheat your grill or grill pan over medium-high heat.
2. In a bowl, mix olive oil, dill, lemon juice, salt, and pepper.
3. Brush the salmon fillets with the dill mixture.
4. Grill the salmon for 4-5 minutes on each side until it reaches your desired doneness.
5. Serve with the remaining dill sauce drizzled over the top.
Let the salmon rest for a few minutes after grilling. This allows the flavors to meld beautifully.
FAQs:
Can I bake the salmon instead?
Absolutely! Bake at 375°F (190°C) for about 15-20 minutes for a delicious alternative.
This grilled salmon with dill sauce is not just a meal; it’s an experience. Enjoy the fresh, vibrant flavors and the ease of preparation!
Grilled Salmon with Dill Sauce
Editor’s Choice


SENSARTE Nonstick Grill Pan for Stove Tops, Versatile Griddle with Pour …
15. Coconut Chia Pudding

Coconut Chia Pudding is a sweet treat that feels indulgent but is packed with nutrition. This dessert is perfect for those moments when you crave something delicious yet healthy. By mixing chia seeds with creamy coconut milk, you create a velvety pudding that satisfies your sweet tooth without guilt. It’s not just a dessert; you can enjoy it for breakfast too!
You can easily customize this pudding with your favorite toppings. Add fresh fruits like berries or bananas for a pop of color and flavor. Nuts provide a satisfying crunch, making every spoonful delightful. Pinterest is buzzing with variations, from tropical coconut to rich chocolate.
Ready to make your own Coconut Chia Pudding? Here’s how:
Ingredients:
– 1/2 cup chia seeds
– 2 cups coconut milk
– 1 tablespoon maple syrup (optional for sweetness)
– Fresh fruits or nuts for topping
Instructions:
1. In a bowl, mix the chia seeds and coconut milk. If you want it sweeter, add the maple syrup.
2. Stir the mixture well to prevent clumping and let it sit for about 5 minutes.
3. Give it another good stir to break up any clumps, then cover and refrigerate. Chill for at least 2 hours, or overnight for the best texture.
4. When ready to serve, scoop into bowls and top with your favorite fruits or nuts.
Feel free to play around with toppings! Add coconut flakes for extra flavor or sprinkle some granola for a fun crunch.
FAQs:
How long does chia pudding last? It stays fresh in the fridge for up to 5 days, making it great for meal prep!
This recipe is not just easy; it’s also budget-friendly. You can find chia seeds and coconut milk at local grocery stores or online. Enjoy this simple yet satisfying dish that brings a taste of the tropics to your table!
Coconut Chia Pudding
Editor’s Choice

Garden of Life Chia Seeds 100% Organic for Smoothies, Pudding – Raw Orga…
Thai Kitchen Gluten Free Unsweetened Coconut Milk, 13.66 fl oz (Pack of 12)

Butternut Mountain Farm Pure Vermont Maple Syrup, Grade A, Dark Color, R…
16. Garlic Herb Roasted Chicken

Garlic Herb Roasted Chicken is not just a meal; it’s a cozy gathering around the table. Imagine succulent chicken, perfectly seasoned with aromatic herbs, roasted until the skin is golden and crispy. The juicy meat inside bursts with flavor, making it an ideal dish for any occasion, from casual weeknight dinners to festive family gatherings.
This recipe shines when paired with seasonal vegetables, bringing a colorful and nutritious balance to your plate. Plus, it’s simple enough to prepare ahead of time, making weeknight cooking a breeze.
Servings: 4
Prep Time: 15 min
Cook Time: 1 hour
Total Time: 1 hour 15 min
Calories: 350
Nutrition Information:
– Protein: 40g
– Fat: 18g
– Carbohydrates: 0g
– Fiber: 0g
Ingredients:
– 1 whole chicken (3-4 lbs)
– 4 cloves garlic, minced
– 2 tablespoons fresh rosemary, chopped
– 2 tablespoons fresh thyme, chopped
– 3 tablespoons olive oil
– Salt and pepper to taste
Instructions:
1. Preheat your oven to 375°F (190°C).
2. In a small bowl, combine the minced garlic, rosemary, thyme, olive oil, salt, and pepper.
3. Rub this aromatic mix all over the chicken, working it under the skin for extra flavor.
4. Place the chicken in a roasting pan and let it roast for about 1 hour. Check that the internal temperature reaches 165°F (74°C).
5. Allow the chicken to rest for 10 minutes before carving.
For a juicier bird, baste the chicken with its juices every 20 minutes.
FAQs:
Can I use chicken thighs? Yes, just adjust the cooking time based on the size and thickness of the thighs.
This Garlic Herb Roasted Chicken is not just easy to make; it’s also a crowd-pleaser. You’ll love how the fresh herbs transform a simple chicken into a flavorful centerpiece for any meal.
Garlic Herb Roasted Chicken
Editor’s Choice

Farberware Bakeware Nonstick Steel Roaster with Flat Rack, 11-Inch x 15-…
AOZITA 17oz Glass Olive Oil Bottle Dispenser – 500ml Green Oil and Vineg…
17. Crunchy Cabbage Slaw

Crunchy Cabbage Slaw is the perfect side dish to elevate any meal. This colorful medley of green and red cabbage, paired with a zesty dressing, delivers a burst of freshness in every bite. Imagine the satisfying crunch of cabbage as you enjoy it alongside grilled meats or tucked into lettuce wraps. It’s not just tasty; it’s also packed with nutrients!
Making this slaw is quick and easy. In just 10 minutes, you can whip up a dish that tastes great and is healthy. Plus, it’s budget-friendly. Cabbage is inexpensive and provides a delightful texture that everyone loves. Serve it fresh, or let it chill in the fridge for an hour to enhance the flavors. It’s a dish that makes any meal feel special.
Ingredients:
– 2 cups shredded green cabbage
– 2 cups shredded red cabbage
– 1 grated carrot
– 1/2 cup apple cider vinegar
– 1/4 cup olive oil
– Salt and pepper to taste
Instructions:
1. In a large bowl, mix the green and red cabbage with the grated carrot.
2. In another bowl, whisk together the apple cider vinegar, olive oil, salt, and pepper.
3. Pour the dressing over the cabbage mixture and toss well to combine.
4. Serve immediately or refrigerate for up to an hour for the best flavor.
Want some extra crunch? Add nuts or seeds to the slaw for a delightful twist.
FAQs:
How long does this slaw last in the fridge? It can stay fresh for about 3 days. Enjoy this refreshing and crunchy slaw as a versatile addition to your meals!
Crunchy Cabbage Slaw
Editor’s Choice

Mueller Pro-Series All-in-One, 12 Blade Mandoline Slicer for Kitchen, Fo…

Pyrex Essentials (3-Piece) Glass Mixing Bowls Set For Prepping, Baking a…

Amazon Fresh, Apple Cider Vinegar, 16 Oz (Pack of 5)
18. Apple Cinnamon Pork Chops

Apple Cinnamon Pork Chops offer a delicious blend of sweet and savory that you’ll love. Imagine juicy pork chops, perfectly seared until golden brown, then topped with tender apples and a sprinkle of cinnamon. This dish not only pleases your taste buds but also fills your home with a delightful aroma, making it perfect for a cozy dinner.
Picture this: you sit down to a plate of warm, flavorful pork chops paired with roasted vegetables or a fresh salad. It’s a complete meal that feels inviting and satisfying. Plus, it’s quick to prepare, making it ideal for busy weeknights or special occasions.
Servings: 4
Prep Time: 10 min
Cook Time: 20 min
Total Time: 30 min
Calories: 300
Nutrition Information:
Protein: 30g
Fat: 15g
Carbohydrates: 10g
Fiber: 1g
Ingredients:
– 4 pork chops
– 2 apples, sliced
– 1 teaspoon cinnamon
– 2 tablespoons olive oil
– Salt and pepper to taste
Instructions:
1. Season the pork chops with salt and pepper.
2. In a large skillet, heat the olive oil over medium-high heat. Sear the pork chops for 4-5 minutes on each side until they are cooked through.
3. Remove the pork chops from the skillet and set them aside. In the same skillet, add the apple slices and cinnamon. Cook for about 3-4 minutes until the apples are tender.
4. Serve the pork chops topped with the warm apple mixture.
For a comforting twist, pair them with mashed sweet potatoes. This combination brings warmth and flavor to your table, making every bite a treat.
FAQs:
Can I use chicken instead? Yes, chicken breasts or thighs work great in this recipe, offering a lighter option while still being delicious.
Apple Cinnamon Pork Chops
Editor’s Choice

Lodge 10.25 Inch Cast Iron Skillet – Pre-Seasoned Frying Pan with Teardr…

PrepWorks Dishwasher Safe Apple Slicer and Corer – 16-Slice Thin Apple C…
19. Turmeric Roasted Carrots

Discover the joy of cooking with Turmeric Roasted Carrots! This simple yet delightful dish not only brightens up your dinner plate but also serves as a nutritious side. The vibrant orange carrots, coated with golden turmeric and a hint of honey, become irresistibly sweet and tender when roasted. Plus, turmeric is known for its anti-inflammatory properties, which makes this dish as good for you as it is delicious.
Imagine serving these beautiful carrots alongside your favorite protein. The warm, earthy flavor of turmeric pairs perfectly with a variety of meals. You’ll find that this dish is not just appealing to the eye but also a fantastic way to sneak in some antioxidants.
Let’s get cooking! Here are the details you need:
Servings: 4
Prep Time: 10 min
Cook Time: 25 min
Total Time: 35 min
Calories: 100 per serving
Nutrition Information:
– Protein: 1g
– Fat: 5g
– Carbohydrates: 15g
– Fiber: 4g
Ingredients:
– 1 lb carrots, peeled and chopped
– 2 tablespoons olive oil
– 1 teaspoon turmeric
– 1 tablespoon honey
– Salt and pepper to taste
Instructions:
1. Preheat your oven to 400°F (200°C).
2. In a mixing bowl, combine the chopped carrots, olive oil, turmeric, honey, salt, and pepper. Toss well to coat.
3. Spread the mixture evenly on a baking sheet, ensuring the carrots are in a single layer.
4. Roast for 25 minutes or until the carrots are tender and caramelized.
5. Serve warm, and for an extra touch, sprinkle with fresh parsley before enjoying.
FAQs:
Can I use different spices? Absolutely! Feel free to add cumin or paprika for a twist. This recipe is flexible and allows you to play with flavors.
Enjoy your healthy, flavorful Turmeric Roasted Carrots as a perfect side dish tonight!
Turmeric Roasted Carrots
Editor’s Choice

Organic Extra Virgin Olive Oil – Premium Single-Source Greek EVOO with C…

Nate’s Organic 100% Pure, Raw & Unfiltered Honey – USDA Certified Organi…
20. Thai Coconut Soup

Thai Coconut Soup is a delightful dish that warms your soul and tantalizes your taste buds. With creamy coconut milk, fragrant herbs, and fresh veggies, this soup is perfect for chilly evenings. Whether you’re battling a cold or just craving comfort, this soup delivers both flavor and nourishment.
Want to make it a hearty meal? Toss in some shrimp or chicken for an extra protein kick. Each spoonful is not just soothing; it’s like a hug in a bowl!
Recipe Overview:
– Servings: 4
– Prep Time: 10 minutes
– Cook Time: 20 minutes
– Total Time: 30 minutes
– Calories: 250
Nutritional Information:
– Protein: 10g
– Fat: 18g
– Carbohydrates: 12g
– Fiber: 2g
Ingredients:
– 1 can coconut milk
– 2 cups vegetable broth
– 1 cup mushrooms, sliced
– 1 cup broccoli florets
– 1 tablespoon fresh ginger, grated
– 2 tablespoons lime juice
– Salt to taste
Instructions:
1. In a large pot, mix coconut milk, vegetable broth, grated ginger, and salt. Heat until it simmers.
2. Add the sliced mushrooms and broccoli. Let them cook for about 10 minutes until tender.
3. Stir in the lime juice for a zesty finish. Serve warm.
For a burst of flavor, garnish with fresh cilantro. This soup is not just a meal; it’s an experience that brings joy to your kitchen!
FAQs:
Can I add protein? Yes! Shrimp or chicken work wonderfully.
With this easy recipe, you can enjoy a comforting bowl of Thai Coconut Soup any night of the week. Enjoy the warmth and flavor with every bite!
Thai Coconut Soup
Editor’s Choice
Thai Kitchen Gluten Free Unsweetened Coconut Milk, 13.66 fl oz (Pack of 12)

365 by Whole Foods Market, Organic Low Sodium Vegetable Broth, 32 Fl Oz
21. Roasted Garlic Mashed Cauliflower

Roasted Garlic Mashed Cauliflower is a delightful twist on traditional mashed potatoes. This creamy dish offers a rich garlic flavor, all while being light and healthy. Imagine enjoying a velvety side that pairs perfectly with your favorite protein, making every meal feel special and guilt-free!
You’ll love how simple it is to whip up this dish. The roasted garlic adds a deep, savory taste that elevates the cauliflower. Plus, it’s a fantastic option for anyone following sensitive diets, as it avoids nightshades.
Here’s how to make it:
Servings: 4
Prep Time: 10 minutes
Cook Time: 30 minutes
Total Time: 40 minutes
Calories: 110
Nutrition Information:
– Protein: 4g
– Fat: 7g
– Carbohydrates: 10g
– Fiber: 3g
Ingredients:
– 1 large head of cauliflower, chopped
– 4 cloves of garlic, roasted
– 1/4 cup almond milk
– 2 tablespoons olive oil
– Salt and pepper to taste
Instructions:
1. Preheat your oven to 400°F (200°C).
2. Wrap the garlic in foil and roast for 20 minutes until soft.
3. Steam the cauliflower until tender, about 15 minutes.
4. In a food processor, combine the steamed cauliflower, roasted garlic, almond milk, olive oil, salt, and pepper.
5. Blend until smooth and creamy.
6. Serve warm and enjoy!
Feel free to adjust the consistency with more almond milk if you like it creamier.
FAQs:
Can I add cheese? If your diet allows dairy, sprinkle some cheese on top for extra richness. This simple addition can make the dish even more satisfying.
This Roasted Garlic Mashed Cauliflower is perfect for family dinners or gatherings. It’s an easy way to impress your guests while keeping it healthy. Try it out, and you might just find it becoming a staple in your kitchen!
Roasted Garlic Mashed Cauliflower
Editor’s Choice

Electric Salt and Pepper Grinder Set Automatic Battery Pepper Mill Shake…

Silk Shelf-Stable Almond Milk, Unsweetened Vanilla, Dairy-Free, Vegan, N…

Pompeian Robust Extra Virgin Olive Oil, Contains Polyphenols, First Cold…
22. Chicken and Vegetable Soup

Chicken and Vegetable Soup is a cozy dish you can enjoy any time of the year. Imagine a bowl filled with warm broth, tender chicken, and colorful veggies. It’s comfort food that nourishes your body and soul. Plus, it’s perfect for using up leftover chicken, making it both practical and delicious.
This recipe is adaptable. You can swap in your favorite vegetables, so feel free to experiment! It’s a great choice for those on a Paleo or nightshade-free diet.
Here’s what you need to make this hearty soup:
Servings: 4
Prep Time: 15 minutes
Cook Time: 30 minutes
Total Time: 45 minutes
Calories: 200
Nutrition Information:
– Protein: 20g
– Fat: 5g
– Carbohydrates: 15g
– Fiber: 4g
Ingredients:
– 2 cups cooked chicken, shredded
– 4 cups chicken broth
– 1 cup carrots, diced
– 1 cup celery, diced
– 1 cup zucchini, diced
– Salt and pepper to taste
Instructions:
1. In a large pot, pour in the chicken broth. Add the diced carrots, celery, and zucchini. Bring everything to a simmer.
2. Toss in the shredded chicken. Season with salt and pepper to your liking.
3. Let it simmer for about 20-30 minutes, until the veggies are tender.
4. Serve it warm and enjoy!
For a flavor boost, try adding fresh herbs like thyme or parsley. They bring a delightful aroma and freshness to your soup.
FAQs:
Can I make this in advance? Yes! This soup keeps well in the fridge for up to 4 days, making it great for meal prep.
Now, grab your ingredients and let’s get cooking! You’ll have a wholesome meal ready in no time. Enjoy the warmth and comfort of this tasty soup!
Chicken and Vegetable Soup
Editor’s Choice

365 by Whole Foods Market, Organic Low Sodium Chicken Broth, 32 Fl Oz

Fullstar The Original Pro Chopper – Vegetable Chopper and Spiralizer, Fo…
Cole & Mason Fresh Herb Keeper – Acrylic Storage Container for Refrigera…
23. Avocado and Bacon Salad

Imagine a salad that combines the rich creaminess of ripe avocados with the crispy, savory goodness of bacon. That’s what you get with the Avocado and Bacon Salad. This quick meal not only satisfies your taste buds but also fuels your body with healthy fats. Perfect for a light lunch or a refreshing dinner, it’s a dish you’ll want to keep coming back to.
You’ll love how simple it is to whip up this salad in just 15 minutes. Plus, it’s packed with nutrients, making it a great fit for your Paleo, nightshade-free diet. Whether you’re at home or on the go, this salad is a winner.
Ingredients:
– 2 ripe avocados, diced
– 4 slices of bacon, cooked and crumbled
– 1/4 cup red onion, chopped
– 1/4 cup olive oil
– Juice of 1 lime
– Salt and pepper to taste
Instructions:
1. In a large bowl, combine the diced avocados, crumbled bacon, and chopped red onion gently.
2. In a separate small bowl, whisk together the olive oil, lime juice, salt, and pepper until well mixed.
3. Drizzle the dressing over the salad mixture and toss carefully to combine.
4. Serve immediately to enjoy the freshness of the avocados.
Feel free to get creative. Add nuts or seeds for an extra crunch or mix in your favorite herbs for added flavor. Just remember, this salad is best enjoyed fresh to keep the avocados from browning.
Want to make it even heartier? Include grilled chicken or shrimp for added protein. This salad is not just a dish; it’s a canvas for your culinary creativity! Enjoy every bite knowing you’re nourishing your body the delicious way.
Avocado and Bacon Salad
Editor’s Choice

AOZITA 17oz Glass Olive Oil Bottle Dispenser – 500ml Green Oil and Vineg…
24. Honey Mustard Glazed Carrots

Honey Mustard Glazed Carrots are a sweet and tangy treat that can elevate any meal. These vibrant, roasted carrots bring a burst of color and flavor to your dinner table. Perfect for special occasions or everyday dinners, they’re sure to delight your family and guests alike. Imagine biting into tender carrots, coated in a glossy honey-mustard glaze. It’s hard to resist!
Ready to make this delicious side dish? Let’s dive into the easy steps. Gather your ingredients and get started. You’ll find that this dish is not only tasty but also budget-friendly. Fresh carrots are often inexpensive, making this a perfect choice for nourishing meals without breaking the bank. Plus, you can whip it up in just 35 minutes!
Servings: 4
Prep Time: 10 min
Cook Time: 25 min
Total Time: 35 min
Calories: 150
Nutrition Information:
– Protein: 1g
– Fat: 5g
– Carbohydrates: 24g
– Fiber: 4g
Ingredients:
– 1 lb carrots, peeled and cut into sticks
– 2 tablespoons honey
– 2 tablespoons mustard
– 2 tablespoons olive oil
– Salt and pepper to taste
Instructions:
1. Preheat your oven to 400°F (200°C).
2. In a bowl, whisk together honey, mustard, olive oil, salt, and pepper.
3. Toss the carrot sticks in the mixture until they’re fully coated.
4. Spread them out on a baking sheet and roast for 25 minutes, until they’re tender and caramelized.
5. Serve warm, and for an extra touch, sprinkle with fresh thyme before serving.
Curious if you can use baby carrots? Absolutely! Just adjust the roasting time to avoid overcooking. Enjoy this delightful dish and watch it become a favorite at your table!
Fun fact: roasting carrots for just 15 minutes doubles their flavor and beta-carotene, a win in paleo nightshade free recipes. Honey mustard glaze turns every bite into a quick, auto-immune-friendly side that shines at any dinner.
Honey Mustard Glazed Carrots
Editor’s Choice

Pompeian USDA Organic Smooth Extra Virgin Olive Oil, Contains Polyphenol…
25. Spinach and Strawberry Salad

Indulge in the refreshing goodness of a Spinach and Strawberry Salad. This delightful dish combines crisp spinach leaves with juicy, sweet strawberries, topped off with a light balsamic vinaigrette. Perfect for a quick lunch or as a colorful side for dinner, this salad brings a burst of flavor to your table.
Imagine the crunch of fresh spinach paired with the soft sweetness of strawberries. The contrast of textures and tastes makes each bite a joy. You can serve this salad alone or as a complementary side to grilled meats. It’s versatile and easy to prepare, making it a go-to for anyone with sensitive diets.
Here’s how to whip up this delicious salad in just 10 minutes. You don’t need any fancy cooking skills, just a few fresh ingredients and a bowl. Plus, it’s budget-friendly—simple yet satisfying.
Servings: 4
Prep Time: 10 min
Cook Time: 0 min
Total Time: 10 min
Calories: 100 per serving
Nutrition Information:
– Protein: 3g
– Fat: 6g
– Carbohydrates: 10g
– Fiber: 4g
Ingredients:
– 4 cups fresh spinach
– 1 cup strawberries, sliced
– 1/4 cup sliced almonds
– 1/4 cup balsamic vinaigrette
Instructions:
1. In a large bowl, toss together the fresh spinach and sliced strawberries.
2. Sprinkle the sliced almonds on top for that extra crunch.
3. Just before serving, drizzle with balsamic vinaigrette and toss gently to combine.
4. Serve immediately for the freshest taste.
If you want to add more flavor, consider including goat cheese, as long as it fits your diet. It adds a creamy texture that complements the salad beautifully.
FAQs:
Can I use frozen strawberries?
Fresh strawberries shine the brightest, but thawed frozen ones can work in a pinch. Just be sure to drain any excess moisture before adding them to your salad.
Enjoy this delightful Spinach and Strawberry Salad, and make your meals colorful and healthy!
Spinach keeps your energy steady and strawberries spark joy—no nightshades, no fuss. This entry in paleo nightshade free recipes proves that simple greens and berries can power your day, with a quick balsamic twist you can toss together in minutes.
Spinach and Strawberry Salad
Editor’s Choice


Amazon Brand – Happy Belly Sliced Almonds, 12 ounce (Pack of 1)

365 by Whole Foods Market, Organic Baby Spinach, 5 oz
Conclusion

Navigating a Paleo nightshade-free diet doesn’t mean sacrificing flavor or enjoyment in meals.
With these 25 delicious recipes, you have the tools to create vibrant, satisfying dishes that cater to your dietary needs.
From savory entrées to refreshing salads and delightful desserts, there’s something for every palate here. Dive into these options and enjoy cooking meals that nourish your body and excite your taste buds!
Note: We aim to provide accurate product links, but some may occasionally expire or become unavailable. If this happens, please search directly on Amazon for the product or a suitable alternative.
This post contains Amazon affiliate links, meaning I may earn a small commission if you purchase through my links, at no extra cost to you.
Frequently Asked Questions
What Are Nightshade Foods and Why Should They Be Avoided on a Paleo Diet?
Nightshade foods include items like tomatoes, potatoes, eggplants, and peppers. Many people on a paleo nightshade free diet choose to avoid them due to potential sensitivities or inflammatory responses. For those with autoimmune conditions, eliminating nightshades can lead to reduced symptoms and improved overall health. By focusing on paleo recipes that are nightshade-free, you can enjoy delicious meals while adhering to your dietary needs!
Can You Provide Examples of Easy Paleo Nightshade Free Recipes for Dinner?
Absolutely! Some easy paleo nightshade free recipes for dinner include dishes like grilled lemon herb chicken, zucchini noodles with pesto, and roasted garlic cauliflower. These meals are not only simple to prepare but also packed with flavor, making them perfect for healthy dinner ideas. You can explore our article for a full list of 25 recipes that cater to sensitive diets!
How Do I Ensure My Meals Are Both Paleo and Nightshade-Free?
To ensure your meals fit both paleo and nightshade-free guidelines, focus on whole, unprocessed foods like lean meats, fish, nuts, seeds, fruits, and non-starchy vegetables. Always check ingredient labels for hidden nightshades, and experiment with herbs and spices to add flavor without compromising your dietary restrictions. This approach aligns perfectly with clean eating recipes!
Are There Any Substitutes for Nightshade Ingredients in Paleo Recipes?
Yes! There are plenty of delicious substitutes for nightshade ingredients in paleo recipes. For instance, you can replace tomatoes with roasted beets or pumpkin puree, and use sweet potatoes instead of regular potatoes. Cauliflower can stand in for rice or mashed potatoes, making it a versatile ingredient! These swaps help you maintain flavor while sticking to your nightshade free diet.
What Are the Health Benefits of Following a Paleo Nightshade Free Diet?
Following a paleo nightshade free diet can have numerous health benefits, especially for those with autoimmune issues. It may lead to decreased inflammation, improved gut health, and better energy levels. By eliminating potential triggers from your meals, you pave the way for a healthier lifestyle filled with nutrient-dense foods. Plus, the variety of healthy dinner ideas available can keep your meals exciting!
Related Topics
paleo recipes
nightshade free
autoimmune protocol
sensitive diets
healthy dinners
clean eating
easy meals
quick recipes
meal prep
gluten free
whole foods
family friendly