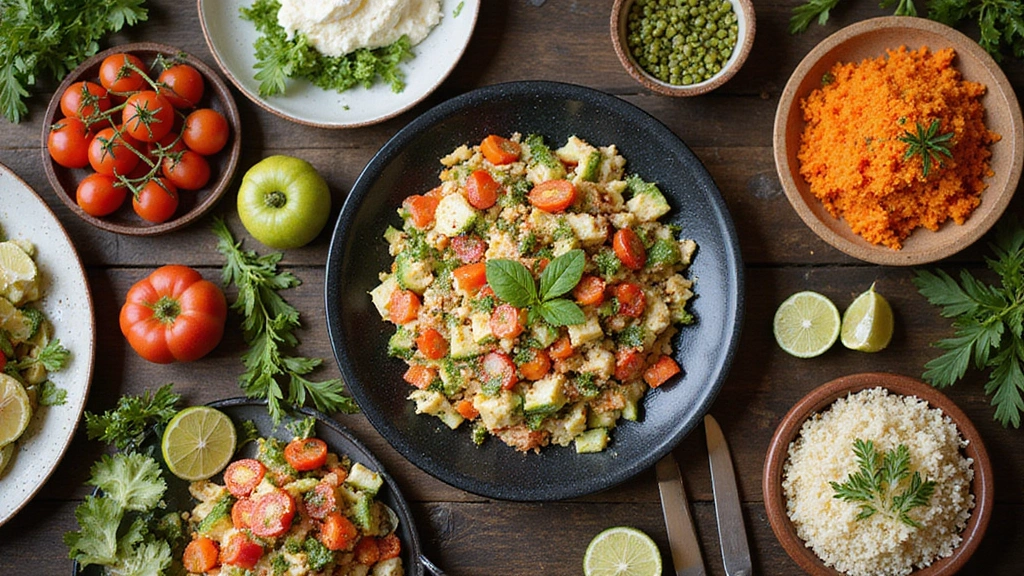
Are you tired of the same old side dishes at dinner? If you’ve been searching for fresh and exciting ideas, you’re not alone. I created this post because I wanted to help you jazz up your meals with delicious Paleo side dishes. Whether you are diving into the Paleo lifestyle or just trying to eat healthier, side dishes can often be the unsung heroes of a great meal.
This collection is for anyone who loves good food but wants to steer clear of grains and processed ingredients. If you’re a busy parent, a health-conscious foodie, or someone simply looking to impress at your next dinner party, you’ll find something here. Side dishes can make or break a meal, and when they’re packed with nutrients and flavor, you know you’re onto something special.
With over 30 mouthwatering recipes, you will discover options that are not just tasty but also simple to prepare. Imagine serving up a vibrant salad bursting with color or roasted veggies that complement your main dish perfectly. These recipes are easy to follow and designed to fit into your busy life. Each one will bring excitement to your plate and keep your meals fresh.
So, get ready to elevate your dining experience. You’ll find everything from hearty vegetable medleys to zesty salads and comforting sides. These recipes will not only satisfy your cravings but also meet your dietary needs. Let’s dive into these Paleo side dishes and elevate your meals to a whole new level!
1. Zesty Cauliflower Rice
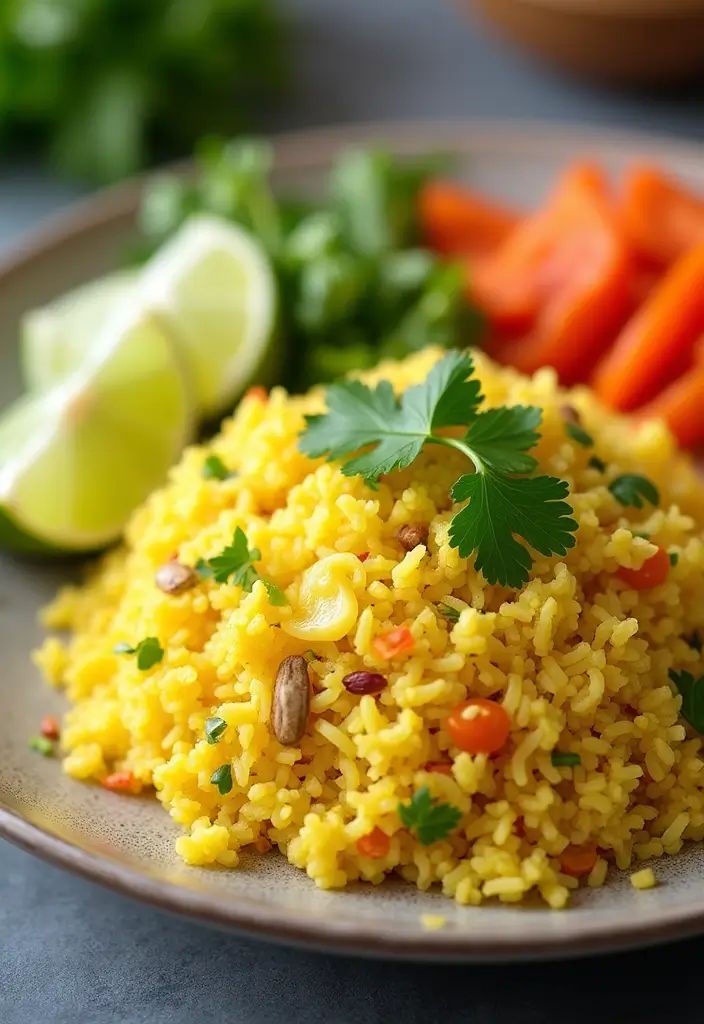
Say goodbye to boring grains and hello to a fresh favorite: zesty cauliflower rice! This tasty, low-carb side dish packs a punch with flavor and nutrients. It’s the perfect way to add excitement to your meals without the carbs.
To make this dish, start by grating a head of cauliflower until it looks like rice. Heat some olive oil in a skillet, then add minced garlic and sauté until fragrant. Stir in the grated cauliflower and cook until tender. Just before serving, brighten it up with a splash of fresh lime juice and a sprinkle of chopped cilantro. Your taste buds will thank you!
This zesty cauliflower rice pairs perfectly with grilled meats or can serve as a base for your favorite stir-fries. It’s an excellent choice for family dinners or gatherings, making every meal feel special.
Recipe Overview:
– Servings: 4
– Prep Time: 10 minutes
– Cook Time: 10 minutes
– Total Time: 20 minutes
– Calories: 50 per serving
Nutrition Information:
– Carbohydrates: 10g
– Protein: 4g
– Fat: 2g
– Fiber: 5g
Ingredients:
– 1 head of cauliflower, grated
– 2 tablespoons olive oil
– 2 cloves garlic, minced
– 1 lime, juiced
– 1/4 cup fresh cilantro, chopped
– Salt to taste
Step-by-Step Instructions:
1. Grate the cauliflower using a food processor for ease.
2. Heat olive oil in a large skillet over medium heat.
3. Add minced garlic and sauté until it’s fragrant, about 1 minute.
4. Stir in the grated cauliflower and cook for 5-7 minutes, until tender.
5. Remove from heat, then mix in lime juice and cilantro. Season with salt to taste.
Tips for the Best Cauliflower Rice:
– Squeeze out excess moisture from the grated cauliflower for a fluffier texture.
– Try different herbs like parsley or basil to switch up the flavor.
Frequently Asked Questions:
– Can I make this ahead of time? Yes! Just reheat before serving.
– Can I freeze it? You can, but it’s best fresh for the best taste.
Zesty Cauliflower Rice
Editor’s Choice

TrendPlain 16oz/470ml Glass Olive Oil Sprayer for Cooking – 2 in 1 Olive…
 Amazon$8.99
2. Roasted Brussels Sprouts with Balsamic Glaze
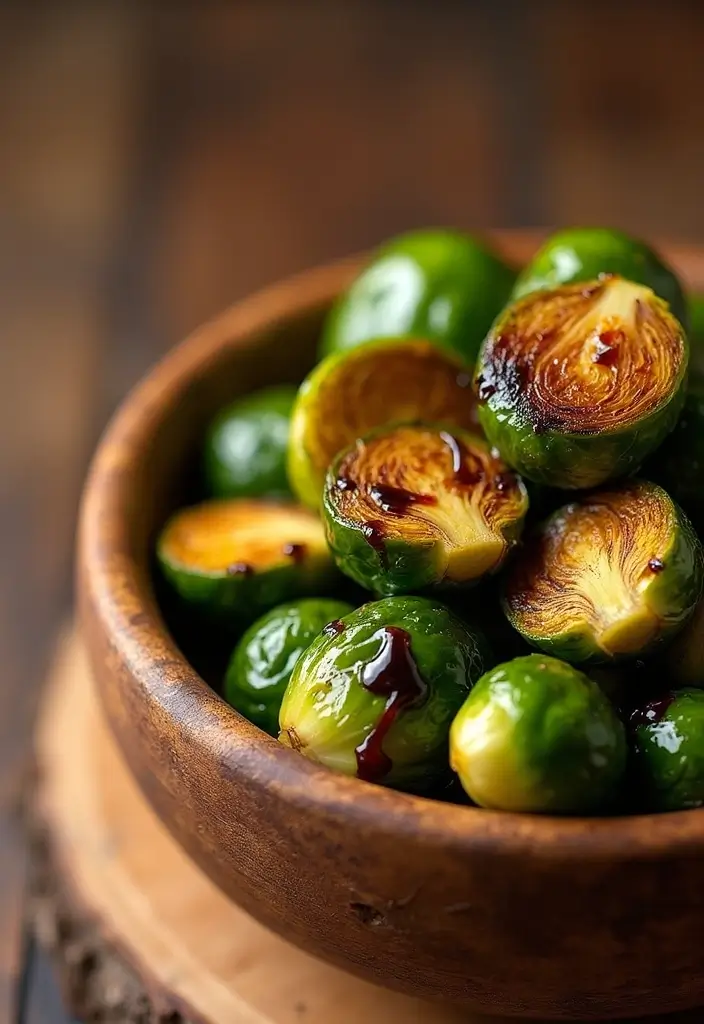
Elevate your dinner table with a delightful side dish: Roasted Brussels Sprouts with Balsamic Glaze. This simple recipe transforms these tiny cabbages into a tasty treat. The roasting process enhances their natural sweetness, and the balsamic glaze adds a zesty punch that makes every bite memorable.
To start, you’ll need to prepare the Brussels sprouts. Trim off the ends and slice them in half. Toss them in olive oil, salt, and pepper for flavor. Spread them evenly on a baking sheet and roast at 400°F for about 20-25 minutes. This will give them a beautiful caramelized finish. In the last few minutes, drizzle a balsamic reduction to add that irresistible sweet-and-sour taste.
This dish is not just appealing; it pairs perfectly with everything from roasted chicken to rich steak, making it a versatile addition to any meal.
Recipe Overview:
– Servings: 6
– Prep Time: 15 minutes
– Cook Time: 25 minutes
– Total Time: 40 minutes
– Calories: 80 per serving
Nutrition Information:
– Carbohydrates: 8g
– Protein: 4g
– Fat: 5g
– Fiber: 3g
Ingredients List:
– 1 lb Brussels sprouts, halved
– 2 tablespoons olive oil
– Salt and pepper to taste
– 1/4 cup balsamic reduction
Step-by-Step Instructions:
1. Preheat your oven to 400°F (200°C).
2. In a bowl, toss the halved Brussels sprouts with olive oil, salt, and pepper.
3. Spread them out on a baking sheet in a single layer.
4. Roast for 20-25 minutes, tossing halfway through for even cooking.
5. Drizzle with balsamic reduction just before serving for a burst of flavor.
Tips for Perfect Roasted Brussels Sprouts:
– Space them out on the baking sheet for even roasting.
– Add bacon bits for extra flavor and crunch!
Frequently Asked Questions:
– Can I use frozen Brussels sprouts? Fresh is best, but frozen will work in a pinch.
– How do I store leftovers? Keep in an airtight container in the fridge for up to 3 days.
Roasted Brussels Sprouts with Balsamic Glaze
Editor’s Choice

GoodCook Everyday Nonstick Carbon Steel Baking Sheet Set, 3 Pack – Small…
 Amazon$17.99
Filippo Berio Glaze with Balsamic Vinegar of Modena, 8.4 Ounce Plastic B…
 Amazon$5.79
AOZITA 17oz Glass Olive Oil Bottle Dispenser – 500ml Green Oil and Vineg…
 Amazon$9.99
3. Sweet Potato Mash
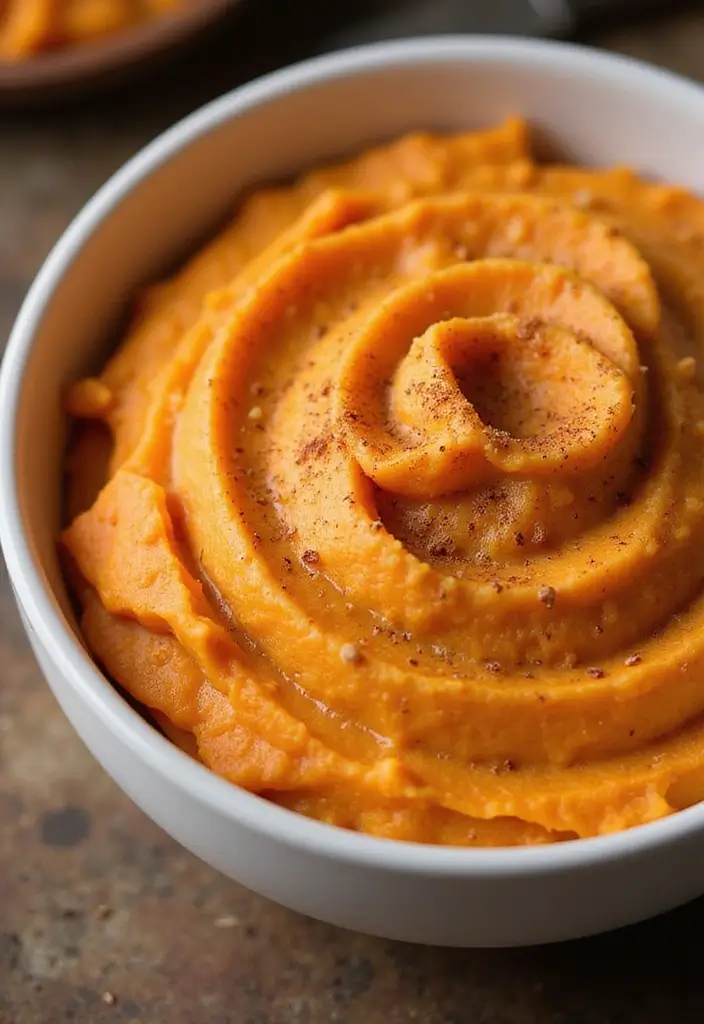
Sweet potato mash is the creamy side dish you didn’t know you needed! It’s not just delicious; it’s packed with nutrients that can elevate any meal. This stunning dish will catch your eye with its bright orange hue and warm flavors, making it perfect for family dinners or holiday gatherings.
To whip up this delightful mash, start by peeling and chopping your sweet potatoes. Boil them in salted water until they’re tender—about 15 to 20 minutes. Once they’re soft, drain the water and return the potatoes to the pot. Add coconut milk, ghee, and a dash of cinnamon, then mash everything together until it’s smooth and creamy. The natural sweetness of the potatoes shines through, while the coconut milk and ghee provide a rich and comforting taste.
This mash pairs wonderfully with roasted meats and adds a splash of color to your plate. Plus, it’s so easy to make ahead of time—just reheat it when you’re ready to serve!
Recipe Overview:
– Servings: 4
– Prep Time: 10 minutes
– Cook Time: 20 minutes
– Total Time: 30 minutes
– Calories: 120 per serving
Nutrition Information:
– Carbohydrates: 24g
– Protein: 2g
– Fat: 4g
– Fiber: 4g
Ingredients List:
– 2 large sweet potatoes, peeled and cubed
– 1/4 cup coconut milk
– 2 tablespoons ghee
– 1 teaspoon cinnamon
– Salt to taste
Step-by-Step Instructions:
1. Boil sweet potatoes in salted water until tender, about 15-20 minutes.
2. Drain and return sweet potatoes to the pot.
3. Add coconut milk, ghee, and cinnamon, then mash until smooth.
4. Season with salt to taste.
Tips for the Best Sweet Potato Mash:
– Add more coconut milk for a creamier texture.
– Include a drizzle of maple syrup for extra sweetness if desired!
Frequently Asked Questions:
– Can I make this ahead of time? Yes! Just reheat it before serving.
– Is it okay to use butter instead of ghee? Absolutely! This works well if you’re not strictly following a Paleo diet.
Sweet Potato Mash
Editor’s Choice

Thai Kitchen Gluten Free Unsweetened Coconut Milk, 13.66 fl oz (Pack of 12)
 Amazon$10.62
4th & Heart Original Grass-Fed Ghee, Clarified Butter, Keto, Pasture Rai…
 Amazon$15.40
KitchenAid Gourmet Stainless Steel Wire Masher, 10.24-Inch, Black
 Amazon$11.00
4. Garlicky Green Beans
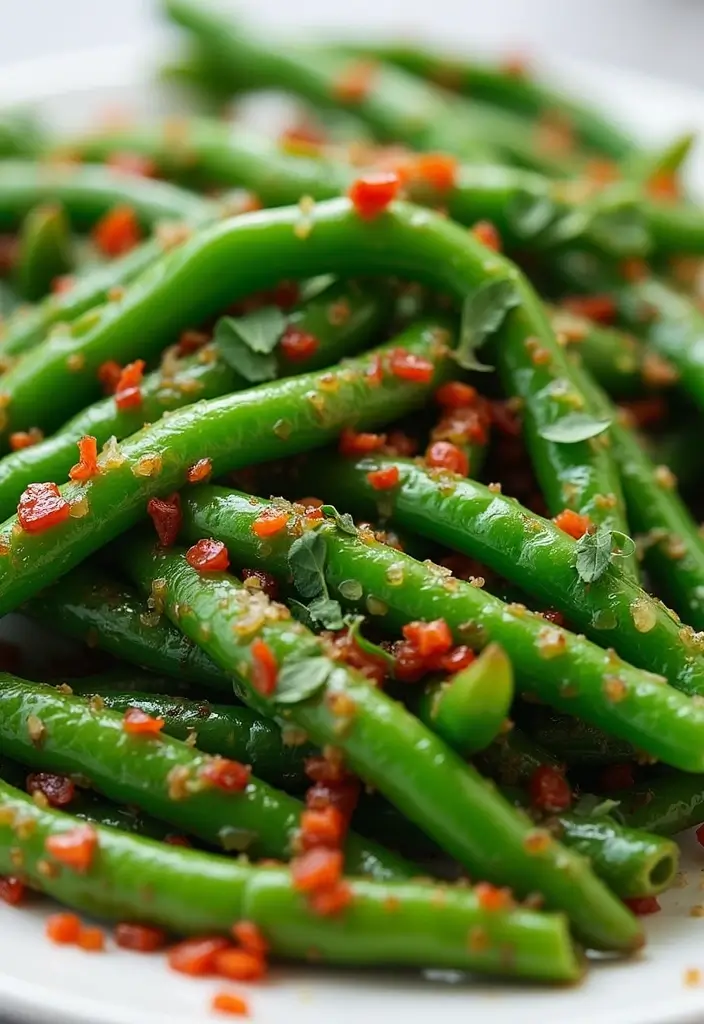
Transform your meals with a simple yet delicious side: Garlicky Green Beans. This dish not only adds a pop of color to your plate but also a satisfying crunch that your family will love. Perfect for busy weeknights or festive gatherings, these green beans are quick to whip up, making them a staple in your kitchen.
To start, take fresh green beans and trim the ends. Blanch them in boiling water for just 2-3 minutes until they turn a bright green and are tender-crisp. This quick step keeps them vibrant and helps lock in nutrients. Meanwhile, heat some olive oil in a skillet and sauté minced garlic until it’s fragrant. Toss in your blanched green beans, and add a pinch of red pepper flakes for a hint of spice. This simple addition makes the beans sing with flavor!
Your family will not only enjoy the taste but also appreciate the health benefits. These green beans are low in calories yet high in fiber, making them a smart choice.
Recipe Overview:
– Servings: 4
– Prep Time: 10 minutes
– Cook Time: 10 minutes
– Total Time: 20 minutes
– Calories: 60 per serving
Nutrition Information:
– Carbohydrates: 10g
– Protein: 3g
– Fat: 4g
– Fiber: 4g
Ingredients:
– 1 lb green beans, trimmed
– 2 tablespoons olive oil
– 2 cloves garlic, minced
– Red pepper flakes to taste
– Salt to taste
Instructions:
1. Bring a pot of salted water to a boil. Blanch the green beans for 2-3 minutes.
2. Drain the beans and immediately plunge them into ice water to stop cooking.
3. In a skillet, heat the olive oil over medium heat.
4. Add the minced garlic and sauté until golden.
5. Toss in the green beans, seasoning with red pepper flakes and salt to taste.
Tips for Perfect Garlicky Green Beans:
– Add lemon juice just before serving for a zesty kick.
– Incorporate toasted almonds for an extra crunch and flavor burst.
Frequently Asked Questions:
– Can I use frozen green beans? Yes, just adjust the cooking time as needed for best results.
– What can I substitute for olive oil? Coconut oil can be a great alternative!
Enjoy your delicious and healthy garlicky green beans as the perfect side dish to any meal!
Garlicky Green Beans
Editor’s Choice

Pompeian USDA Organic Robust Extra Virgin Olive Oil, Contains Polyphenol…
 Amazon$5.52
Zulay Kitchen Stainless Steel Garlic Press Rocker Set – Premium Garlic M…
 Amazon$14.99
5. Spicy Roasted Carrots
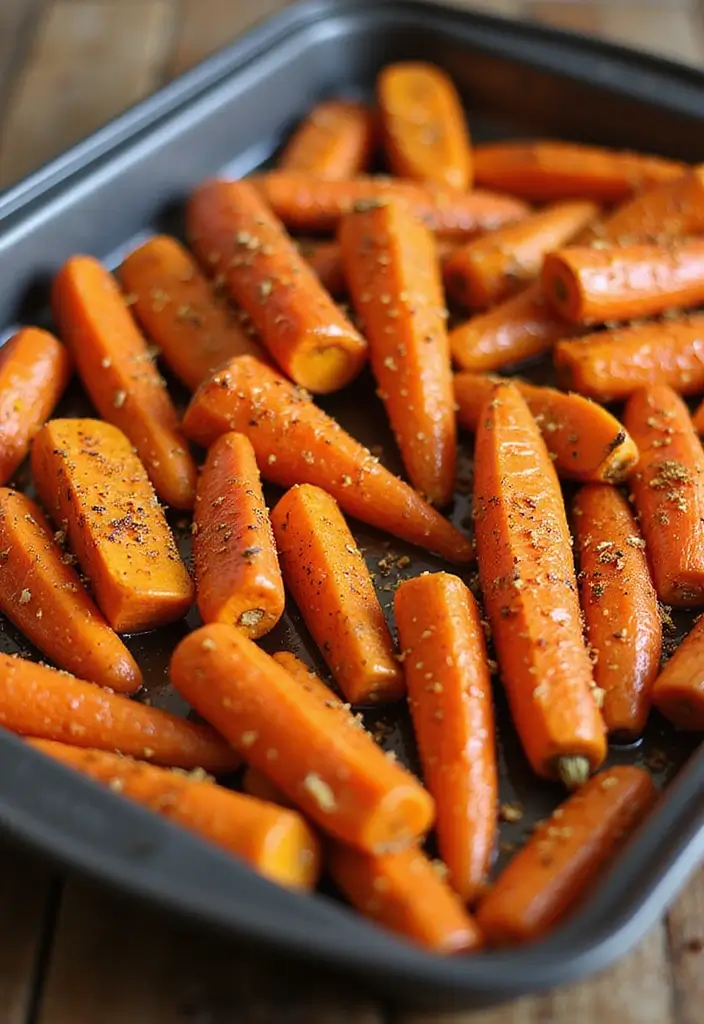
Turn your ordinary meal into something special with these Spicy Roasted Carrots. This side dish is not just easy to make but also bursts with flavor. The combination of honey and spices takes simple carrots and elevates them to star status on your dinner plate.
Begin by peeling a pound of fresh carrots and cutting them into sticks. In a mixing bowl, combine olive oil, honey, cumin, chili powder, and salt to create a rich coating. Toss the carrot sticks in this mixture until they’re well-covered. Spread them out on a baking sheet and roast in a preheated oven at 425°F (220°C) for about 25-30 minutes. You want them tender and caramelized, with a hint of sweetness and spice that will have everyone reaching for seconds.
These spicy roasted carrots are perfect for any gathering. They add color and excitement to your table, making them a hit with both family and friends.
Recipe Overview:
– Servings: 4
– Prep Time: 10 minutes
– Cook Time: 30 minutes
– Total Time: 40 minutes
– Calories: 100 per serving
Nutrition Information:
– Carbohydrates: 15g
– Protein: 2g
– Fat: 5g
– Fiber: 4g
Ingredients List:
– 1 lb carrots, peeled and cut into sticks
– 2 tablespoons olive oil
– 1 tablespoon honey
– 1 teaspoon cumin
– 1 teaspoon chili powder
– Salt to taste
Step-by-Step Instructions:
1. Preheat your oven to 425°F (220°C).
2. In a bowl, mix olive oil, honey, cumin, chili powder, and salt.
3. Add the carrot sticks and toss to coat thoroughly.
4. Spread the carrots on a baking sheet in a single layer.
5. Roast for 25-30 minutes until they are caramelized and tender.
Tips for the Best Spicy Roasted Carrots:
– Experiment with spices: Try adding paprika or cayenne for extra heat!
– Pair with a yogurt dip: A cooling sauce can balance the spice perfectly.
Frequently Asked Questions:
– Can I use baby carrots? Yes, but adjust the roasting time to prevent them from overcooking.
– How do I store leftovers? Keep them in an airtight container in the fridge for up to 3 days.
With this recipe, you’ll serve up a side dish that’s as exciting as it is delicious. Enjoy your cooking!
Spicy Roasted Carrots
Editor’s Choice

Pompeian Robust Extra Virgin Olive Oil, Contains Polyphenols, First Cold…
 Amazon$15.64
Spice Rack Kitchen Cabinet Organizer- 3 Tier Bamboo Expandable Display S…
 Amazon$20.99
6. Creamy Avocado Salad
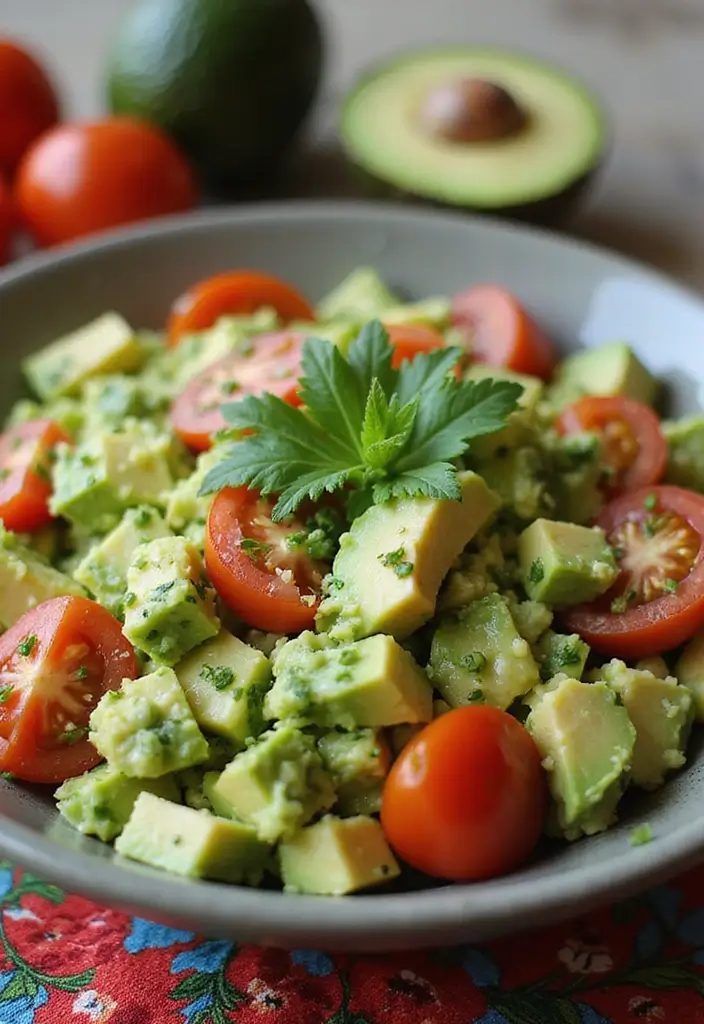
Brighten up your meals with a creamy avocado salad that’s not only delicious but also packed with nutrition. This refreshing side dish is loaded with healthy fats and is super simple to make. You’ll love how it adds a creamy texture and vibrant flavors to any plate.
Start by mashing ripe avocados in a bowl. Then, mix in juicy diced tomatoes, finely chopped red onion, fresh cilantro, zesty lime juice, and a pinch of salt. The result? A flavorful salad that pairs perfectly with grilled meats or serves as a tasty dip for fresh veggies. This salad is versatile enough for any occasion, making it a favorite at family gatherings and barbecues.
Here’s an easy recipe to follow:
Recipe Overview:
– Servings: 4
– Prep Time: 10 minutes
– Cook Time: 0 minutes
– Total Time: 10 minutes
– Calories: 150 per serving
Nutrition Information:
– Carbohydrates: 8g
– Protein: 3g
– Fat: 12g
– Fiber: 5g
Ingredients:
– 2 ripe avocados, mashed
– 1 medium tomato, diced
– 1/4 red onion, finely chopped
– 1/4 cup fresh cilantro, chopped
– Juice of 1 lime
– Salt to taste
Step-by-Step Instructions:
1. In a bowl, mash the avocados until creamy.
2. Stir in diced tomatoes, red onion, cilantro, and lime juice.
3. Season with salt to taste, mixing well.
4. Serve immediately to enjoy the fresh flavors.
Tips for the Best Creamy Avocado Salad:
– Choose ripe avocados for the best taste and creaminess.
– Serve with corn chips for a fun snack option!
Frequently Asked Questions:
– Can I prepare this in advance? It’s best enjoyed fresh to prevent browning.
– What can I substitute for lime juice? Lemon juice is a great alternative!
This creamy avocado salad is sure to become a go-to recipe. Enjoy the ease of making it and the joy it brings to your meals!
Creamy Avocado Salad
Editor’s Choice

Zulay Kitchen Cast-Iron Orange Juice Squeezer – Easy-to-Clean, Heavy-Dut…
 Amazon$129.99
7. Cilantro Lime Cauliflower Salad
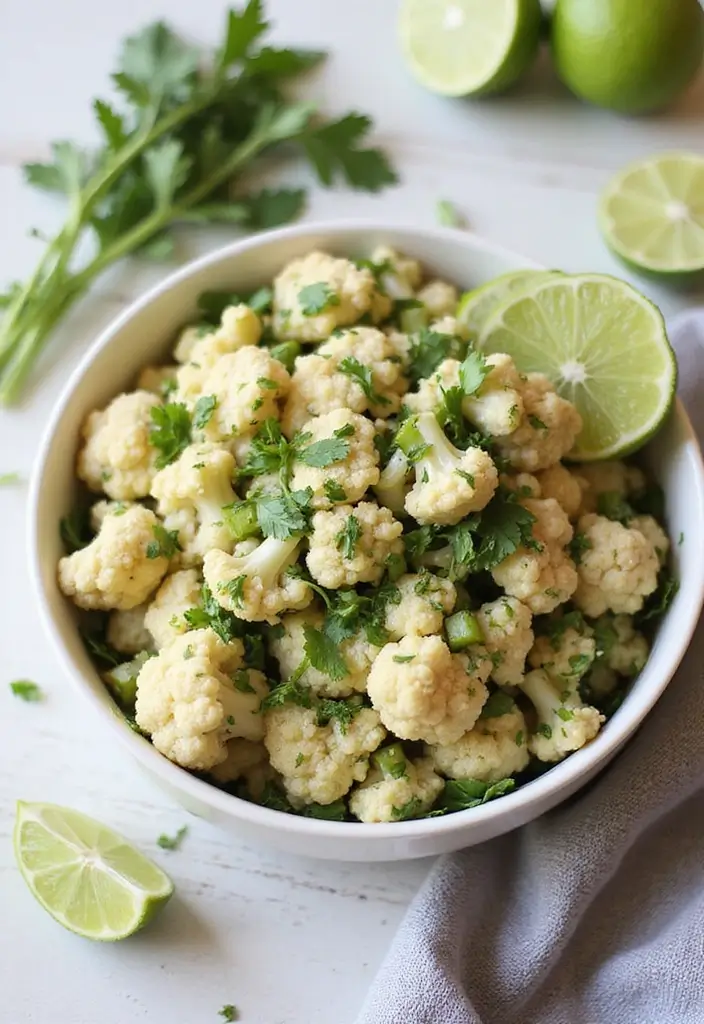
Discover the refreshing taste of a Cilantro Lime Cauliflower Salad. This delightful dish adds a crisp, zesty touch to your meals. It’s perfect for summer barbecues or as a light side for grilled chicken. With its vibrant colors, this salad is not just tasty; it’s a feast for the eyes too.
To make this salad, start by ricing a head of cauliflower in your food processor. Lightly steam the riced cauliflower for about 3-5 minutes to soften it slightly, then let it cool. Mix it in a bowl with diced red onion, fresh cilantro, lime juice, and a splash of olive oil. The combination creates a bright, flavorful salad that will impress your family and friends.
This salad is not only easy to make but also versatile. You can serve it chilled or at room temperature, making it a flexible addition to any gathering.
Recipe Overview:
– Servings: 6
– Prep Time: 15 minutes
– Cook Time: 5 minutes
– Total Time: 20 minutes
– Calories: 60 per serving
Nutrition Information:
– Carbohydrates: 9g
– Protein: 2g
– Fat: 3g
– Fiber: 3g
Ingredients:
– 1 head cauliflower, riced
– 1/2 red onion, diced
– 1/4 cup fresh cilantro, chopped
– Juice of 2 limes
– 2 tablespoons olive oil
– Salt and pepper to taste
Instructions:
1. Rice the cauliflower in a food processor until fine.
2. Steam the riced cauliflower for 3-5 minutes until slightly softened.
3. Allow it to cool before mixing it with the diced onion, cilantro, lime juice, and olive oil.
4. Season with salt and pepper to taste.
5. Serve chilled or at room temperature.
To make your salad even better, consider these tips:
Choose colorful bell peppers for added crunch.
Add diced jalapeños for a spicy kick.
Mix in avocado for creaminess.
Top with pumpkin seeds for extra texture.
Frequently Asked Questions:
– Can I prepare this salad ahead of time? Absolutely! You can make it a day in advance. Just store it in the fridge.
– How should I store leftovers? Keep them in an airtight container and enjoy within 2 days for the best flavor.
This Cilantro Lime Cauliflower Salad is a must-try! It’s not just healthy; it’s also a dish that brings joy to your table. Enjoy the bright flavors and the compliments that come with it!
Cilantro Lime Cauliflower Salad
Editor’s Choice

Hamilton Beach Food Processor & Vegetable Chopper for Slicing, Shredding…
 AmazonEUR 40.61
AOZITA 17oz Glass Olive Oil Bottle Dispenser – 500ml Green Oil and Vineg…
 Amazon$9.99
8. Loaded Sweet Potato Skins

Enjoy a tasty side that’s perfect for gatherings or snack time with these Loaded Sweet Potato Skins. These crispy delights are not just mouthwatering; they’re also a fun way to share deliciousness with family and friends. Imagine a platter of these golden, crispy skins topped with rich avocado and savory bacon. Everyone will want to dig in!
To make them, start by baking sweet potatoes until they’re soft and tender. Then scoop out some of the flesh and mix it with creamy avocado, crunchy bacon, and your favorite seasonings. Once you fill the skins with this yummy mixture, pop them back in the oven until they’re crispy. Sprinkle with green onions for an extra burst of flavor.
These Loaded Sweet Potato Skins are an excellent option if you have leftover sweet potatoes. They’ll turn an ordinary meal into something special that everyone will love.
Recipe Overview:
– Servings: 4
– Prep Time: 20 minutes
– Cook Time: 30 minutes
– Total Time: 50 minutes
– Calories: 200 per serving
Nutrition Information:
– Carbohydrates: 30g
– Protein: 6g
– Fat: 8g
– Fiber: 5g
Ingredients List:
– 2 large sweet potatoes
– 1 avocado, mashed
– 4 slices cooked bacon, crumbled
– Salt and pepper to taste
– 2 green onions, chopped
Step-by-Step Instructions:
1. Preheat your oven to 400°F (200°C).
2. Bake the sweet potatoes for 45 minutes, or until they’re tender.
3. Cut each potato in half and scoop out the insides, leaving a thin layer.
4. Combine the scooped flesh with the mashed avocado, crumbled bacon, salt, and pepper.
5. Stuff this tasty mixture back into the potato skins and bake for another 15 minutes.
6. Before serving, add chopped green onions on top for a fresh crunch!
Tips for the Best Loaded Sweet Potato Skins:
– Choose cheese as a topping for a non-strict paleo option.
– Add a dash of chili powder for a spicy kick!
Frequently Asked Questions:
– Can I make these vegetarian? Yes! Just skip the bacon and load up on more veggies.
– How can I store leftovers? Keep them in an airtight container in the fridge for up to 3 days. Enjoy these delightful bites anytime!
Loaded Sweet Potato Skins
Editor’s Choice

OXO Good Grips Handheld Mandoline Slicer for Kitchen, Adjustable Vegetab…
 Amazon$18.92

GoodCook Everyday Nonstick Carbon Steel Baking Sheet Set, 3 Pack – Small…
 Amazon$17.99
9. Eggplant Parmesan Bites
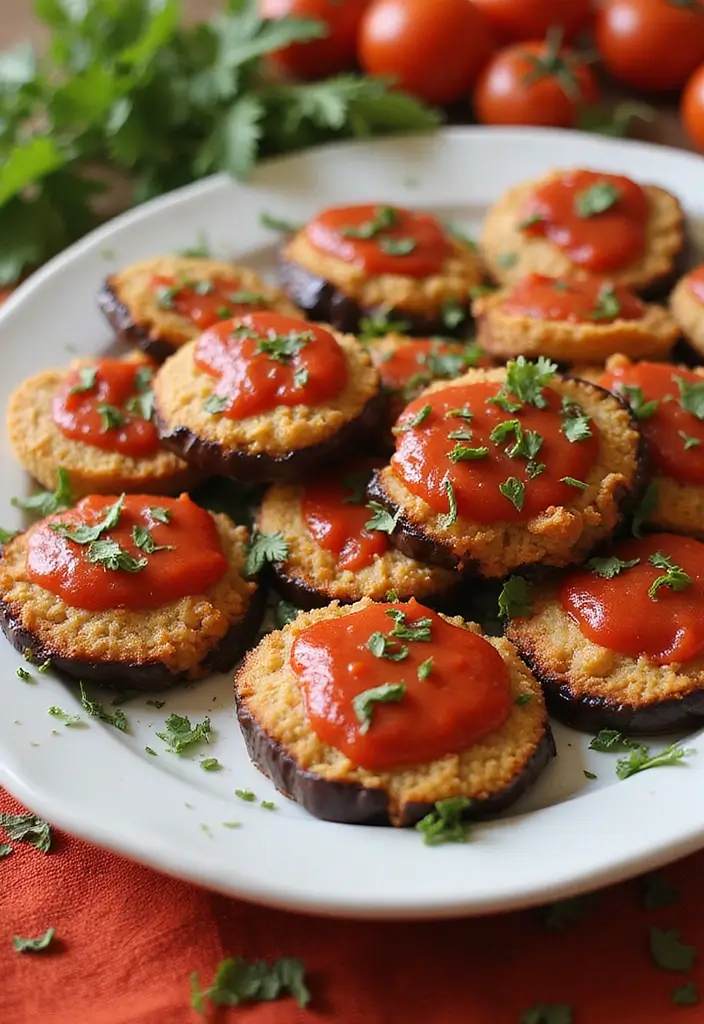
Craving a delicious side that’s packed with flavor? These Eggplant Parmesan Bites are the perfect solution! They are bite-sized, crispy, and a crowd-pleaser at any gathering. Whether served as an appetizer or alongside your main dish, they offer a tasty way to enjoy healthy veggies.
To make these tasty bites, start by slicing a large eggplant into rounds. Then, dip each slice in almond flour before baking them until they turn golden and crispy. Top with marinara sauce and dairy-free cheese, and pop them back in the oven until the cheese bubbles. You will end up with a satisfying, cheesy bite that everyone will love!
Here’s a complete recipe to get you started:
Recipe Overview:
– Servings: 6
– Prep Time: 15 minutes
– Cook Time: 25 minutes
– Total Time: 40 minutes
– Calories: 180 per serving
Nutrition Information:
– Carbohydrates: 15g
– Protein: 4g
– Fat: 10g
– Fiber: 4g
Ingredients List:
– 1 large eggplant, sliced into rounds
– 1 cup almond flour
– 1 cup marinara sauce
– 1 cup dairy-free cheese
– Olive oil spray
– Salt and pepper to taste
Step-by-Step Instructions:
1. Preheat the oven to 375°F (190°C).
2. Dip each eggplant slice in almond flour, then place them on a baking sheet.
3. Lightly spray with olive oil and season with salt and pepper.
4. Bake for 20 minutes, flipping halfway through for even cooking.
5. Top each slice with marinara and cheese, then bake until the cheese is melted and bubbly.
Tips for the Best Eggplant Parmesan Bites:
– Slice the eggplant evenly for uniform baking.
– For extra flavor, mix Italian herbs into the almond flour.
Frequently Asked Questions:
– How can I tell when the eggplant is done? Look for a golden color and a soft texture.
– Can I prepare these ahead of time? Absolutely! Just reheat them in the oven before serving.
These delightful bites not only satisfy your taste buds but also add a healthy twist to your meals. Enjoy them at your next party or family dinner, and watch them disappear!
Eggplant Parmesan Bites
Editor’s Choice

Blue Diamond Almonds Almond Flour, Gluten Free, Blanched, Finely Sifted,…
 Amazon$9.91
365 by Whole Foods Market Non Dairy Gouda Cheese Slices, 8 OZ
 Amazon$3.69
TrendPlain 16oz/470ml Glass Olive Oil Sprayer for Cooking – 2 in 1 Olive…
 AmazonEUR 7.77
10. Coconut Green Curry Zucchini Noodles
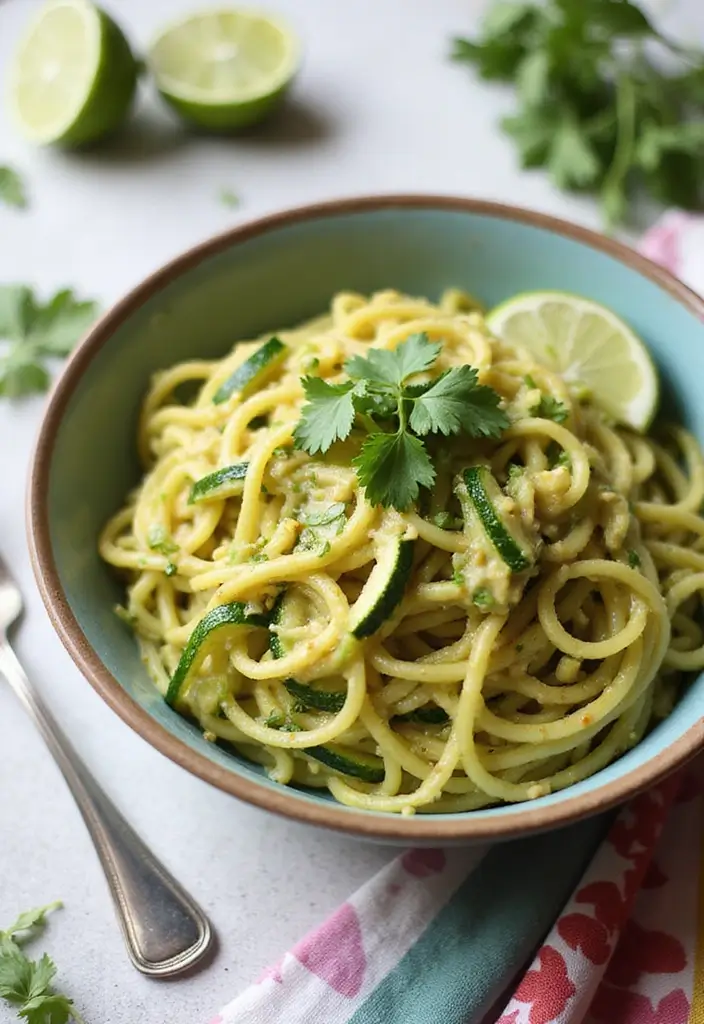
Craving something fresh and flavorful? These Coconut Green Curry Zucchini Noodles are a delightful way to elevate your meal! With a burst of exotic taste, this dish is ready in just 30 minutes, making it ideal for busy weeknights or special gatherings.
Start by spiralizing fresh zucchinis, which create a fun, noodle-like texture. Sauté these in a rich mixture of coconut milk and green curry paste, then finish with a splash of lime juice. This combination infuses each bite with vibrant flavors and a hint of warmth. Not only is it a colorful side dish, but it also shines on its own as a satisfying main course.
Let’s get cooking! Here’s how to make it:
Recipe Overview:
– Servings: 4
– Prep Time: 10 minutes
– Cook Time: 15 minutes
– Total Time: 25 minutes
– Calories: 120 per serving
Nutrition Information:
– Carbohydrates: 8g
– Protein: 3g
– Fat: 9g
– Fiber: 2g
Ingredients List:
– 4 zucchinis, spiralized
– 1 can coconut milk
– 2 tablespoons green curry paste
– Juice of 1 lime
– Salt to taste
Step-by-Step Instructions:
1. Spiralize the zucchinis into noodle shapes.
2. In a pan, heat the coconut milk and green curry paste over medium heat.
3. Add the zucchini noodles and cook for 3-5 minutes until they soften slightly.
4. Stir in the lime juice and season with salt before serving.
Tips for the Best Coconut Green Curry Zucchini Noodles:
– Serve immediately to keep the noodles crunchy.
– Garnish with fresh cilantro for an extra flavor kick!
Frequently Asked Questions:
– Can I use other vegetables? Yes, try carrots or yellow squash for variety.
– How do I store leftovers? Keep them in an airtight container in the fridge for up to two days.
This dish is not just easy to prepare; it’s also a healthy addition to your meals. Enjoy the bright flavors and the delightful texture that will impress your family and friends!
Coconut Green Curry Zucchini Noodles
Editor’s Choice

Veggetti Veggie Slicer, Dual Stainless Steel Blade Vegetable Cutter for …
 Amazon$19.20
Mae Ploy Green Curry Paste, Authentic Thai Green Curry Paste for Thai Cu…
 Amazon$11.35
11. Lemon Garlic Asparagus
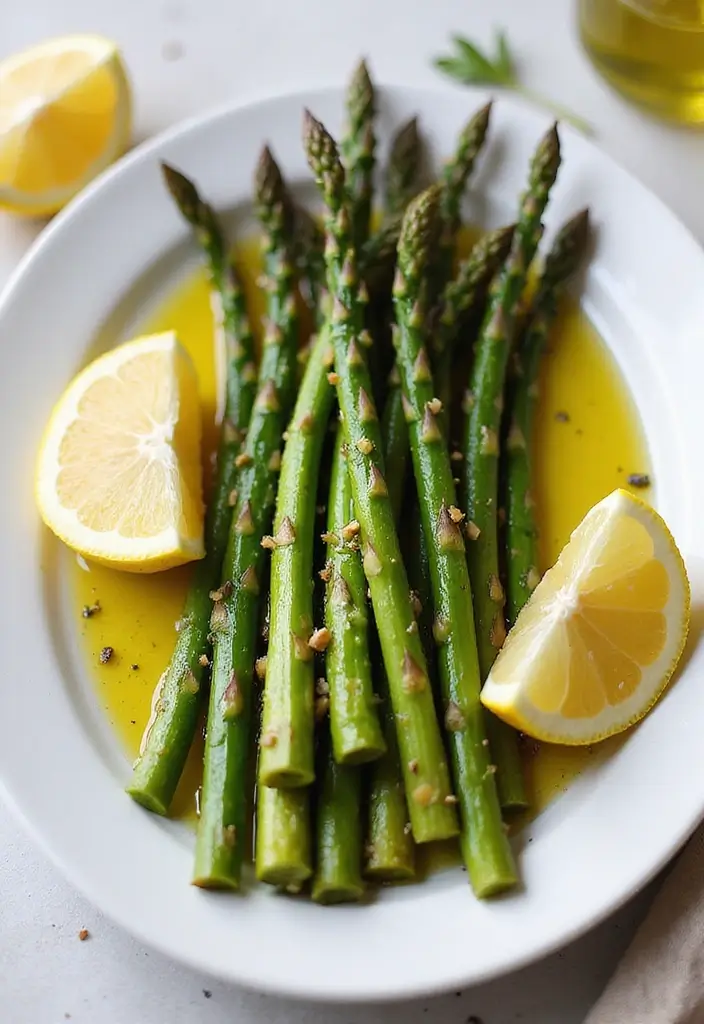
Brighten your dinner table with a delightful side dish: Lemon Garlic Asparagus. This vibrant dish not only adds a splash of color but also bursts with fresh flavor. It’s quick to make and complements a variety of main courses beautifully.
Start by choosing fresh asparagus for the best taste. Trim the ends and toss them with olive oil, zesty lemon juice, and minced garlic. Roast them in the oven until tender and just crispy. The lemon gives a refreshing kick, while the garlic adds depth and warmth.
This side is perfect for family dinners or holiday gatherings, pairing wonderfully with grilled meats and seafood. It can even stand alone as a light snack or appetizer.
Here’s how to make it:
Recipe Overview:
– Servings: 4
– Prep Time: 10 minutes
– Cook Time: 15 minutes
– Total Time: 25 minutes
– Calories: 70 per serving
Nutrition Information:
– Carbohydrates: 5g
– Protein: 3g
– Fat: 5g
– Fiber: 2g
Ingredients:
– 1 lb asparagus, trimmed
– 2 tablespoons olive oil
– Juice of 1 lemon
– 3 cloves garlic, minced
– Salt and pepper to taste
Instructions:
1. Preheat your oven to 400°F (200°C).
2. In a bowl, mix the asparagus with olive oil, lemon juice, garlic, salt, and pepper until well-coated.
3. Spread the asparagus on a baking sheet in a single layer and roast for 12-15 minutes, or until tender and slightly crispy.
4. Serve warm, and if you like, sprinkle with lemon zest for an extra touch.
Tips for the Best Lemon Garlic Asparagus:
– Use fresh asparagus for maximum flavor.
– Avoid overcooking to keep that satisfying crunch!
Frequently Asked Questions:
– Can I use frozen asparagus? Fresh is ideal, but frozen works in a pinch.
– How do I store leftovers? Keep them in an airtight container in the fridge for up to 3 days.
This simple yet flavorful dish is sure to impress your guests and make any meal feel special. Try it out, and enjoy the bright, fresh flavors of lemon garlic asparagus tonight!
Did you know lemon garlic asparagus shines in under 15 minutes? A quick roast at 425°F with olive oil, lemon, and garlic makes a vibrant paleo side dish recipe that appears in many paleo side dish recipes and pairs perfectly with any main.
Lemon Garlic Asparagus
Editor’s Choice

Pompeian Robust Extra Virgin Olive Oil, Contains Polyphenols, First Cold…
 Amazon$15.64
GoodCook Everyday Nonstick Carbon Steel Baking Sheet Set, 3 Pack – Small…
 Amazon$17.99
12. Savory Mushroom Medley
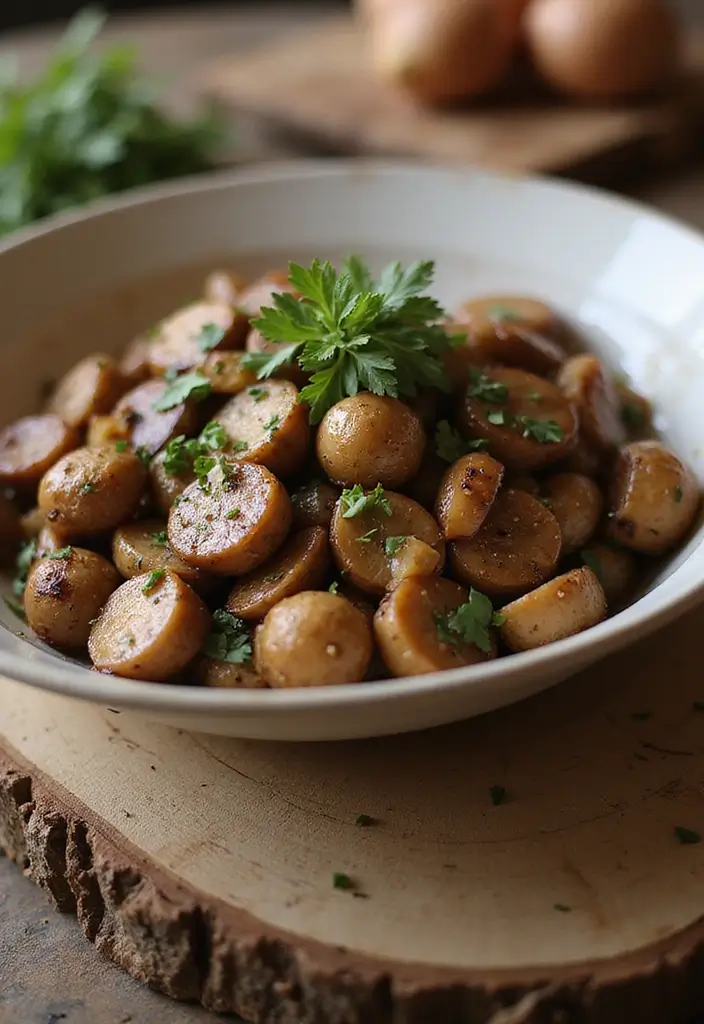
Get ready to elevate your side dish game with a delicious Savory Mushroom Medley! This dish bursts with flavor, combining a variety of mushrooms sautéed with garlic and fresh herbs. It’s not just tasty; it’s a dish that can truly shine at your dinner table.
Start with a colorful blend of shiitake, cremini, and button mushrooms. As you sauté them in olive oil, the garlic will fill your kitchen with an irresistible aroma. A splash of balsamic vinegar adds a tangy twist, making every bite a delightful experience. This medley pairs beautifully with grilled steak, succulent chicken, or even as a topping on your favorite salad.
This recipe is not only flavorful but also packed with nutrients, making it perfect for family gatherings or casual dinners. Plus, it’s quick to whip up!
Recipe Overview:
– Servings: 4
– Prep Time: 10 minutes
– Cook Time: 15 minutes
– Total Time: 25 minutes
– Calories: 110 per serving
Nutrition Information:
– Carbohydrates: 6g
– Protein: 3g
– Fat: 8g
– Fiber: 2g
Ingredients List:
– 1 lb mixed mushrooms, sliced
– 2 tablespoons olive oil
– 3 cloves garlic, minced
– 1 teaspoon fresh thyme
– 2 tablespoons balsamic vinegar
– Salt and pepper to taste
Step-by-Step Instructions:
1. Heat olive oil in a skillet over medium heat.
2. Add minced garlic and sauté until fragrant, about 1 minute.
3. Stir in the sliced mushrooms, thyme, and balsamic vinegar.
4. Cook until mushrooms are tender and caramelized, roughly 10 minutes.
5. Season with salt and pepper before serving.
Tips for the Perfect Mushroom Medley:
– Mix in different mushroom varieties for unique flavors.
– Serve immediately for the best texture and taste.
Frequently Asked Questions:
– Can I use dried mushrooms? Yes, but remember to rehydrate them first for the best texture.
– How do I store leftovers? Keep them in an airtight container in the fridge for up to 3 days.
Enjoy this savory mushroom medley as a stunning side dish that everyone will love!
Savory Mushroom Medley
Editor’s Choice

Lodge 12 Inch Cast Iron Skillet with Red Silicone Hot Handle Holder – Pr…
 Amazon$39.90
Pompeian Extra Virgin Olive Oil Variety Pack – Smooth, Robust, Naturally…
 AmazonCheck Price
9 Herb Indoor Garden Kit – Unique Kitchen Gift for Women, Men, Mom, Frie…
 Amazon$29.95
13. Spaghetti Squash with Pesto
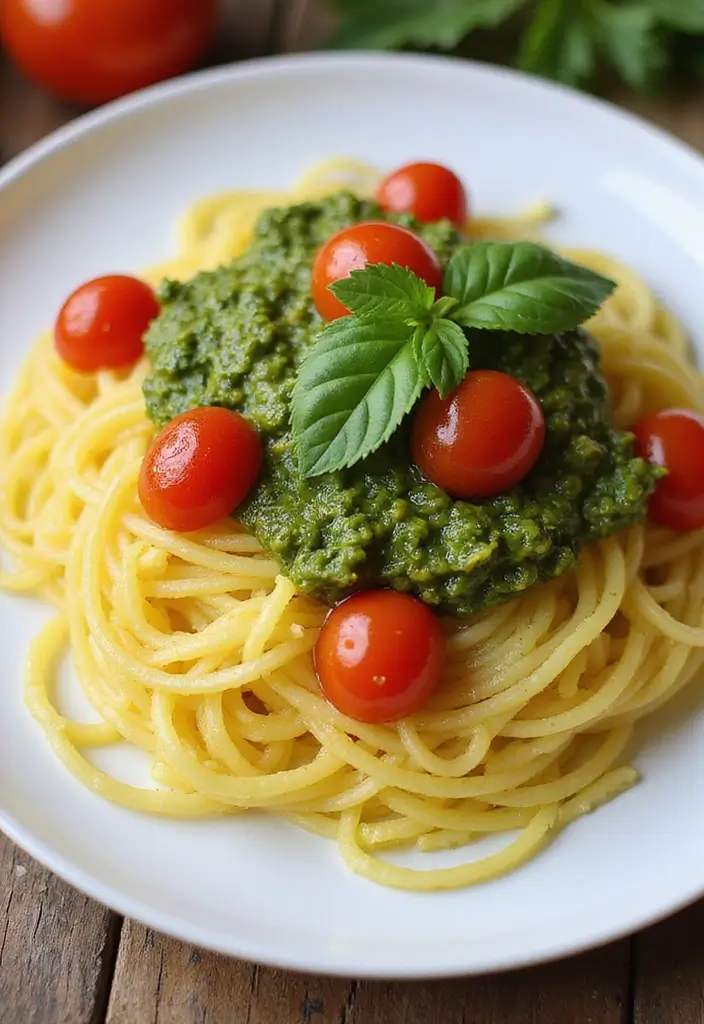
Indulge in the delightful taste of Spaghetti Squash with Pesto, a perfect alternative to regular pasta. This dish not only looks stunning on any table but also offers a healthy twist that everyone will love. The strands of spaghetti squash mimic traditional spaghetti, soaking up the rich, aromatic flavors of pesto beautifully.
To make this dish, start by roasting your spaghetti squash until it’s tender. Once it cools, use a fork to scrape out the strands. Mix these with either homemade or store-bought pesto. For a burst of freshness, toss in halved cherry tomatoes. This colorful side is not just gluten-free and low-carb; it’s also a crowd-pleaser at family gatherings!
Here’s how to create this flavorful dish:
Recipe Overview:
– Servings: 4
– Prep Time: 15 minutes
– Cook Time: 40 minutes
– Total Time: 55 minutes
– Calories: 140 per serving
Nutrition Information:
– Carbohydrates: 10g
– Protein: 4g
– Fat: 10g
– Fiber: 3g
Ingredients:
– 1 spaghetti squash
– 1 cup pesto
– 1 cup cherry tomatoes, halved
– Salt to taste
Instructions:
1. Preheat your oven to 400°F (200°C).
2. Cut the spaghetti squash in half lengthwise and scoop out the seeds.
3. Place the squash cut side down on a baking sheet. Roast for about 30-40 minutes, or until soft.
4. Once cooked, scrape the insides with a fork to create spaghetti-like strands.
5. Toss the strands with pesto and cherry tomatoes. Season with salt before serving.
Tips for the Best Spaghetti Squash with Pesto:
– Make your own pesto for a burst of flavor! It’s simple and worth the effort.
– Add grilled chicken or shrimp for a satisfying, protein-packed meal.
Frequently Asked Questions:
– Can I use other sauces? Absolutely! Your favorite sauce works just fine.
– How do I store leftovers? Keep them in an airtight container in the fridge for up to 3 days.
Enjoy this healthy and delicious dish that brings a new twist to your meals. It’s the perfect side that everyone will rave about!
Spaghetti Squash with Pesto
Editor’s Choice


Filippo Berio Pesto, Organic Classic Basil, 6.7 Ounce Glass Jar, Gluten …
 AmazonCheck Price
14. Bell Pepper Salad
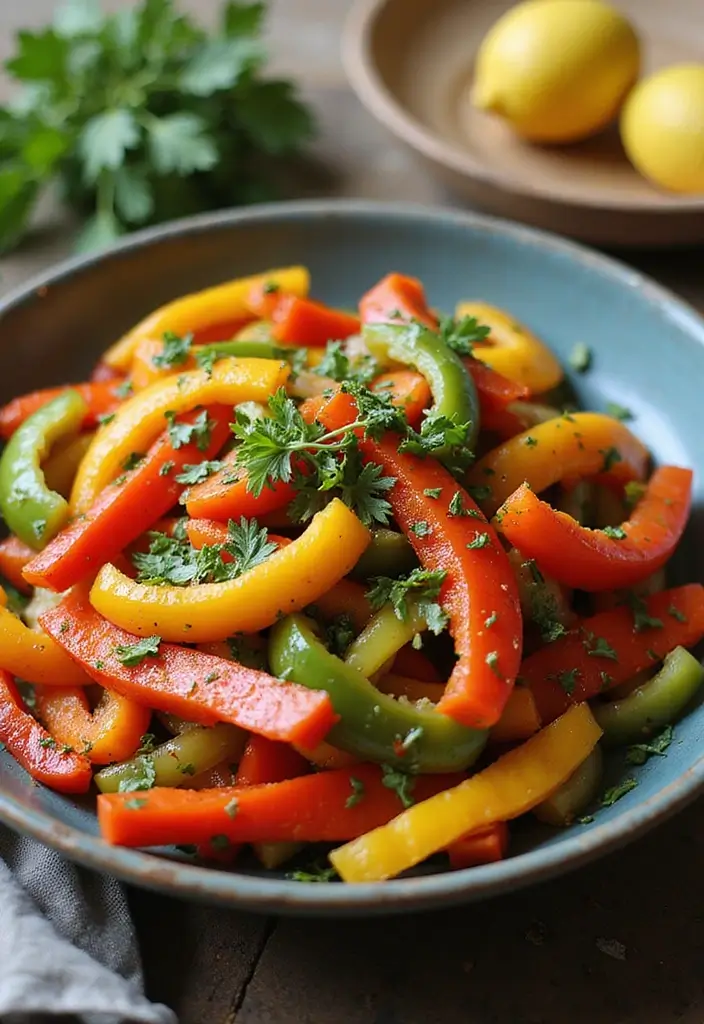
Brighten up your meals with a refreshing Bell Pepper Salad! This crunchy side dish is not only a feast for the eyes but also a powerhouse of vitamins. Its colorful mix of bell peppers adds a delightful crunch to any plate.
To create this salad, chop a variety of bell peppers—red, yellow, and green—alongside some crisp cucumber and zesty red onion. Toss everything together with a splash of olive oil, a squeeze of fresh lemon juice, and your favorite herbs. This simple yet flavorful combination pairs beautifully with grilled meats and seafood, making it a hit at any gathering. Plus, it’s an easy way to get your family to eat more veggies!
Recipe Overview:
– Servings: 4
– Prep Time: 15 minutes
– Cook Time: 0 minutes
– Total Time: 15 minutes
– Calories: 50 per serving
Nutrition Information:
– Carbohydrates: 10g
– Protein: 1g
– Fat: 3g
– Fiber: 2g
Ingredients:
– 1 red bell pepper, diced
– 1 yellow bell pepper, diced
– 1 green bell pepper, diced
– 1/2 cucumber, diced
– 1/4 red onion, finely chopped
– 2 tablespoons olive oil
– Juice of 1 lemon
– Salt and pepper to taste
Step-by-Step Instructions:
1. In a large bowl, combine the diced bell peppers, cucumber, and red onion.
2. Drizzle with olive oil and freshly squeezed lemon juice.
3. Season with salt and pepper, then gently toss everything together.
4. Serve chilled or at room temperature for the best flavor.
Tips for Making the Best Bell Pepper Salad:
– Use a rainbow of colors for a stunning presentation.
– Add feta cheese for a creamy and tangy twist that elevates the dish!
Frequently Asked Questions:
– Can I add other vegetables? Absolutely! Shredded carrots or sliced radishes make great additions.
– How do I store leftovers? Keep them in an airtight container in the fridge for up to 2 days.
Enjoy this vibrant salad that’s not only healthy but also a joy to make. Perfect for picnics, barbecues, or a simple weeknight dinner!
Bell Pepper Salad
Editor’s Choice
![30+ Paleo Side Dish Recipes to Complete Any Meal 73 Bamboo Cutting Boards for Kitchen [Set of 3] Wood Cutting Board for Chop...](https://m.media-amazon.com/images/I/81gLwPfpWbL._AC_UL320_.jpg)
Bamboo Cutting Boards for Kitchen [Set of 3] Wood Cutting Board for Chop…
 Amazon$13.99
OXO Good Grips Salad Spinner | Lettuce Spinner | Fruit Washer | Fruit Wa…
 Amazon$28.99
AOZITA 17oz Glass Olive Oil Bottle Dispenser – 500ml Green Oil and Vineg…
 Amazon$9.99
15. Roasted Beet and Walnut Salad
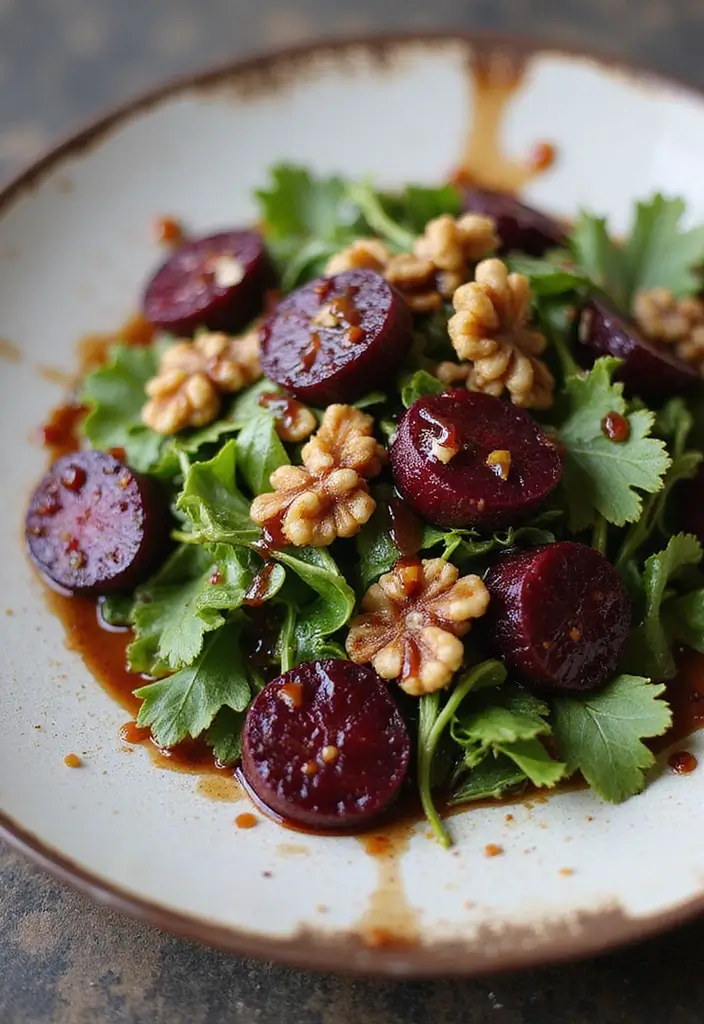
Elevate your dining experience with a stunning Roasted Beet and Walnut Salad. This dish is not just a side; it’s a feast for the eyes and the palate. The rich, earthy sweetness of roasted beets pairs beautifully with crunchy walnuts and peppery arugula. It’s a simple yet sophisticated addition to any meal.
To prepare this vibrant salad, start by roasting fresh beets until they’re tender. Once cooled, peel and slice them into delightful rounds. Combine these beets with toasted walnuts and fresh arugula. Drizzle with a light vinaigrette made from olive oil, balsamic vinegar, and Dijon mustard. The result? A colorful medley that’s as tasty as it is beautiful, making it the perfect centerpiece for family gatherings or casual dinners.
Let’s break down the recipe:
Recipe Overview:
– Servings: 4
– Prep Time: 15 minutes
– Cook Time: 30 minutes
– Total Time: 45 minutes
– Calories: 190 per serving
Nutrition Information:
– Carbohydrates: 15g
– Protein: 5g
– Fat: 15g
– Fiber: 4g
Ingredients:
– 2 medium beets
– 1/4 cup walnuts, toasted
– 2 cups arugula
– 2 tablespoons olive oil
– 1 tablespoon balsamic vinegar
– 1 teaspoon Dijon mustard
– Salt and pepper to taste
Step-by-Step Instructions:
1. Preheat your oven to 400°F (200°C).
2. Wrap the beets in foil and roast them for about 30 minutes until tender.
3. Allow the beets to cool, then peel and slice them into rounds.
4. In a small bowl, whisk together olive oil, balsamic vinegar, Dijon mustard, salt, and pepper.
5. In a large bowl, toss the sliced beets, arugula, and toasted walnuts with the dressing just before serving.
Tips for the Best Salad:
– Use gloves when peeling beets to avoid staining your hands.
– Add crumbled goat cheese for a creamy twist!
Frequently Asked Questions:
– Can I use canned beets? Yes, but fresh roasted beets have a deeper flavor.
– How do I store leftovers? Keep in an airtight container in the fridge for up to 3 days.
This salad is not only delicious; it’s a beautiful way to enjoy healthy ingredients. Perfect for impressing guests or adding a pop of color to your weeknight dinners!
Roasted Beet and Walnut Salad
Editor’s Choice

Brewin Professional Kitchen Knives, 3PC Chef Knife Set Sharp Knives for …
 Amazon$29.98
16. Cucumber and Tomato Salad
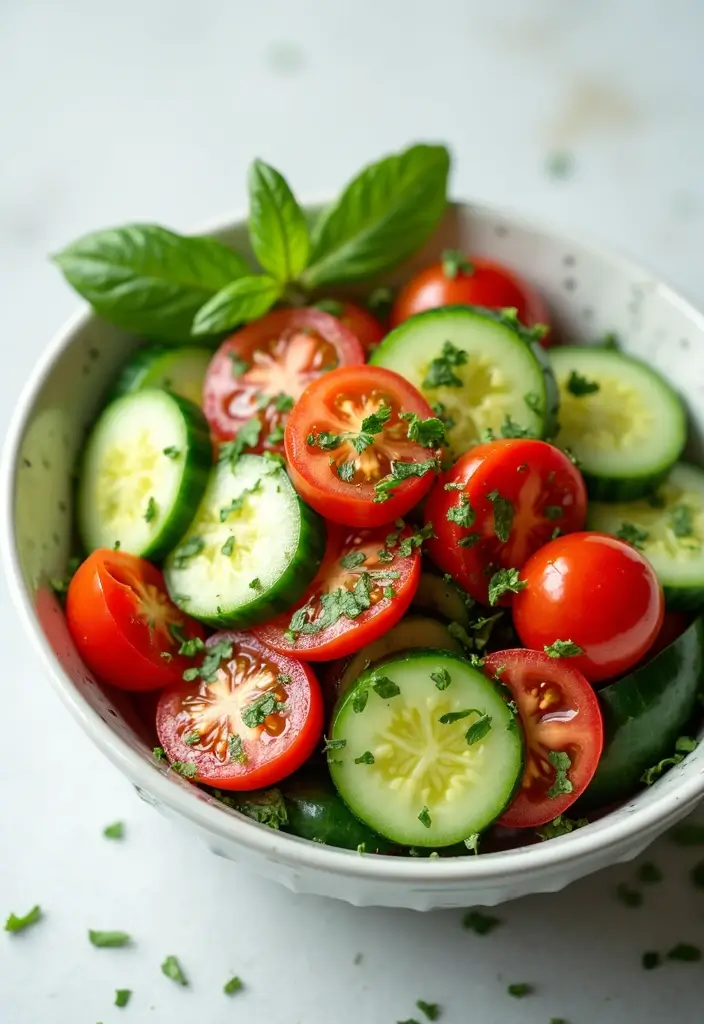
This cucumber and tomato salad is a delightful way to add freshness to any meal. It’s light, crunchy, and bursting with flavor! Imagine biting into juicy tomatoes paired with cool, crisp cucumbers. This salad not only refreshes but also brings a splash of color to your table, making it perfect for warm days or family gatherings.
You can whip it up in just a few minutes! Start by dicing a cucumber and a couple of ripe tomatoes. Toss them together with some finely chopped red onion, a drizzle of olive oil, and a handful of fresh herbs like basil or parsley. The result is a nutrient-rich dish that’s as appealing to the eye as it is to the palate.
Recipe Overview:
– Servings: 4
– Prep Time: 10 minutes
– Cook Time: 0 minutes
– Total Time: 10 minutes
– Calories: 50 per serving
Nutrition Information:
– Carbohydrates: 8g
– Protein: 2g
– Fat: 3g
– Fiber: 2g
Ingredients List:
– 1 large cucumber, diced
– 2 medium tomatoes, diced
– 1/4 red onion, finely chopped
– 2 tablespoons olive oil
– Fresh herbs, chopped (basil or parsley)
– Salt and pepper to taste
Step-by-Step Instructions:
1. In a mixing bowl, combine the diced cucumber, tomatoes, and onion.
2. Drizzle with olive oil and gently toss everything together.
3. Stir in the fresh herbs and season with salt and pepper to your liking.
4. Serve immediately or chill for a bit to enhance the flavors.
Tips for the Best Cucumber and Tomato Salad:
– Choose ripe, in-season tomatoes for maximum flavor.
– Chill your salad before serving for a refreshing taste.
Frequently Asked Questions:
– Can I add other vegetables? Yes! Bell peppers or radishes can add extra crunch and flavor.
– How do I store leftovers? Keep them in an airtight container in the fridge for up to 2 days.
This salad is not only easy to prepare but also a crowd favorite. It’s a simple way to elevate your meals while keeping things healthy and delicious!
Cucumber and Tomato Salad
Editor’s Choice

OXO Good Grips Salad Spinner | Lettuce Spinner | Fruit Washer | Fruit Wa…
 Amazon$28.99
AOZITA 17oz Glass Olive Oil Bottle Dispenser – 500ml Green Oil and Vineg…
 Amazon$9.99
Astercook Knife Set, 13 Pieces Kitchen Knives Set with Healthy Anti-Rust…
 Amazon$19.99
17. Mediterranean Roasted Vegetable Platter
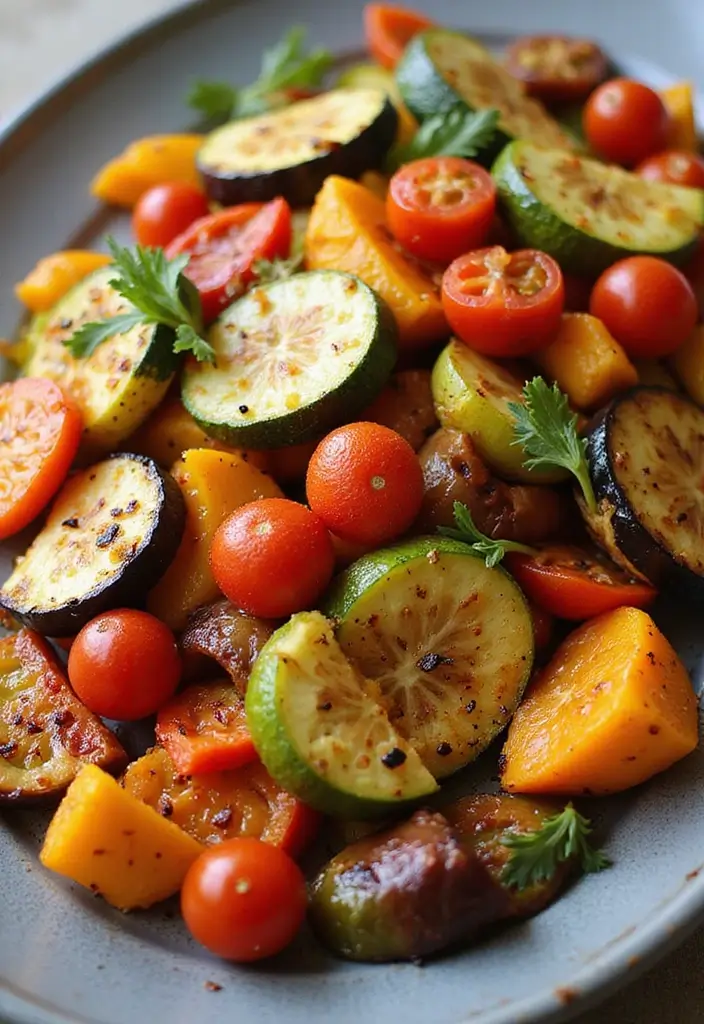
Elevate your meal with a Mediterranean roasted vegetable platter! This vibrant side dish not only looks stunning but also bursts with flavor and nutrients. Picture a colorful mix of zucchini, bell peppers, eggplant, and cherry tomatoes, all drizzled with olive oil and sprinkled with Mediterranean herbs. This dish is perfect for family gatherings, where everyone can dig in and share the deliciousness.
Roasting these veggies brings out their natural sweetness and creates a mouthwatering aroma. Serve this platter warm or at room temperature, and you’ll see your guests coming back for more!
Recipe Overview:
– Servings: 6
– Prep Time: 15 minutes
– Cook Time: 30 minutes
– Total Time: 45 minutes
– Calories: 80 per serving
Nutrition Information:
– Carbohydrates: 12g
– Protein: 2g
– Fat: 5g
– Fiber: 4g
Ingredients List:
– 1 zucchini, sliced
– 1 bell pepper, chopped
– 1 eggplant, chopped
– 1 cup cherry tomatoes
– 2 tablespoons olive oil
– 1 teaspoon dried oregano
– Salt and pepper to taste
Step-by-Step Instructions:
1. Preheat your oven to 425°F (220°C).
2. In a large bowl, toss the zucchini, bell pepper, eggplant, and cherry tomatoes with olive oil, oregano, salt, and pepper.
3. Spread the vegetables evenly on a baking sheet.
4. Roast for 25-30 minutes, until the veggies are tender and slightly charred.
5. Serve warm or at room temperature for the best experience.
Tips for the Best Mediterranean Roasted Vegetables:
– Choose seasonal vegetables for maximum flavor and freshness.
– Drizzle with balsamic glaze before serving for a delightful finish.
Frequently Asked Questions:
– Can I use frozen vegetables? Fresh is best, but frozen can work if needed.
– How do I store leftovers? Keep them in an airtight container in the fridge for up to 3 days.
This Mediterranean roasted vegetable platter is not just a dish; it’s an experience. It’s easy to make, budget-friendly, and sure to impress. Perfect for creating a warm, inviting atmosphere at your next gathering!
Did you know roasting vegetables can boost flavor by up to 40% while preserving nutrients? A Mediterranean roasted veggie platter makes paleo side dish recipes feel festive enough for family gatherings.
Mediterranean Roasted Vegetable Platter
Editor’s Choice

Pompeian Robust Extra Virgin Olive Oil, Contains Polyphenols, First Cold…
 Amazon$15.64
Litehouse Freeze Dried Poultry Herb Blend – Substitute for Fresh Poultry…
 Amazon$8.76
Filippo Berio Glaze with Balsamic Vinegar of Modena, 8.4 Ounce Plastic B…
 Amazon$5.79
18. Cauliflower Tabouli Salad
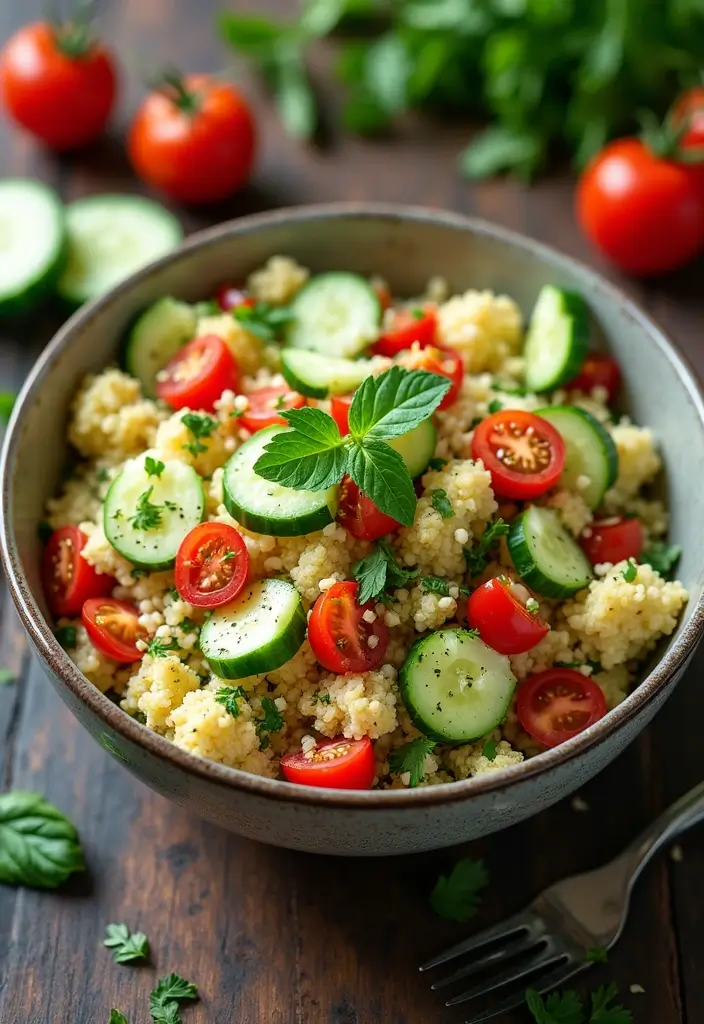
This Cauliflower Tabouli Salad is a delightful take on the classic dish. It’s not just Paleo-friendly; it’s also an explosion of fresh flavors. By swapping out bulgur for riced cauliflower, you create a light and nutritious side that can brighten up any meal.
Imagine biting into crisp cucumber, juicy tomatoes, and fragrant herbs. The bright lemon juice and rich olive oil tie it all together, making it a perfect complement for barbecues or family gatherings. Plus, it’s super easy to whip up in just 15 minutes!
Here’s how to make this refreshing salad:
Recipe Overview:
– Servings: 4
– Prep Time: 15 minutes
– Cook Time: 0 minutes
– Total Time: 15 minutes
– Calories: 50 per serving
Nutrition Information:
– Carbohydrates: 10g
– Protein: 2g
– Fat: 3g
– Fiber: 3g
Ingredients List:
– 1 head cauliflower, riced
– 1 cup parsley, finely chopped
– 1/2 cup mint, finely chopped
– 1/2 cucumber, diced
– 1 cup cherry tomatoes, quartered
– Juice of 1 lemon
– 2 tablespoons olive oil
– Salt to taste
Step-by-Step Instructions:
1. Begin by ricing the cauliflower in a food processor until it resembles grains.
2. In a large bowl, mix the riced cauliflower, parsley, mint, cucumber, and tomatoes together.
3. Drizzle in the lemon juice and olive oil, and sprinkle salt to taste.
4. Toss everything gently until well combined. Serve chilled for the best flavor!
Tips for the Best Cauliflower Tabouli Salad:
– Use fresh herbs for brighter flavors.
– Chill the salad for a refreshing experience!
Frequently Asked Questions:
– Can I prepare this salad in advance? Yes! It tastes even better after a day in the fridge.
– How should I store leftovers? Keep it in an airtight container in the refrigerator for up to three days.
This salad not only satisfies your hunger but also nourishes your body with whole foods. You’ll impress your guests while sticking to your Paleo lifestyle. Enjoy!
Cauliflower Tabouli Salad
Editor’s Choice

Hamilton Beach Food Processor & Vegetable Chopper for Slicing, Shredding…
 Amazon$46.98
Pyrex Essentials (3-Piece) Glass Mixing Bowls Set For Prepping, Baking a…
 Amazon$17.99
Olive Oil Dispenser Bottle, 2 Pcs Glass Olive Oil Dispenser and Vinegar …
 Amazon$8.54
19. Grilled Vegetable Skewers
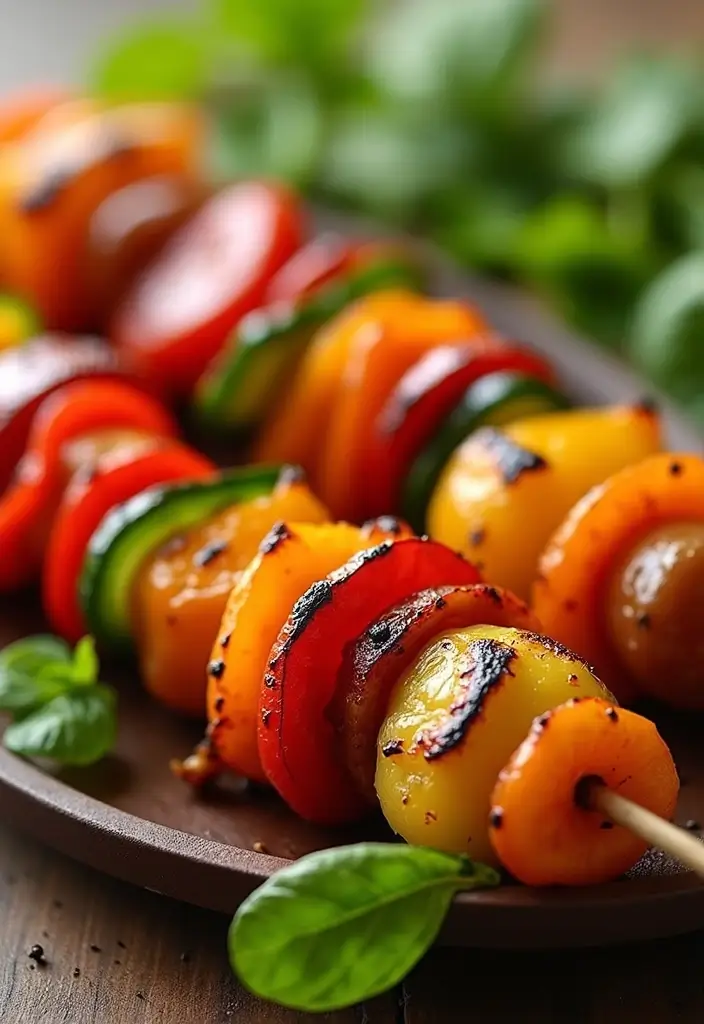
Grilled vegetable skewers are a tasty and colorful way to enjoy your veggies. They bring fun to your outdoor gatherings and barbecues. Imagine bright bell peppers, fresh zucchini, juicy cherry tomatoes, and earthy mushrooms all sizzling on the grill. These skewers not only look great but also burst with flavor, making them a hit with friends and family.
Creating these skewers is a breeze. Simply chop your favorite vegetables, thread them onto skewers, and give them a brush with olive oil. Season with salt, pepper, and your go-to herbs for that extra zing. Grill them until they’re tender and have a delightful char. You can serve these skewers as a side dish or even as the star of your meal.
Here’s how to make your own grilled vegetable skewers:
Recipe Overview:
– Servings: 4
– Prep Time: 15 minutes
– Cook Time: 15 minutes
– Total Time: 30 minutes
– Calories: 70 per serving
Nutrition Information:
– Carbohydrates: 10g
– Protein: 2g
– Fat: 3g
– Fiber: 3g
Ingredients:
– 1 bell pepper, cut into chunks
– 1 zucchini, sliced
– 1 cup cherry tomatoes
– 1 cup mushrooms, halved
– 2 tablespoons olive oil
– Salt and pepper to taste
Instructions:
1. Preheat your grill to medium-high heat.
2. In a bowl, toss the chopped veggies with olive oil, salt, and pepper.
3. Thread the vegetables onto skewers, alternating for color.
4. Grill for about 10-15 minutes, turning occasionally, until tender.
Tips for Perfect Skewers:
– Soak wooden skewers in water for 30 minutes to prevent burning.
– Mix and match vegetables based on what you love or have on hand!
Frequently Asked Questions:
– Can I add protein to the skewers? Yes! Chicken or shrimp works wonderfully.
– How do I store leftovers? Place them in an airtight container in the fridge for up to 2 days.
With these grilled vegetable skewers, you’ll have a vibrant and delicious side that’s easy to make and sure to impress!
Fun fact: Grilled vegetable skewers punch up veggie intake by about 40% at outdoor gatherings. They’re colorful, easy to prep, and cook in minutes, making paleo side dish recipes a crowd-pleaser. Grab peppers, zucchini, tomatoes, and mushrooms, thread, brush with olive oil, and grill.
Grilled Vegetable Skewers
Editor’s Choice

Metal Skewer for Grilling,Kabob Skewer,Flat BBQ Barbecue Skewer,Grilling…
 Amazon$7.99
TrendPlain 16oz/470ml Glass Olive Oil Sprayer for Cooking – 2 in 1 Olive…
 Amazon$8.99
20. Spinach and Strawberry Salad
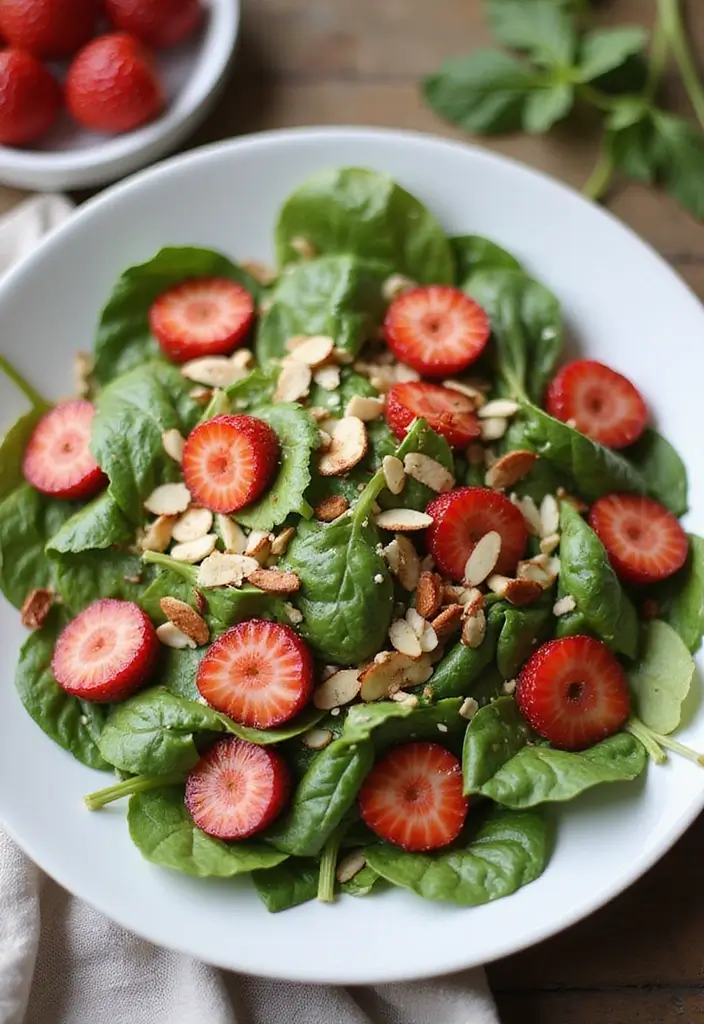
Imagine a sunny afternoon, and you’re at a picnic or family gathering. You need a side dish that dazzles and brings smiles. Look no further than this refreshing Spinach and Strawberry Salad! With its mix of sweet strawberries and crunchy almonds, this salad is a delightful addition to any meal. It’s light, colorful, and packed with nutrients—perfect for warm weather and outdoor fun.
Start by tossing together fresh baby spinach and vibrant sliced strawberries. Add some sliced almonds for that satisfying crunch. Then, whip up a simple vinaigrette with balsamic vinegar, olive oil, and a hint of honey. Drizzle it over the salad and watch the colors pop! This dish is not just tasty; it’s a feast for your eyes too.
Ready to make it? Here’s how:
Recipe Overview:
– Servings: 4
– Prep Time: 10 minutes
– Cook Time: 0 minutes
– Total Time: 10 minutes
– Calories: 100 per serving
Nutrition Information:
– Carbohydrates: 12g
– Protein: 3g
– Fat: 5g
– Fiber: 3g
Ingredients:
– 4 cups baby spinach
– 1 cup strawberries, sliced
– 1/4 cup almonds, sliced
– 2 tablespoons balsamic vinegar
– 2 tablespoons olive oil
– 1 tablespoon honey
– Salt to taste
Step-by-Step Instructions:
1. In a large bowl, mix the spinach, sliced strawberries, and almonds.
2. In a separate small bowl, whisk together the balsamic vinegar, olive oil, honey, and salt.
3. Pour the vinaigrette over the salad and toss gently until everything is well coated.
4. Serve immediately to enjoy the fresh flavors!
Tips for the Best Spinach and Strawberry Salad:
– Use ripe, juicy strawberries for maximum sweetness.
– Consider adding crumbled feta cheese for a creamy touch!
Frequently Asked Questions:
– Can I use other fruits? Yes! Blueberries or peaches work wonderfully too.
– How do I store leftovers? Keep them in an airtight container in the fridge for up to 1 day.
This salad not only complements your main dishes but also makes you feel good about eating healthy. It’s a win-win for any meal! Enjoy the burst of flavors and colors on your plate!
Spinach and Strawberry Salad
Editor’s Choice

365 by Whole Foods Market, Balsamic Vinegar Of Modena, 16.9 Fl Oz
 AmazonCheck Price
Pompeian USDA Organic Robust Extra Virgin Olive Oil, Contains Polyphenol…
 Amazon$5.52
OXO Good Grips Salad Spinner | Lettuce Spinner | Fruit Washer | Fruit Wa…
 Amazon$28.99
21. Stuffed Bell Peppers
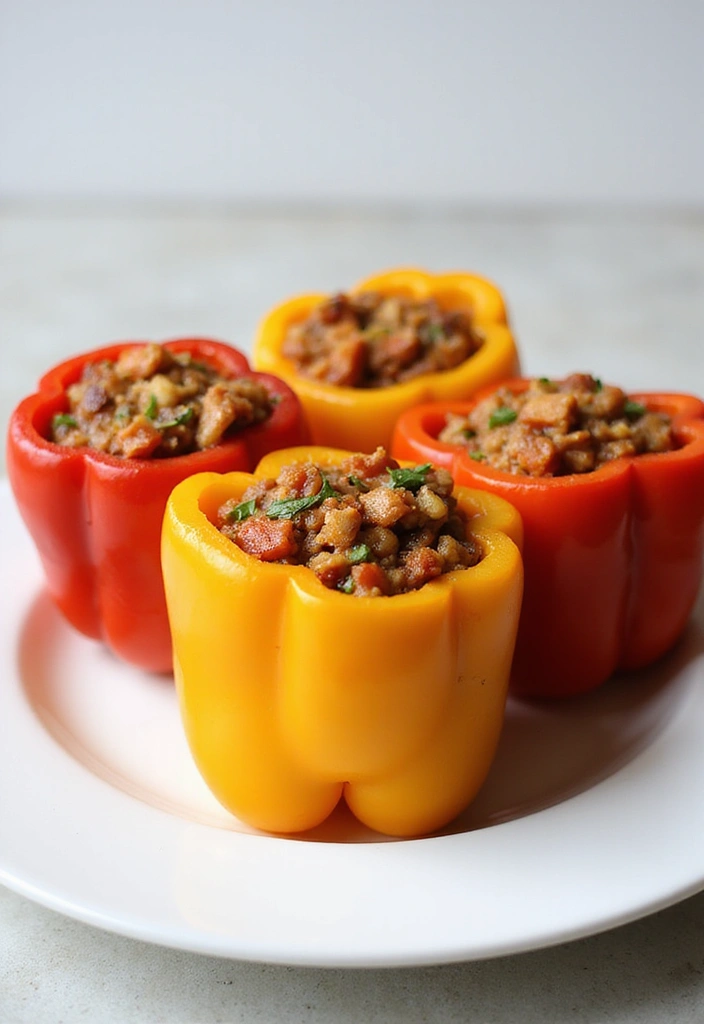
Get ready to enjoy stuffed bell peppers, a delightful side dish that can easily steal the show at any meal! These colorful veggies are not just pretty; they are packed with flavor and nutrients. You can customize them to fit your taste, making them a hit for everyone at the table.
To make these tasty stuffed peppers, start by hollowing out some vibrant bell peppers—red, yellow, or green all work beautifully. Fill them with a savory mix of ground meat, cauliflower rice, onions, and your favorite spices. Bake until the peppers are tender and the filling is perfectly cooked. The result? A deliciously colorful dish that’s both nutritious and satisfying, perfect for family dinners or gatherings with friends.
Recipe Overview:
– Servings: 4
– Prep Time: 20 minutes
– Cook Time: 40 minutes
– Total Time: 60 minutes
– Calories: 300 per serving
Nutrition Information:
– Carbohydrates: 25g
– Protein: 20g
– Fat: 10g
– Fiber: 5g
Ingredients List:
– 4 bell peppers (pick your favorite colors)
– 1 lb ground meat (beef, turkey, or chicken)
– 1 cup cauliflower rice
– 1/2 onion, chopped
– 2 cloves garlic, minced
– 1 teaspoon Italian seasoning
– Salt and pepper to taste
Step-by-Step Instructions:
1. Preheat your oven to 375°F (190°C).
2. Slice the tops off the bell peppers and remove the seeds.
3. In a skillet, sauté the onions and garlic until they become translucent.
4. Add the ground meat, cauliflower rice, Italian seasoning, salt, and pepper. Cook until the meat is browned.
5. Stuff the mixture into each pepper and place them upright in a baking dish.
6. Bake for 30-40 minutes until the peppers are tender and the filling is bubbly.
Tips for the Best Stuffed Peppers:
– Top with cheese for a melty, delicious finish (if you allow it).
– Try different spices like cumin or paprika for a flavor twist.
Frequently Asked Questions:
– Can I freeze stuffed peppers? Yes! Freeze them before baking for later meals.
– How do I store leftovers? Keep them in an airtight container in the fridge for up to 3 days.
Enjoy these stuffed bell peppers as a healthy, filling side that everyone will love!
Stuffed Bell Peppers
Editor’s Choice

Kitchen & Love Organic Riced Cauliflower 8 oz (6 Pack) | Low Carb, Low C…
 Amazon$27.69

Badia Italian Seasoning, Mediterranean Blend, 5 oz – Classic Mix of Herb…
 Amazon$9.00
22. Roasted Garlic Mashed Cauliflower
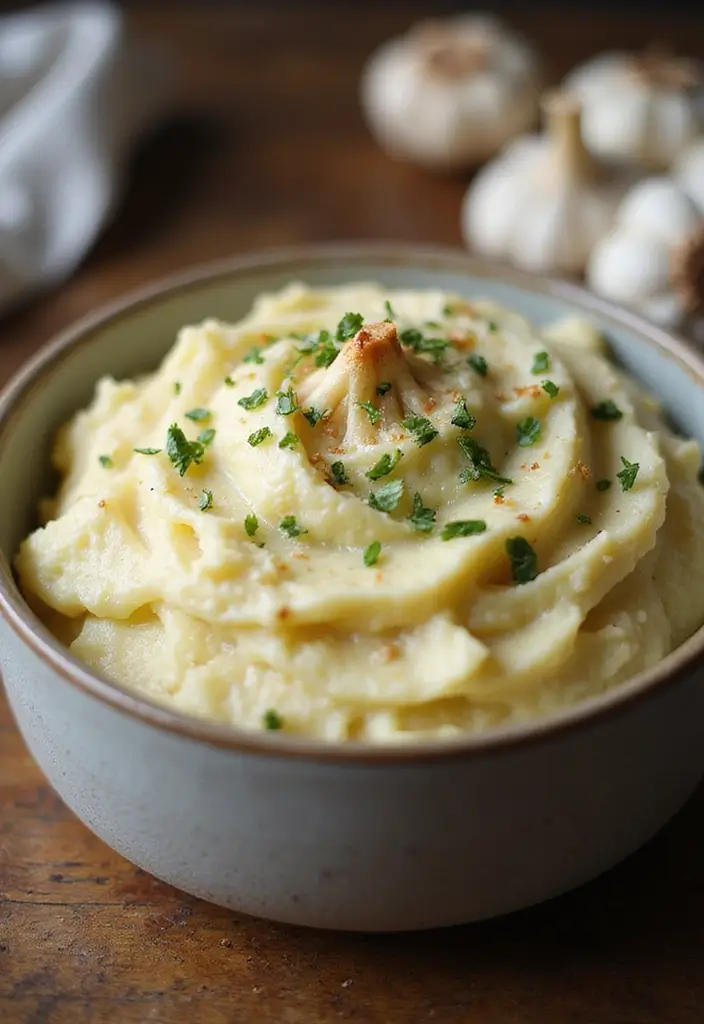
Looking for a creamy side dish that won’t wreck your low-carb goals? Roasted garlic mashed cauliflower is your answer! This dish brings all the comfort of traditional mashed potatoes but with fewer carbs and tons of flavor. Imagine rich, buttery goodness that everyone will love, making it a hit at family dinners or holiday gatherings.
To create this delicious side, start by roasting garlic until it’s soft and caramelized. Then, blend it with steamed cauliflower, a drizzle of olive oil, and just a splash of cream. The result? A dreamy mash that’s as indulgent as it is healthy.
Here’s how to whip it up:
Recipe Overview:
– Servings: 4
– Prep Time: 10 minutes
– Cook Time: 25 minutes
– Total Time: 35 minutes
– Calories: 120 per serving
Nutrition Information:
– Carbohydrates: 8g
– Protein: 3g
– Fat: 9g
– Fiber: 4g
Ingredients List:
– 1 head of cauliflower, cut into florets
– 1 whole garlic bulb
– 2 tablespoons olive oil
– 1/4 cup cream (or coconut milk for a dairy-free option)
– Salt and pepper to taste
Step-by-Step Instructions:
1. Preheat your oven to 400°F (200°C).
2. Wrap the garlic bulb in foil and roast it for about 30 minutes or until soft.
3. Steam the cauliflower until tender, which takes about 10-15 minutes.
4. In a blender, combine the roasted garlic, steamed cauliflower, olive oil, and cream. Blend until smooth and creamy.
5. Season with salt and pepper to taste, then serve warm and enjoy!
Tips for Making the Best Roasted Garlic Mashed Cauliflower:
– Add herbs like thyme or chives for a fresh flavor boost.
– Keep blending until you reach your desired creaminess!
Frequently Asked Questions:
– Can I make this ahead of time? Yes! Just reheat it before serving.
– What can I substitute for cream? Almond milk works well for a dairy-free option!
This roasted garlic mashed cauliflower will impress your family and friends. It’s creamy, flavorful, and fits perfectly into your Paleo meal plan. Enjoy your delicious, guilt-free side dish!
Roasted Garlic Mashed Cauliflower
Editor’s Choice

Pompeian Robust Extra Virgin Olive Oil, Contains Polyphenols, First Cold…
 Amazon$15.64
Ninja BL660 Professional Compact Smoothie & Food Processing Blender, 110…
 Amazon$99.99
Vegetable Steamer Basket, Premium Stainless Steel Veggie Steamer Basket …
 Amazon$7.98
23. Fresh Fruit Salad
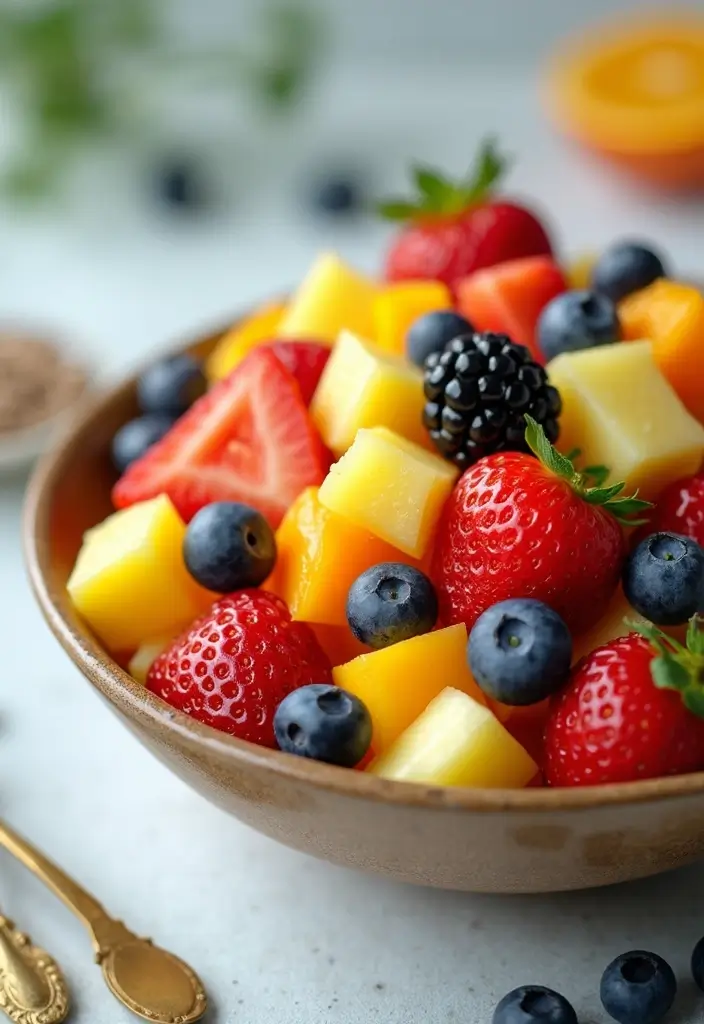
Imagine a dish that captures the essence of summer—refreshing, colorful, and bursting with flavor. That’s exactly what a fresh fruit salad offers. This vibrant side dish not only brightens up any table but also serves as a delightful palate cleanser. You can combine seasonal fruits like juicy watermelon, sweet strawberries, tangy kiwi, and tropical pineapple for a mix that everyone will love. Drizzle it with honey and a squeeze of lime for that perfect zing. Pinterest is filled with stunning fruit salad presentations, and you can easily create your own with just a bit of creativity.
To make this dish even better, choose ripe fruits for the best taste. If you’re on a budget, local farmers’ markets often have great deals on fresh produce. Plus, this healthy addition to your meal brings a burst of nutrition without breaking the bank. It’s perfect for summer gatherings, picnics, or even as a light dessert after a hearty meal.
Here’s how to whip up your fresh fruit salad:
Ingredients:
– 1 cup watermelon, cubed
– 1 cup strawberries, halved
– 1 cup kiwi, sliced
– 1 cup pineapple, cubed
– 2 tablespoons honey
– Juice of 1 lime
Instructions:
1. In a large bowl, mix all the prepared fruits together.
2. Drizzle with honey and lime juice.
3. Gently toss everything until well combined.
4. Serve immediately for the freshest taste!
Tips for the Best Fresh Fruit Salad:
– Use ripe, in-season fruits for maximum flavor.
– Add fresh mint leaves for a burst of color and flavor.
– Try mixing in other fruits like blueberries or mangoes for variety.
– Serve in a clear bowl to showcase the beautiful colors.
Frequently Asked Questions:
– Can I use frozen fruit? While fresh is best, frozen works in a pinch.
– How do I store leftovers? Keep in an airtight container in the fridge for up to two days.
Now you have a simple yet delicious fresh fruit salad that will impress your guests and brighten your meals!
Fresh Fruit Salad
Editor’s Choice

EHOMEA2Z Commercial-Grade Tempered Glass Honey Dispenser, 14 Ounce Honey…
 Amazon$23.99
Fruit Slicer Cup, Speed Cutter for Strawberry Banana Grape Egg, Stainles…
 Amazon$6.99
24. Pickled Vegetables
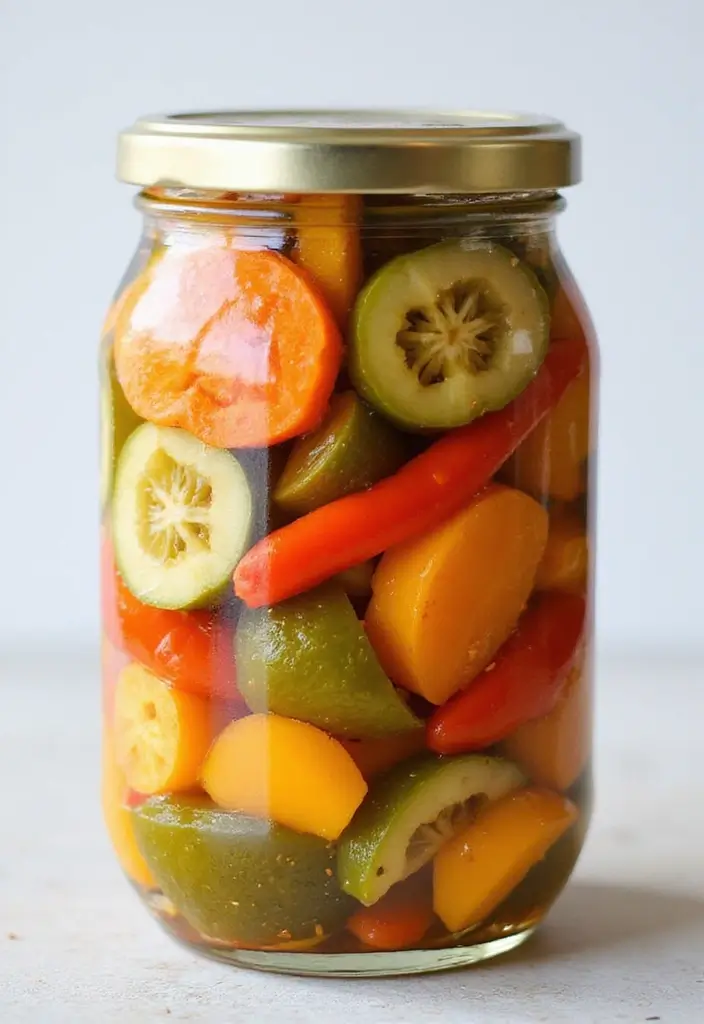
Pickled vegetables are a delightful addition to any meal. Their tangy crunch can liven up your plate, making them a perfect side for gatherings or a simple family dinner. Picture vibrant cucumber slices, colorful carrots, and crisp radishes, all bursting with flavor. These little gems not only taste great but also add a splash of color to your table, making your meals visually appealing.
Creating quick pickles is easy and fun! Just grab your favorite vegetables and follow this simple recipe. You’ll love how quickly they come together, and the best part? They’re incredibly refreshing.
Recipe Overview:
– Servings: 4
– Prep Time: 15 minutes
– Cook Time: 0 minutes
– Total Time: 15 minutes
– Calories: 30 per serving
Nutrition Information:
– Carbohydrates: 5g
– Protein: 1g
– Fat: 0g
– Fiber: 1g
Ingredients List:
– 1 cucumber, sliced
– 2 carrots, sliced
– 1 cup radishes, sliced
– 1 cup vinegar
– 1 cup water
– 1 tablespoon salt
– 1 tablespoon sugar
Step-by-Step Instructions:
1. In a jar, mix vinegar, water, salt, and sugar until everything dissolves.
2. Add your sliced vegetables to the jar, making sure they are fully submerged.
3. Seal the jar and place it in the fridge for at least 2 hours before serving.
Want to make the best pickled vegetables? Here are some tips:
– Experiment with different vegetables like bell peppers or red onions for unique flavors.
– Add spices such as mustard seeds or garlic for an extra kick!
Frequently Asked Questions:
– How long do pickled vegetables last? They can last a few weeks in the fridge.
– Can I use other vinegars? Absolutely! Apple cider vinegar is a great alternative.
Try making these pickled vegetables at home. They’re not just delicious; they’re a fun project that brightens up any meal!
Pickled Vegetables
Editor’s Choice

32 oz Wide Mouth Mason Jars,4 Pack Glass Pickling Jars with Airtight Lid…
 Amazon$25.99
McCormick Culinary Pickling Spice, 12 oz – One 12 Ounce Container of Mix…
 Amazon$11.25
25. Garlic Parmesan Roasted Broccoli
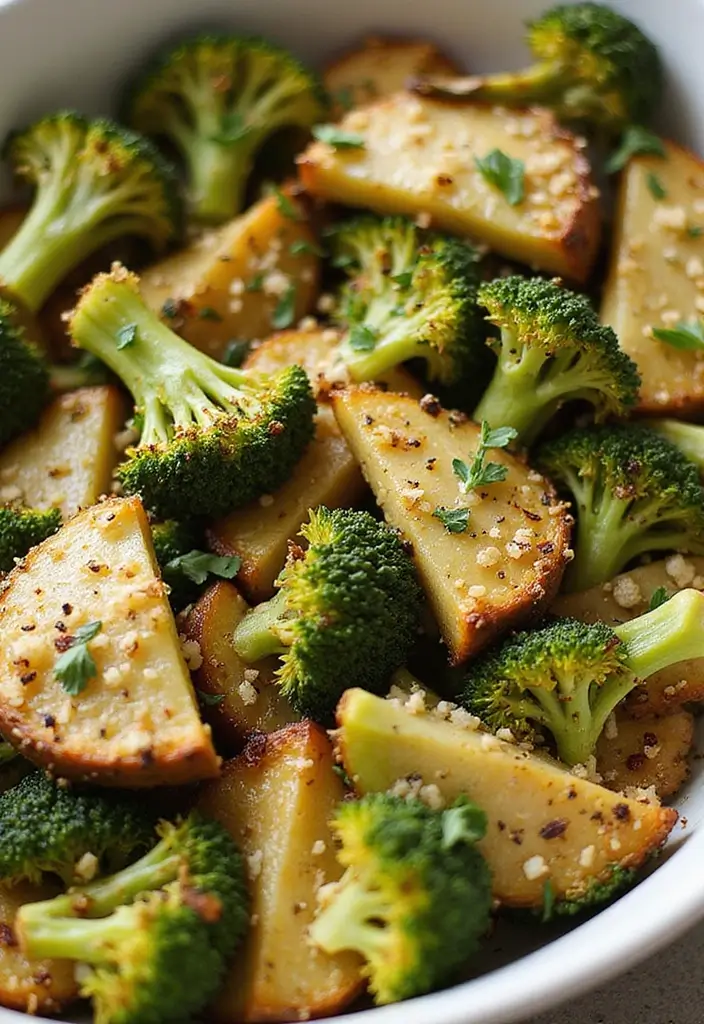
Garlic Parmesan Roasted Broccoli is a tasty way to enjoy this healthy vegetable. You’ll love how simple it is to prepare. With a few ingredients, you can turn plain broccoli into a dish that steals the show at any meal!
Start by tossing fresh broccoli florets with olive oil, minced garlic, and a sprinkle of grated parmesan cheese. Spread the mixture on a baking sheet, then roast it until the edges are crispy and golden brown. The garlic adds a savory flavor, while the parmesan brings a rich, cheesy finish. Trust me, you’ll find it hard to resist going back for seconds!
This side dish pairs perfectly with chicken, fish, or even a hearty steak. It’s not just delicious; it’s also a great way to boost your veggie intake without sacrificing flavor!
Recipe Overview:
– Servings: 4
– Prep Time: 10 minutes
– Cook Time: 20 minutes
– Total Time: 30 minutes
– Calories: 120 per serving
Nutrition Information:
– Carbohydrates: 8g
– Protein: 5g
– Fat: 9g
– Fiber: 3g
Ingredients List:
– 1 lb broccoli florets
– 2 tablespoons olive oil
– 3 cloves garlic, minced
– 1/4 cup parmesan cheese, grated
– Salt and pepper to taste
Step-by-Step Instructions:
1. Preheat your oven to 425°F (220°C).
2. In a large bowl, combine broccoli florets, olive oil, minced garlic, parmesan, salt, and pepper. Toss well until the broccoli is evenly coated.
3. Spread the broccoli in a single layer on a baking sheet.
4. Roast for 15-20 minutes, or until the broccoli is crispy and golden brown.
Tips for the Best Garlic Parmesan Roasted Broccoli:
– Don’t overcrowd the baking sheet; this helps the broccoli roast evenly.
– Add a touch of lemon zest just before serving for a fresh, bright flavor.
Frequently Asked Questions:
– Can I use frozen broccoli? Fresh broccoli is best, but frozen can work too—just adjust the cooking time!
– How do I store leftovers? Keep them in an airtight container in the fridge for up to 3 days.
Enjoy this delightful side dish that makes healthy eating both enjoyable and delicious!
Garlic Parmesan Roasted Broccoli
Editor’s Choice

YARRAMATE 16oz/470ml Glass Olive Oil Sprayer for Cooking with Stickers, …
 Amazon$8.99
Zulay Kitchen Premium Garlic Press Set – Rust Proof & Dishwasher Safe Pr…
 Amazon$14.99
GoodCook Everyday Nonstick Carbon Steel Baking Sheet Set, 3 Pack – Small…
 Amazon$17.99
26. Tomato Basil Soup
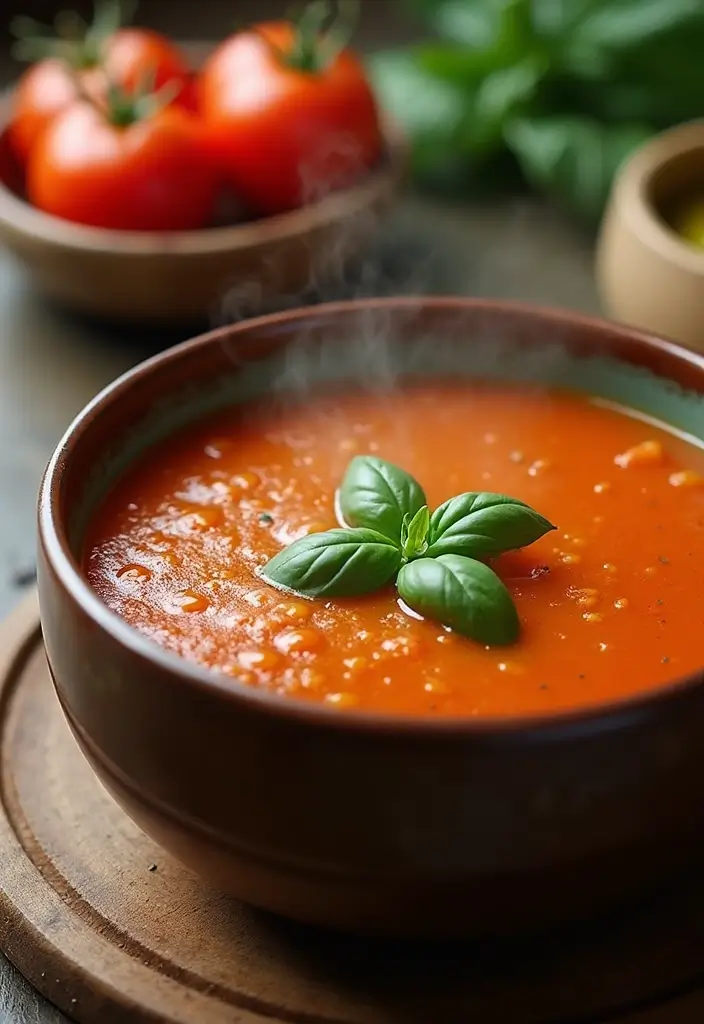
Craving a warm and comforting side dish? This Tomato Basil Soup is just what you need! It’s perfect for family gatherings or a cozy night in. The rich flavors of fresh tomatoes and basil will warm your heart and please your taste buds.
To whip up this delicious soup, start by sautéing onions and garlic until they’re soft and fragrant. Then, add in ripe tomatoes, vegetable broth, and fresh basil. Let it simmer gently until everything is tender. Finally, blend it all together until smooth and creamy. Drizzle a little olive oil on top and sprinkle with fresh basil for an extra pop of flavor. Enjoy it on its own or pair it with your favorite main dish!
Here’s how to make it:
Recipe Overview:
– Servings: 4
– Prep Time: 15 minutes
– Cook Time: 30 minutes
– Total Time: 45 minutes
– Calories: 100 per serving
Nutrition Information:
– Carbohydrates: 9g
– Protein: 3g
– Fat: 5g
– Fiber: 3g
Ingredients List:
– 4 cups fresh tomatoes, chopped
– 1 onion, diced
– 3 cloves garlic, minced
– 2 cups vegetable broth
– 1/4 cup fresh basil, chopped
– Salt and pepper to taste
Step-by-Step Instructions:
1. In a large pot, heat a splash of olive oil and sauté the onions and garlic until they are translucent.
2. Add in the chopped tomatoes and vegetable broth. Let it simmer for about 30 minutes, until everything is tender.
3. Stir in the fresh basil and blend the mixture until it’s smooth and creamy.
4. Season with salt and pepper to taste before serving.
Tips for Making the Best Tomato Basil Soup:
– Use ripe tomatoes for a richer taste.
– Top with a dollop of coconut cream for added creaminess!
Frequently Asked Questions:
– Can I use canned tomatoes? Yes! Canned tomatoes work well if fresh ones aren’t available.
– How do I store leftovers? Keep in an airtight container in the fridge for up to 4 days.
This Tomato Basil Soup is not only easy to make but also a delightful addition to any meal. Enjoy every spoonful!
Tomato Basil Soup
Editor’s Choice

Bonsenkitchen Hand Blender, Immersion Blender with 2 Mixing Speed, Elect…
 Amazon$14.44
Pompeian Robust Extra Virgin Olive Oil, Contains Polyphenols, First Cold…
 Amazon$15.64
Kirecoo Stainless Steel Stock Pot – 8 Quart Heavy Duty Induction Cooking…
 Amazon$29.99
27. Honey Mustard Roasted Carrots
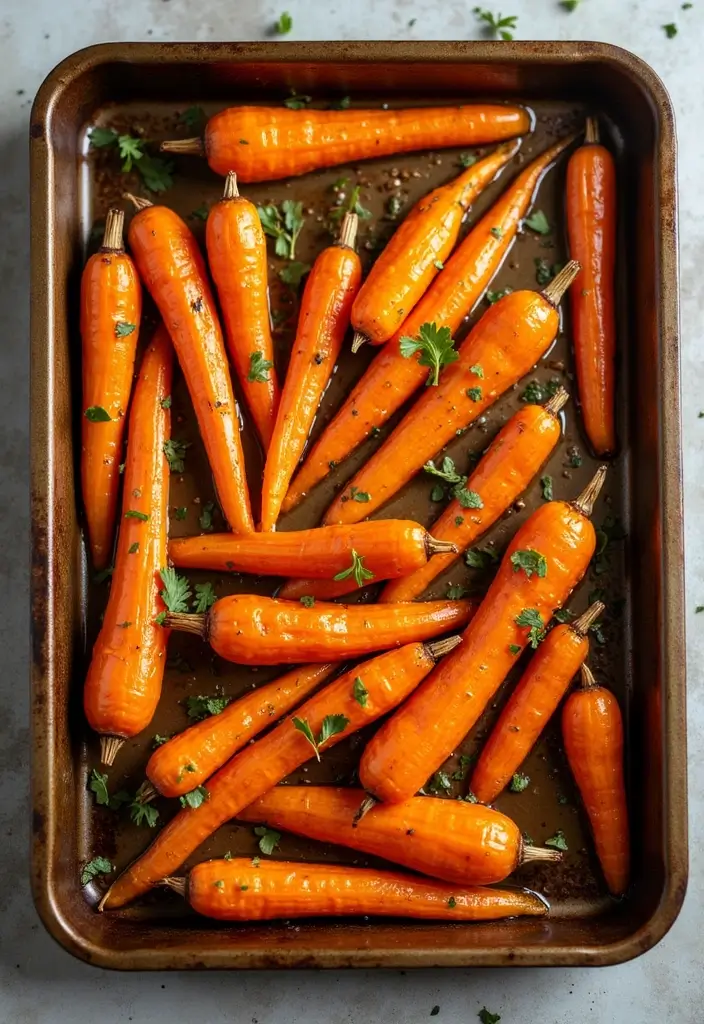
Looking for a side dish that combines sweetness with a zesty kick? Honey Mustard Roasted Carrots are the answer! These colorful and flavorful carrots can brighten up any meal. Their sweet and tangy taste makes them a hit at family dinners or casual gatherings. Plus, they’re incredibly easy to prepare!
Simply toss baby carrots with olive oil, honey, and Dijon mustard, then roast them to perfection. As they cook, they become tender and slightly caramelized, creating a wonderful contrast of flavors that will have everyone coming back for seconds.
Let’s break down the recipe details so you can whip these up in no time!
Recipe Overview:
– Servings: 4
– Prep Time: 10 minutes
– Cook Time: 25 minutes
– Total Time: 35 minutes
– Calories: 100 per serving
Nutrition Information:
– Carbohydrates: 15g
– Protein: 1g
– Fat: 4g
– Fiber: 3g
Ingredients:
– 1 lb baby carrots
– 2 tablespoons olive oil
– 1 tablespoon honey
– 1 tablespoon Dijon mustard
– Salt and pepper to taste
Step-by-Step Instructions:
1. Preheat your oven to 425°F (220°C).
2. In a bowl, mix the baby carrots with olive oil, honey, Dijon mustard, salt, and pepper.
3. Spread the mixture evenly on a baking sheet.
4. Roast in the oven for 25 minutes until the carrots are tender and slightly caramelized.
5. Serve warm and enjoy the compliments!
Tips for the Best Honey Mustard Roasted Carrots:
– Adjust the amount of honey to suit your taste preference.
– Garnish with fresh herbs like parsley or thyme for an extra burst of flavor!
Frequently Asked Questions:
– Can I use regular carrots? Yes, just chop them into similar-sized pieces for even cooking.
– How do I store leftovers? Keep them in an airtight container in the fridge for up to 3 days.
Now you have a delicious, colorful side dish that’s sure to please everyone at your table. Enjoy your cooking adventure with these honey mustard roasted carrots!
Honey Mustard Roasted Carrots
Editor’s Choice

Pompeian Robust Extra Virgin Olive Oil, Contains Polyphenols, First Cold…
 Amazon$15.64

Oneroot 100% Organic Canadian Wildflower Honey – 17.6 Oz/1.1 Lbs, Unheat…
 AmazonCheck Price
28. Balsamic Roasted Vegetables
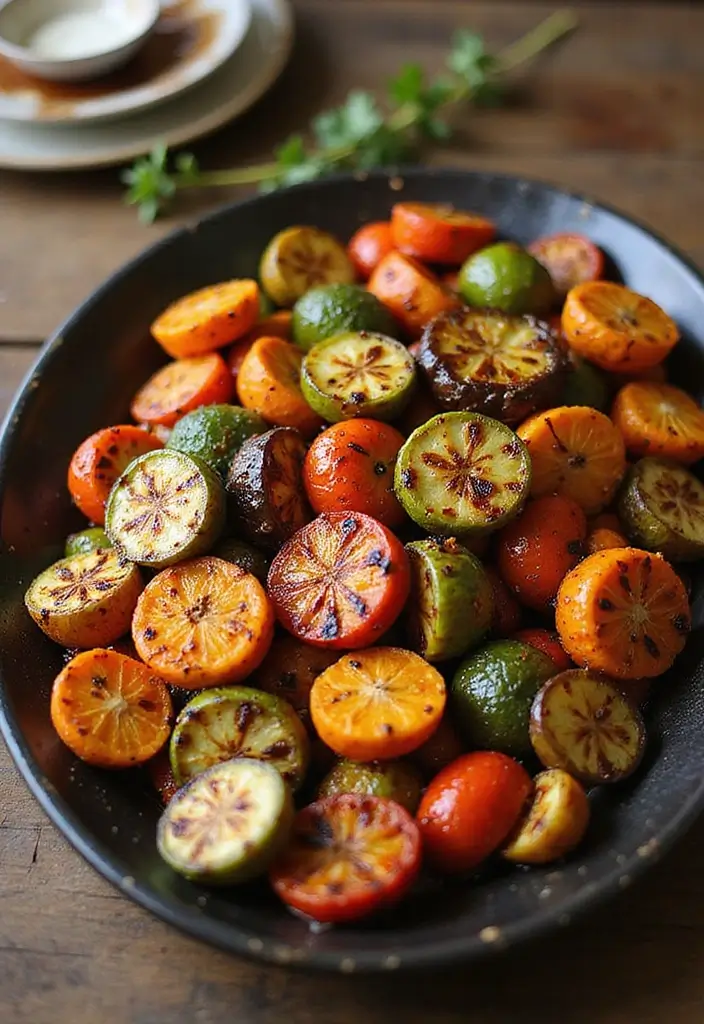
Balsamic roasted vegetables are a delicious way to elevate your meals. This savory side dish features a perfect blend of sweet and tangy flavors, thanks to the balsamic reduction that caramelizes the veggies beautifully. Imagine biting into tender zucchini, colorful bell peppers, and sweet carrots that burst with flavor. These veggies not only taste great but also look stunning on your plate, making them a feast for the eyes too!
To make the best balsamic roasted vegetables, you don’t need to break the bank. Gather a mix of fresh vegetables from your local market. This dish is incredibly versatile, allowing you to adapt it with whatever you have on hand. Plus, it pairs perfectly with grilled meats or can serve as a hearty base for salads. It’s perfect for family dinners or casual gatherings.
Recipe Overview:
– Servings: 4
– Prep Time: 10 minutes
– Cook Time: 30 minutes
– Total Time: 40 minutes
– Calories: 90 per serving
Nutrition Information:
– Carbohydrates: 14g
– Protein: 2g
– Fat: 4g
– Fiber: 4g
Ingredients:
– 1 zucchini, chopped
– 1 bell pepper, chopped
– 1 carrot, chopped
– 2 tablespoons olive oil
– 2 tablespoons balsamic vinegar
– Salt and pepper to taste
Instructions:
1. Preheat your oven to 400°F (200°C).
2. In a large bowl, toss the chopped vegetables with olive oil, balsamic vinegar, salt, and pepper.
3. Spread the mixture evenly on a baking sheet.
4. Roast in the oven for 25-30 minutes, or until the veggies are tender and caramelized.
5. Serve warm or let them cool to room temperature, then add them to your salad.
Tips for Perfect Balsamic Roasted Vegetables:
– Don’t overcrowd the baking sheet for even roasting.
– Add fresh herbs like thyme or rosemary for an extra flavor boost!
Frequently Asked Questions:
– Can I use frozen vegetables? Fresh is best, but frozen can work in a pinch.
– How do I store leftovers? Keep them in an airtight container in the fridge for up to 3 days.
With these tips and this simple recipe, you’re all set to impress your family and friends with a healthy, tasty side dish. Enjoy the ease and flavor of balsamic roasted vegetables at your next meal!
Balsamic Roasted Vegetables
Editor’s Choice

GoodCook Everyday Nonstick Carbon Steel Baking Sheet Set, 3 Pack – Small…
 Amazon$17.99

Fullstar The Original Pro Chopper – Vegetable Chopper and Spiralizer, Fo…
 Amazon$29.99
29. Spicy Quinoa and Black Bean Salad
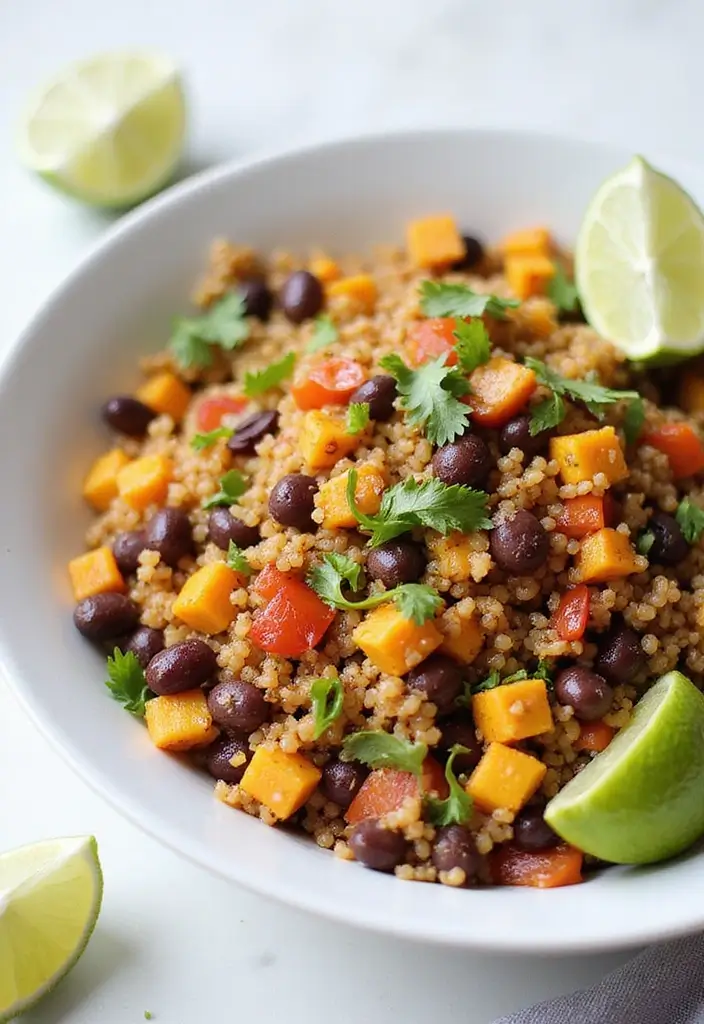
Discover the vibrant and satisfying flavors of Spicy Quinoa and Black Bean Salad. This hearty dish is not just delicious; it’s a colorful addition to any meal. Whether you’re hosting a family gathering or enjoying a quiet dinner, this salad shines. Serve it warm or chilled, and watch your guests come back for seconds!
Start with fluffy quinoa as your base. Mix in hearty black beans, sweet corn, and crunchy bell peppers. Drizzle everything with a zesty lime dressing that adds a refreshing kick. The spices elevate the dish, making it a standout side. Plus, it’s perfect for meal prep, so you can enjoy it throughout the week!
Let’s break down the recipe:
Ingredients:
– 1 cup quinoa, rinsed
– 1 can black beans, drained and rinsed
– 1 cup corn (fresh or frozen)
– 1 bell pepper, chopped
– Juice of 2 limes
– 2 tablespoons olive oil
– 1 teaspoon cumin
– Salt and pepper to taste
Instructions:
1. Cook the quinoa according to package instructions in a pot.
2. In a large bowl, combine the cooked quinoa with black beans, corn, bell pepper, lime juice, olive oil, cumin, salt, and pepper.
3. Toss the mixture until well combined, then serve.
Tips for the Best Salad:
– Add jalapeños for extra heat.
– Chill for an hour to let the flavors blend beautifully!
Frequently Asked Questions:
– Can I make this salad ahead? Yes, it lasts up to 3 days in the fridge!
– How should I store leftovers? Keep them in an airtight container in the fridge.
Enjoy this colorful salad as a healthy side that brings a burst of flavor to your table!
Spicy Quinoa and Black Bean Salad
Editor’s Choice

Viva Naturals Organic Quinoa, 4 lb – Pre-Washed Whole Grain, Plant Prote…
 Amazon$17.99
Atlas 1 LT Cold Press Extra Virgin Olive Oil in Glass Bottle, Polyphenol…
 Amazon$27.42
8 Pack 36oz Large Glass Meal Prep Containers with lids, Glass Food Stora…
 Amazon$30.39
30. Spiced Roasted Sweet Potatoes
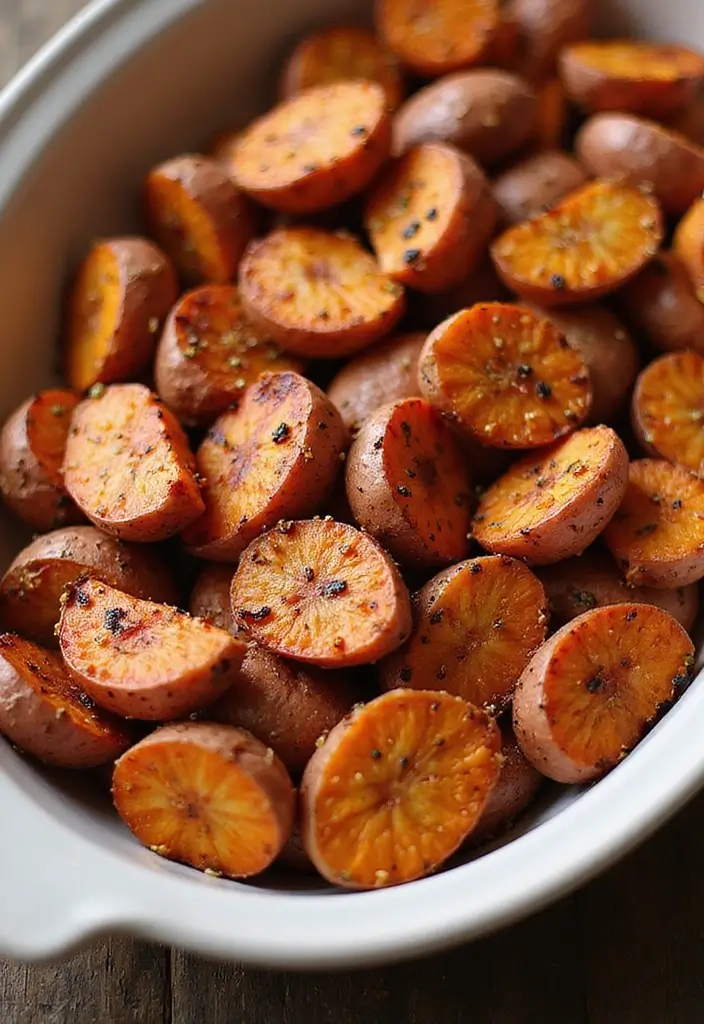
Spiced roasted sweet potatoes make a fantastic side dish that brings both sweetness and warmth to your meals. They’re simple to prepare and bursting with flavor, making them a favorite for family dinners or gatherings.
To prepare this dish, start by cutting sweet potatoes into bite-sized cubes. Toss them in olive oil, along with a sprinkle of cinnamon, paprika, and a pinch of salt. Roast them in the oven until they become tender and caramelized. This process enhances their natural sweetness and gives them a delightful texture.
Perfect for pairing with any main course, these sweet potatoes also highlight seasonal produce, making them a wonderful addition to your table.
Recipe Overview:
– Servings: 4
– Prep Time: 10 minutes
– Cook Time: 30 minutes
– Total Time: 40 minutes
– Calories: 150 per serving
Nutrition Information:
– Carbohydrates: 30g
– Protein: 2g
– Fat: 5g
– Fiber: 4g
Ingredients:
– 2 large sweet potatoes, peeled and cubed
– 2 tablespoons olive oil
– 1 teaspoon cinnamon
– 1 teaspoon paprika
– Salt to taste
Step-by-Step Instructions:
1. Preheat your oven to 425°F (220°C).
2. In a mixing bowl, combine the sweet potato cubes with olive oil, cinnamon, paprika, and salt. Toss well to coat.
3. Spread the seasoned potatoes on a baking sheet in a single layer.
4. Roast for 25-30 minutes, or until they are golden and tender.
5. Serve warm and enjoy this comforting side dish!
Tips for the Best Spiced Roasted Sweet Potatoes:
– Adjust the spices to your taste—feel free to experiment!
– Drizzle honey over the finished dish for a sweeter touch.
Frequently Asked Questions:
– Can I use other types of potatoes? Yes, regular potatoes will work too!
– How do I store leftovers? Keep them in an airtight container in the fridge for up to 3 days.
These spiced roasted sweet potatoes are not just delicious; they also make your meal feel special. Try them out, and watch how they brighten up your dining experience!
Spiced Roasted Sweet Potatoes
Editor’s Choice

Pompeian USDA Organic Robust Extra Virgin Olive Oil, Contains Polyphenol…
 Amazon$5.52
Simply Organic Ceylon Ground Cinnamon, 2.08 Ounce, Non-GMO Organic Cinna…
 Amazon$6.11
Conclusion
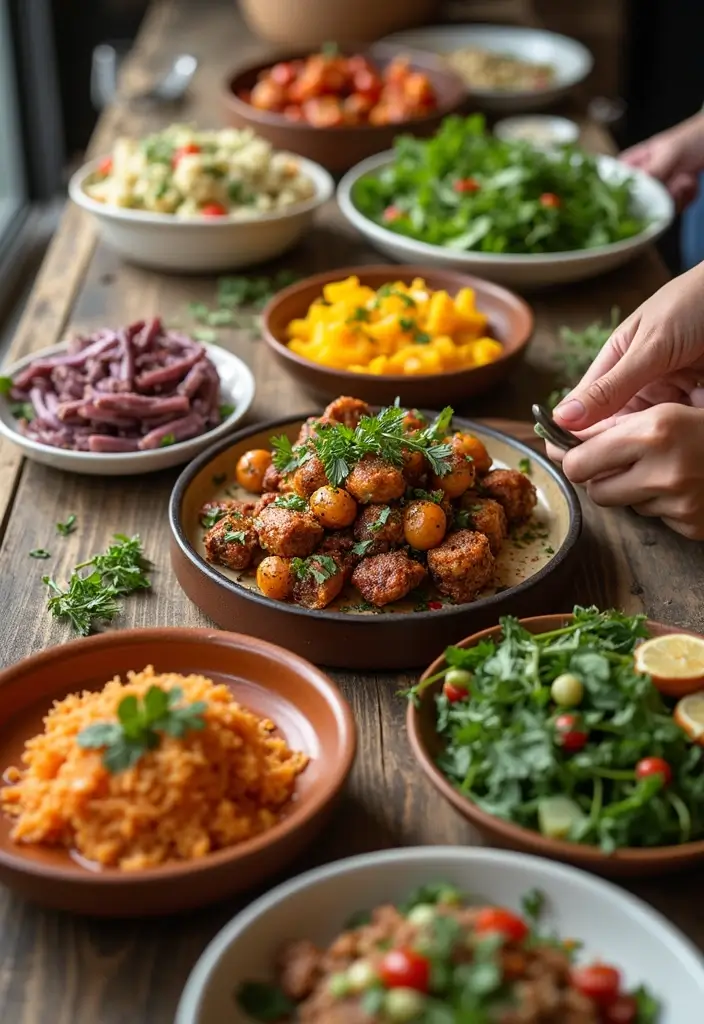
With these 30+ Paleo side dish recipes, your gatherings will never be the same. Each recipe is crafted to bring flavor and nutrition to your table, ensuring that every meal is a celebration of health and taste.
So gather your loved ones, bring out the flavors, and enjoy these healthy side dishes that will delight your guests and satisfy your cravings for wholesome foods!
Note: We aim to provide accurate product links, but some may occasionally expire or become unavailable. If this happens, please search directly on Amazon for the product or a suitable alternative.
This post contains Amazon affiliate links, meaning I may earn a small commission if you purchase through my links, at no extra cost to you.
Frequently Asked Questions
What Are Some Easy Paleo Side Dish Recipes for Family Gatherings?
Looking for easy yet delicious paleo side dish recipes to impress your family? You can try roasted sweet potatoes, garlic sautéed green beans, or a crunchy cauliflower salad. These dishes not only complement your main meal but are also packed with nutrients.
Plus, they’re gluten-free and align perfectly with paleo diet ideas, ensuring everyone at your gathering can enjoy them!
Can I Make Paleo Side Dishes Ahead of Time?
Absolutely! Many healthy side dishes can be prepared in advance. For instance, you can roast vegetables a day or two before your gathering and reheat them just before serving. Dishes like zucchini noodles or coleslaw can be made ahead and stored in the fridge.
This way, you can enjoy your time with family without rushing in the kitchen at the last minute!
Are Paleo Side Dishes Suitable for Gluten-Free Diets?
Yes, paleo side dishes are inherently gluten-free! By focusing on whole foods like vegetables, nuts, and healthy fats, you can create delicious side dishes that fit a gluten-free lifestyle. Think along the lines of a vibrant spinach salad or a creamy avocado dip, all while sticking to low-carb meals on your plate.
These options are perfect for those with gluten sensitivities or anyone looking to eat healthier.
What Are Some Low-Carb Vegetable Side Dishes for a Paleo Diet?
If you’re on the lookout for low-carb meals, vegetable side dishes are your best friends! Consider options like roasted Brussels sprouts with bacon, zucchini fritters, or a fresh cucumber salad. Each of these dishes is not only paleo-friendly but also adds a burst of color and flavor to your table.
These sides can help you stay on track with your dietary goals while still enjoying delicious food!
How Can I Ensure My Paleo Side Dishes Are Flavorful?
To make sure your paleo side dish recipes are bursting with flavor, focus on using fresh herbs and spices! Ingredients like garlic, rosemary, and lemon juice can elevate the taste of simple vegetable dishes. Experiment with different combinations, such as adding a touch of coconut aminos to sautéed veggies for a sweet umami kick.
Remember, a good dressing or seasoning can transform your dish from ordinary to extraordinary!
Related Topics
paleo side dishes
healthy recipes
gluten-free meals
low-carb options
vegetable sides
family gatherings
easy paleo
meal prep
quick side dishes
holiday recipes
seasonal vegetables
paleo diet

