Are you tired of spending hours in the kitchen, trying to prepare meals that truly nourish your body? You’re not alone. Many people juggling autoimmune issues and busy lives struggle to find that balance between healthy eating and convenience. That’s why I put together this collection of 30+ Autoimmune Paleo Crockpot Recipes. These recipes can help you on your path to healing without the stress of complicated cooking.
If you’re someone who wants to feel better and eat well, you’re in the right place. You care about what goes into your body. You want meals that support your health, but you also need them to fit into your hectic schedule. Each recipe here is designed with simplicity in mind, making it easy for you to whip up delicious and nutritious meals without spending all day at the stove.
What can you expect? You’ll find a variety of mouthwatering recipes that are wholesome, filling, and packed with nutrients. From savory stews to hearty casseroles, each dish is tailored to support your healing journey. You’ll learn how to make meals that not only taste great but also align with your dietary needs. Plus, the slow cooker does most of the work for you, giving you more time to relax or tackle other tasks.
So grab your crockpot and get ready to explore these easy recipes that will fire up your taste buds while helping you feel your best. Whether you’re new to the Autoimmune Paleo lifestyle or a seasoned pro, these recipes offer something for everyone. Let’s dive into a world of effortless healing meals that will make your life a little easier and a lot more delicious.
1. Savory Sweet Potato and Chicken Stew

Warm up your evenings with a delightful bowl of Savory Sweet Potato and Chicken Stew. This dish is like a cozy hug, perfect for those chilly nights. Imagine tender chicken simmering with sweet potatoes and fragrant herbs. Sweet potatoes bring natural sweetness and are packed with fiber. The chicken adds lean protein, making this stew a fantastic choice for your autoimmune-friendly meals.
Here’s how to create this comforting stew:
Recipe Overview:
– Servings: 6
– Prep Time: 15 minutes
– Cook Time: 6 hours on low
– Total Time: 6 hours 15 minutes
– Calories: 320 per serving
Nutrition Information:
– 25g protein
– 35g carbohydrates
– 10g fat
Ingredients:
– 2 pounds boneless, skinless chicken thighs
– 3 medium sweet potatoes, cubed
– 1 onion, diced
– 2 carrots, sliced
– 2 cloves garlic, minced
– 4 cups chicken broth (homemade or low-sodium)
– 2 teaspoons dried thyme
– Salt and pepper to taste
Instructions:
1. Start by placing the chicken thighs at the bottom of your crockpot.
2. Layer the cubed sweet potatoes, diced onion, sliced carrots, and minced garlic on top.
3. Pour the chicken broth over everything, then sprinkle with thyme, salt, and pepper.
4. Cover the crockpot and cook on low for 6 hours or until the chicken is tender.
5. Shred the chicken with two forks and give it a good stir before serving.
Want to kick up the flavor? Try searing the chicken thighs in a pan before adding them to the crockpot. You can also toss in some kale or spinach in the last 30 minutes for an extra boost of greens.
FAQ:
– Can I use other vegetables? Absolutely! Feel free to mix in your favorites.
– How do I store leftovers? Store them in an airtight container in the fridge for up to 3 days.
This stew is not just a meal; it’s a remedy for your soul. Enjoy every comforting spoonful!
Savory Sweet Potato and Chicken Stew
Editor’s Choice

Crock-Pot 7 Quart Oval Manual Slow Cooker, Stainless Steel (SCV700-S-BR)…
2. Coconut Curry Vegetable Soup

Warm your soul with a comforting bowl of Coconut Curry Vegetable Soup. This delicious dish bursts with colorful vegetables and the rich, creamy goodness of coconut milk. The aromatic curry spices create a delightful experience for your taste buds. It’s not just a meal; it’s a soothing escape after a long day.
Picture this: you come home to the inviting scent of curry wafting through your kitchen. In just ten minutes of prep, you can set your crockpot to work for the next four hours. This soup is not only easy to make but also a fantastic way to sneak in multiple servings of veggies.
Let’s get cooking! Here’s how to whip up this delightful soup:
Recipe Overview:
– Servings: 4
– Prep Time: 10 minutes
– Cook Time: 4 hours on low
– Total Time: 4 hours 10 minutes
– Calories: 250 per serving
Nutrition Information:
8g protein, 36g carbohydrates, 11g fat
Ingredients:
– 1 can full-fat coconut milk
– 4 cups vegetable broth
– 1 bell pepper, diced
– 1 zucchini, chopped
– 1 cup cauliflower florets
– 1 tablespoon curry powder
– 1 teaspoon turmeric
– Salt to taste
– Fresh cilantro for garnish
Instructions:
1. Pour the coconut milk and vegetable broth into your crockpot.
2. Add the bell pepper, zucchini, cauliflower, curry powder, turmeric, and salt. Stir well.
3. Cover the pot and let it cook on low for 4 hours.
4. Serve hot, topped with fresh cilantro for a burst of flavor.
Feel free to adjust the curry powder to match your spice level. If you want a heartier meal, pair it with cauliflower rice or toss in some cooked chicken or tofu before serving for extra protein.
FAQ:
– Can I add protein to this dish? Yes! Add cooked chicken or tofu for a protein boost.
– How long does it last in the fridge? Store it in an airtight container for up to 4 days.
This Coconut Curry Vegetable Soup is a delightful addition to your meal rotation. It’s easy to prepare, full of flavor, and perfect for those seeking comfort and healing in a bowl. Enjoy every spoonful!
Coconut Curry Vegetable Soup
Editor’s Choice
Crock-Pot 7 Quart Oval Manual Slow Cooker, Stainless Steel (SCV700-S-BR)…

Birch & Meadow 2 lb of Curry Powder, Stews & Soups, Authentic Flavor

Thai Kitchen Gluten Free Unsweetened Coconut Milk, 13.66 fl oz (Pack of 12)
3. Zesty Lemon Garlic Pork Chops

Get ready to spice up your dinner with these Zesty Lemon Garlic Pork Chops! The bright flavors of lemon and the savory aroma of garlic meld perfectly with tender pork. This dish isn’t just easy to make; it brings a burst of sunshine and joy to your table for any meal. Imagine your family enjoying a hearty, healing dish that’s both delicious and nutritious!
Recipe Overview:
– Servings: 4
– Prep Time: 10 minutes
– Cook Time: 6 hours on low
– Total Time: 6 hours 10 minutes
– Calories: 400 per serving
Nutrition Information:
30g protein, 8g carbohydrates, 28g fat
Ingredients:
– 4 bone-in pork chops
– 1 lemon, juiced and zested
– 4 cloves garlic, minced
– 2 teaspoons dried rosemary
– Salt and pepper to taste
– 1 cup chicken broth
Instructions:
1. Start by seasoning the pork chops with salt and pepper.
2. Place the seasoned chops in your slow cooker. Pour the lemon juice and zest over them. Add the minced garlic, rosemary, and chicken broth.
3. Cover the slow cooker and set it to cook on low for 6 hours.
4. When ready, serve the pork chops hot, drizzled with the flavorful cooking liquid.
Pro Tip: For a crispy finish, pop the pork chops under the broiler for a few minutes after slow cooking. Pair them with roasted vegetables or a light salad for a complete meal.
FAQs:
– Can I use boneless chops? Yes! Just adjust the cooking time since they cook faster.
– What sides go well with this dish? Mashed sweet potatoes or a fresh salad are perfect complements.
This dish is not only a delightful addition to your dinner rotation but also a great way to embrace a wholesome, autoimmune-friendly lifestyle. Enjoy the ease of a slow cooker meal that delivers on flavor and health!
Zesty Lemon Garlic Pork Chops
Editor’s Choice
Crock-Pot 7 Quart Oval Manual Slow Cooker, Stainless Steel (SCV700-S-BR)…

Zulay Kitchen Premium Garlic Press Set – Rust Proof & Dishwasher Safe Pr…

4. Hearty Beef and Mushroom Stew

Cozy up with a bowl of Hearty Beef and Mushroom Stew, a classic dish that warms your heart and nourishes your body. Imagine tender beef chunks mingling with earthy mushrooms, all simmered in a rich, savory broth. This comforting stew not only satisfies your hunger but also aligns perfectly with your Autoimmune Paleo lifestyle. It’s a nutrient-packed meal that makes meal prep a breeze.
This recipe serves six and is perfect for busy days when you want a homemade meal without the fuss. With just 20 minutes of prep time, you can set it and forget it for eight hours. Your kitchen will fill with delicious aromas, making it hard to wait until dinner!
Recipe Overview:
– Servings: 6
– Prep Time: 20 minutes
– Cook Time: 8 hours on low
– Total Time: 8 hours 20 minutes
– Calories: 360 per serving
Nutritional Information:
32g protein, 20g carbohydrates, 18g fat
Ingredients:
– 2 pounds beef stew meat, cubed
– 8 ounces mushrooms, sliced
– 1 onion, chopped
– 3 carrots, chopped
– 4 cloves garlic, minced
– 4 cups beef broth
– 2 teaspoons dried thyme
– Salt and pepper to taste
Instructions:
1. Brown the beef in a skillet over medium heat, then transfer it to your crockpot.
2. Add the mushrooms, onion, carrots, garlic, broth, thyme, salt, and pepper.
3. Stir everything well, cover, and cook on low for 8 hours.
4. Serve warm and enjoy every bite!
For a healthier twist, choose grass-fed beef. If you prefer a thicker stew, simply remove a cup of the liquid, blend it until smooth, and stir it back in.
Frequently Asked Questions:
– Can I freeze this stew? Yes, it freezes beautifully for up to three months!
– What can I use instead of mushrooms? Feel free to add more carrots or even parsnips for a different flavor.
This stew is not just a meal; it’s comfort food that brings family and friends together. Enjoy your cooking adventure!
Hearty Beef and Mushroom Stew
Editor’s Choice
Crock-Pot 7 Quart Oval Manual Slow Cooker, Stainless Steel (SCV700-S-BR)…

Organic Rancher Organic Ground Beef 93% Lean/7% Fat, 16 Oz

5. Asian-Inspired Chicken Thighs

Get ready to enjoy a dish that brings the bold flavors of Asia right to your kitchen! These Asian-Inspired Chicken Thighs are not only flavorful but also incredibly simple to make. With a marinade of ginger, garlic, and coconut aminos, you’ll infuse the chicken with a delightful sweet and savory taste. This recipe is perfect for meal prep or a busy weeknight dinner!
Let’s break down the essentials:
Recipe Overview:
– Servings: 4
– Prep Time: 15 minutes
– Cook Time: 6 hours on low
– Total Time: 6 hours 15 minutes
– Calories: 320 per serving
Nutrition Information:
28g protein, 15g carbohydrates, 18g fat
Ingredients:
– 4 skinless chicken thighs
– 1/4 cup coconut aminos
– 2 tablespoons fresh ginger, grated
– 3 cloves garlic, minced
– 1 tablespoon sesame oil
– Salt and pepper to taste
Instructions:
1. In a bowl, whisk together coconut aminos, ginger, garlic, sesame oil, salt, and pepper.
2. Place the chicken thighs in the crockpot and pour the marinade over the top, ensuring they’re well coated.
3. Cover and cook on low for 6 hours.
4. Serve with steamed broccoli or cauliflower rice for a complete meal.
For extra flavor, let the chicken marinate overnight. You can also sprinkle some chopped green onions on top before serving for a fresh touch.
FAQs:
– Can I use different cuts of chicken? Yes, but adjust the cooking time as needed.
– What can I substitute for coconut aminos? Tamari is a great gluten-free alternative.
Enjoy these savory chicken thighs and savor the benefits of a delicious, healing meal that fits your dietary needs! Your taste buds will thank you, and you’ll love the ease of this crockpot recipe.
Asian-Inspired Chicken Thighs
Editor’s Choice
Crock-Pot 7 Quart Oval Manual Slow Cooker, Stainless Steel (SCV700-S-BR)…

BetterBody Foods Organic Coconut Aminos, Soy Sauce Alternative, Gluten F…

La Tourangelle, Toasted Sesame Oil, Great for Cooking, Add to Noodles, S…
6. Creamy Garlic Mashed Cauliflower

Step up your side dish game with this Creamy Garlic Mashed Cauliflower. If you’re looking for a tasty alternative to traditional mashed potatoes, you’ve found it! This dish delivers a rich, creamy texture and a bold garlic flavor, all while being low in carbs. It’s an ideal match for any main course and fits perfectly into your autoimmune-friendly diet.
You’ll be amazed at how simple this dish is to prepare! Just toss the ingredients into your crockpot, and let it do the work for you. In about four hours, you’ll have a delicious side that everyone will rave about.
Recipe Overview:
– Servings: 4
– Prep Time: 10 minutes
– Cook Time: 4 hours on low
– Total Time: 4 hours 10 minutes
– Calories: 180 per serving
Nutritional Information: 5g protein, 12g carbohydrates, 13g fat
Ingredients:
– 1 head of cauliflower, cut into florets
– 4 cloves of garlic, minced
– 1/4 cup coconut cream
– Salt and pepper to taste
– Fresh chives for garnish
Instructions:
1. Add cauliflower florets and minced garlic to the crockpot. Pour in a little water.
2. Cover and cook on low for about 4 hours, or until the cauliflower is tender.
3. Drain any excess water. Blend the cauliflower with coconut cream, salt, and pepper until smooth and creamy.
4. Top with fresh chives before serving.
Want to add a cheesy twist? Sprinkle in some nutritional yeast before blending for a rich flavor. You can also use a hand blender for a quicker mash.
FAQs:
– Can I prepare this ahead of time? Absolutely! It keeps well in the fridge and reheats beautifully.
– Is it freezer-friendly? Yes, portion it out and freeze for future meals.
This Creamy Garlic Mashed Cauliflower will not only satisfy your cravings but also help you stay on track with your health goals. Enjoy every bite!
Creamy Garlic Mashed Cauliflower
Editor’s Choice
Crock-Pot 7 Quart Oval Manual Slow Cooker, Stainless Steel (SCV700-S-BR)…

Immersion Blender Handheld Corded Hand Blenders Set 1100W, Trigger Varia…

Bragg Premium Nutritional Yeast Seasoning – Vegan, Gluten Free – Good So…
7. Tangy Balsamic Glazed Brussels Sprouts

Bring a burst of flavor to your table with Tangy Balsamic Glazed Brussels Sprouts. This side dish is a crowd-pleaser, combining the rich sweetness of balsamic vinegar with the earthy goodness of roasted Brussels sprouts. Not only do they taste amazing, but they also provide essential nutrients to support your health goals. Imagine serving these at your next meal—they’re sure to impress!
Here’s how to make this simple yet delicious dish:
Recipe Overview:
– Servings: 4
– Prep Time: 5 minutes
– Cook Time: 4 hours on low
– Total Time: 4 hours 5 minutes
– Calories: 150 per serving
Nutrition Information:
5g protein, 20g carbohydrates, 7g fat
Ingredients:
– 1 pound Brussels sprouts, halved
– 1/4 cup balsamic vinegar
– 2 tablespoons olive oil
– Salt and pepper to taste
Instructions:
1. Start by placing the halved Brussels sprouts in your crockpot.
2. Drizzle the balsamic vinegar and olive oil over them. Season with salt and pepper to taste.
3. Stir gently to coat the sprouts evenly. Cover the pot and let them cook on low for 4 hours.
4. For an extra touch, you can broil them for a few minutes after slow cooking to add a delightful crispiness.
5. Serve warm and enjoy the burst of flavors!
Tips to Enhance Your Dish:
– Add minced garlic or shallots for a savory depth.
– like thyme or rosemary to elevate the flavor.
– Pair with roasted meats for a balanced meal.
– Store leftovers in an airtight container in the fridge for up to 3 days.
FAQ:
– Can I use frozen Brussels sprouts? While fresh is best, frozen can work in a pinch.
– How do I store leftovers? Refrigerate them in an airtight container for up to 3 days.
These Tangy Balsamic Glazed Brussels Sprouts are not just good for you; they’re also a delicious way to complement any meal. Dive into this easy recipe and enjoy a flavorful journey toward healthier eating!
Tangy Balsamic Glazed Brussels Sprouts
Editor’s Choice
Crock-Pot 7 Quart Oval Manual Slow Cooker, Stainless Steel (SCV700-S-BR)…

Colavita Balsamic Vinegar of Modena, 17 Ounce Bottle

Pompeian Robust Extra Virgin Olive Oil, Contains Polyphenols, First Cold…
8. Italian Herb Chicken and Veggies

Imagine savoring a warm, hearty meal filled with Italian flavors that not only delights your taste buds but also nourishes your body. This Italian Herb Chicken and Veggies dish is just what you need for a simply delicious and healthy dinner. The chicken turns tender and juicy, while the colorful veggies soak up all the rich, herb-infused goodness. It’s a true feast for both the eyes and the palate!
Here’s how you can prepare this dish effortlessly in your crockpot:
Recipe Overview:
– Servings: 4
– Prep Time: 10 minutes
– Cook Time: 6 hours on low
– Total Time: 6 hours 10 minutes
– Calories: 330 per serving
Nutrition Information:
– 28g protein
– 12g carbohydrates
– 20g fat
Ingredients:
– 4 skinless chicken breasts
– 2 zucchinis, sliced
– 1 bell pepper, chopped
– 1 onion, sliced
– 1 tablespoon Italian seasoning
– Salt and pepper to taste
– 1 cup chicken broth
Instructions:
1. Start by placing the chicken breasts at the bottom of your crockpot.
2. Layer the sliced zucchini, chopped bell pepper, and onion on top of the chicken.
3. Sprinkle Italian seasoning, salt, and pepper over the veggies and chicken. Then pour the chicken broth over everything.
4. Cover the crockpot and set it on low to cook for 6 hours.
5. When it’s done, serve it up with fresh basil as a garnish and enjoy!
Feel free to get creative! Add olives or sun-dried tomatoes to give your dish a Mediterranean flair. You can also serve it over zucchini noodles for a tasty low-carb option.
FAQ:
– Can I use frozen chicken breasts? Yes, just be aware that you might need to increase the cooking time slightly.
– What sides pair well with this dish? A crisp salad or some fluffy cauliflower rice makes an excellent complement!
This meal is perfect for busy days when you want something healthy without spending hours in the kitchen. Enjoy the flavors of Italy while taking care of your health!
Italian Herb Chicken and Veggies
Editor’s Choice
Crock-Pot 7 Quart Oval Manual Slow Cooker, Stainless Steel (SCV700-S-BR)…

Simply Organic Italian Seasoning, 0.95 Ounce, Organic Herbs, Oregano, Ma…

Veggetti Veggie Slicer, Dual Stainless Steel Blade Vegetable Cutter for …
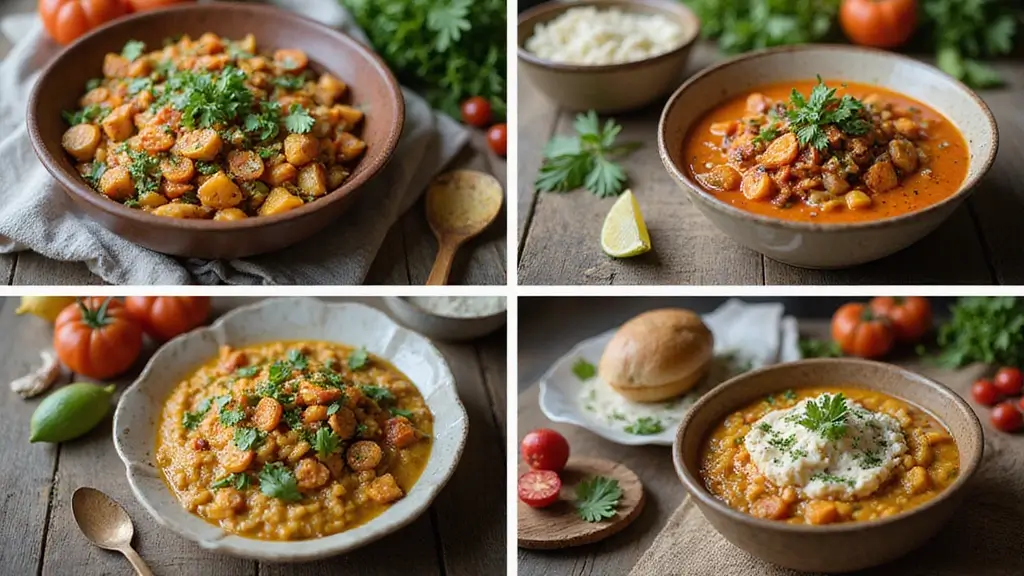
9. Simple Spiced Carrot Soup

Warm up your evenings with a bowl of Simple Spiced Carrot Soup. This nutritious dish brings comfort and flavor to your table. The natural sweetness of carrots blends perfectly with earthy spices like cumin and coriander. You’ll love how easy it is to prepare, making it ideal for meal prep or a cozy night in.
Here’s what you need to know:
Recipe Overview:
– Servings: 4
– Prep Time: 10 minutes
– Cook Time: 6 hours on low
– Total Time: 6 hours 10 minutes
– Calories: 180 per serving
Nutrition Information:
– 4g protein
– 25g carbohydrates
– 7g fat
Ingredients:
– 1 pound carrots, chopped
– 1 onion, diced
– 4 cups vegetable broth
– 1 teaspoon cumin
– 1 teaspoon coriander
– Salt and pepper to taste
Instructions:
1. Place the chopped carrots and diced onion into your crockpot. Pour in the vegetable broth.
2. Add in the cumin, coriander, salt, and pepper. Stir everything together.
3. Cover the crockpot and set it to cook on low for 6 hours.
4. Once cooked, blend the soup until smooth. Enjoy warm!
For an extra touch, garnish with a swirl of coconut cream. Want some spice? Toss in fresh ginger for a kick!
FAQ:
– Can I freeze this soup? Yes, it keeps well in the freezer for up to 3 months.
– What’s a good garnish? Try pumpkin seeds or freshly chopped herbs for added texture and flavor.
Enjoy this easy and delightful soup that nourishes your body and warms your soul!
Simple Spiced Carrot Soup
Editor’s Choice
Crock-Pot 7 Quart Oval Manual Slow Cooker, Stainless Steel (SCV700-S-BR)…

Bonsenkitchen Hand Blender, Immersion Blender with 2 Mixing Speed, Elect…

McCormick Gourmet Three Tier Wood 24 Piece Organic Spice Rack Organizer …
10. Sweet and Spicy Chicken Drumsticks

Get ready for a flavor explosion with these Sweet and Spicy Chicken Drumsticks! Perfectly tender, these drumsticks combine the sweetness of honey with a kick of chili powder and aromatic garlic. Cooked to perfection in your slow cooker, they’re not just easy to prepare; they’ll quickly become a family favorite!
Imagine walking into your home after a long day and being greeted by the mouthwatering scent of slow-cooked chicken. These drumsticks are not only delicious but also require just a few minutes of prep time. In less than 10 minutes, you’ll have everything ready to go into the crockpot. This recipe is great for busy weeknights or when you want to impress guests without spending hours in the kitchen!
Recipe Overview:
– Servings: 4
– Prep Time: 10 minutes
– Cook Time: 6 hours on low
– Total Time: 6 hours 10 minutes
– Calories: 320 per serving
Nutrition Information:
– Protein: 25g
– Carbohydrates: 12g
– Fat: 20g
Ingredients:
– 8 chicken drumsticks
– 1/4 cup honey
– 3 cloves garlic, minced
– 2 tablespoons apple cider vinegar
– 1 teaspoon chili powder
– Salt to taste
Instructions:
1. In a small bowl, whisk together the honey, minced garlic, apple cider vinegar, chili powder, and salt.
2. Place the chicken drumsticks in your crockpot and pour the honey mixture over them, ensuring they are well-coated.
3. Cover the crockpot and cook on low for 6 hours, allowing the flavors to meld beautifully.
4. For an added touch, broil the drumsticks for a few minutes after slow cooking to achieve a crispy exterior.
5. Serve hot and enjoy the delightful sweet and spicy flavors!
Tips for Enjoyment:
– Pair with coleslaw for a refreshing crunch that complements the dish.
– Experiment with spices like paprika or cumin for a unique twist.
FAQ:
– Can I use other cuts of chicken? Yes! Just remember to adjust the cooking time accordingly.
– How do I store leftovers? Keep them in an airtight container in the fridge for up to three days.
These Sweet and Spicy Chicken Drumsticks are not only tasty but also a hassle-free way to enjoy a hearty meal. So, gather your ingredients and let your slow cooker do the heavy lifting!
Sweet and spicy chicken drumsticks prove weeknights can be effortless—your slow cooker does the heavy lifting while you breathe easy. With autoimmune paleo crockpot recipes, dinner is ready in hours, dairy-free and family-friendly, all cooked with flavor you can taste.
Sweet and Spicy Chicken Drumsticks
Editor’s Choice
Crock-Pot 7 Quart Oval Manual Slow Cooker, Stainless Steel (SCV700-S-BR)…

Nate’s Texas 100% Pure, Raw & Unfiltered Honey – 16 oz. Squeeze Bottle -…

Spice Rack Kitchen Cabinet Organizer- 3 Tier Bamboo Expandable Display S…
11. One-Pot Lemon Herb Quinoa

Imagine a dish that’s both light and filling—a true culinary gem. This One-Pot Lemon Herb Quinoa is not just a side; it’s a complete meal bursting with flavor. Quinoa, known for its rich protein content, pairs beautifully with zesty lemon and fresh herbs. You’ll find it refreshing and satisfying, making it perfect for your busy weeknights or meal prepping sessions.
This dish is easy to store, reheat, and enjoy throughout the week. Just picture yourself diving into a bowl of fluffy quinoa, brightened by lemon’s tang and the earthy notes of parsley. It’s a meal that not only nourishes your body but also delights your taste buds.
Here’s how to whip up this delicious recipe:
Recipe Overview:
– Servings: 4
– Prep Time: 10 minutes
– Cook Time: 4 hours on low
– Total Time: 4 hours 10 minutes
– Calories: 220 per serving
Nutrition Information:
– Protein: 9g
– Carbohydrates: 38g
– Fat: 5g
Ingredients:
– 1 cup quinoa, rinsed
– 2 cups vegetable broth
– 1 lemon, juiced and zested
– 1/4 cup fresh parsley, chopped
– Salt and pepper to taste
Instructions:
1. In your crockpot, combine the rinsed quinoa, vegetable broth, lemon juice, and zest.
2. Stir in the chopped parsley, and season with salt and pepper.
3. Cover and let it cook on low for 4 hours.
4. Once done, fluff it with a fork and serve.
For a nutrition boost, add chopped veggies like bell peppers or spinach. You can also serve it as a side or mix in some grilled chicken for a hearty meal.
FAQ:
– Can I use chicken broth instead? Yes, that will enhance the flavor!
– How long does quinoa last in the fridge? It stays fresh for about 4 days.
One-Pot Lemon Herb Quinoa
Editor’s Choice
Crock-Pot 7 Quart Oval Manual Slow Cooker, Stainless Steel (SCV700-S-BR)…

BetterBody Foods Organic Quinoa, Vegan, Gluten Free, Low Glycemic Rice R…

365 by Whole Foods Market, Organic Low Sodium Vegetable Broth, 32 Fl Oz
12. Creamy Tomato Basil Soup

Craving a warm, nourishing bowl of soup? Dive into this Creamy Tomato Basil Soup, a delightful dish that brings the flavors of summer right to your kitchen. Each spoonful bursts with the freshness of ripe tomatoes and vibrant basil, combined with rich coconut cream for a creamy texture without the dairy. It’s a cozy meal that pairs perfectly with gluten-free bread for the ultimate dipping experience!
Here’s a quick look at what you’ll need for this soul-soothing recipe:
– Servings: 4
– Prep Time: 10 minutes
– Cook Time: 4 hours on low
– Total Time: 4 hours 10 minutes
– Calories: 220 per serving
Nutritional Breakdown: 5g protein, 30g carbohydrates, 10g fat
Ingredients:
– 6 cups fresh tomatoes, chopped
– 1 onion, diced
– 4 cloves garlic, minced
– 1/4 cup fresh basil, chopped
– 1 can coconut cream
– Salt and pepper to taste
Instructions:
1. Start by placing the chopped tomatoes, diced onion, minced garlic, and a pinch of salt into your crockpot.
2. Set the crockpot to low and let it cook for about 4 hours, or until the tomatoes are soft and fragrant.
3. Once cooked, stir in the coconut cream and fresh basil. Blend everything until smooth for that creamy texture you’ll love.
4. Serve your soup hot, garnished with extra basil for a fresh touch.
If you’re looking for ways to enhance your soup, try these tips:
– Use roasted tomatoes for a deeper, richer flavor.
– Add a pinch of chili flakes if you like a hint of spice!
FAQs:
– Can I freeze this soup? Yes, it freezes beautifully for up to 3 months!
– What toppings work well? Fresh basil or a drizzle of olive oil adds a lovely finish!
This soup is not just a meal; it’s a warm hug in a bowl. Perfect for chilly evenings or when you’re feeling under the weather, it’s a simple way to nourish yourself and your loved ones with wholesome ingredients. Enjoy every creamy bite!
Fun fact: this Creamy Tomato Basil Soup turns dairy-free with coconut cream, delivering rich texture in just 4 ingredients. It’s a soothing entry in autoimmune paleo crockpot recipes that proves dairy-free meals can be comfortingly creamy.
Creamy Tomato Basil Soup
Editor’s Choice
Crock-Pot 7 Quart Oval Manual Slow Cooker, Stainless Steel (SCV700-S-BR)…

Coco Reàl, Cream of Coconut, 16.9 FL OZ Squeezable Bottle, Individually …

Dave’s Killer Bread 21 Whole Grains & Seeds Thin-Sliced, Whole Grain Org…
You might also like

13. Baked Apple Cinnamon Oatmeal

Start your morning with a warm bowl of Baked Apple Cinnamon Oatmeal. This delicious dish not only fills your kitchen with a cozy aroma but also keeps you energized all morning long. Imagine biting into soft apples, crunchy walnuts, and a sprinkle of cinnamon. This recipe is your ticket to a satisfying breakfast that supports your health goals.
Here’s how to whip up this easy meal in your crockpot:
Recipe Overview:
– Servings: 6
– Prep Time: 15 minutes
– Cook Time: 4 hours on low
– Total Time: 4 hours 15 minutes
– Calories: 250 per serving
Nutrition Information:
– Protein: 6g
– Carbohydrates: 40g
– Fat: 8g
Ingredients:
– 2 cups gluten-free oats
– 2 apples, chopped
– 1 teaspoon cinnamon
– 2 cups almond milk
– 1/4 cup maple syrup
– 1/4 cup walnuts (optional)
Instructions:
1. In your crockpot, mix together the oats, chopped apples, cinnamon, almond milk, and maple syrup.
2. Stir everything until it’s well combined. If you want a nutty crunch, add walnuts on top.
3. Cover the crockpot and set it to cook on low for 4 hours.
4. Serve warm. Drizzle additional maple syrup on top for sweetness if you like!
For an extra creamy touch, try adding almond butter. Dried cranberries can also bring a delightful sweetness and boost the nutrients in your bowl.
FAQ:
– Can I prepare this the night before? Yes! Just refrigerate it and warm it up when you’re ready to eat.
– What if I can’t use oats? Feel free to substitute with quinoa or buckwheat for a different flavor and texture.
This Baked Apple Cinnamon Oatmeal is not just a meal; it’s a comforting hug in a bowl. Your mornings deserve this treat!
Baked Apple Cinnamon Oatmeal
Editor’s Choice
Crock-Pot 7 Quart Oval Manual Slow Cooker, Stainless Steel (SCV700-S-BR)…

Bob’s Red Mill Gluten Free Organic Extra Thick Rolled Oats, 32oz (Pack o…

365 by Whole Foods Market, Organic Creamy Almond Butter, 16 Ounce
14. Chocolate Avocado Pudding

Satisfy your sweet cravings with a delightful and healthy twist on dessert: Chocolate Avocado Pudding! This rich and creamy treat feels indulgent but fits perfectly into your autoimmune paleo diet. You get to enjoy a dessert that’s not only delicious but also loaded with healthy fats from avocados. It’s an easy way to treat yourself without any guilt!
Let’s break down how to make this simple yet satisfying pudding. The best part? You only need a few ingredients, and it takes just 10 minutes to whip up. It’s perfect for a quick dessert on busy nights or a delicious snack anytime you need a chocolate fix.
Recipe Overview:
– Servings: 4
– Prep Time: 10 minutes
– Cook Time: None
– Total Time: 10 minutes
– Calories: 220 per serving
Nutrition Information: 3g protein, 18g carbohydrates, 15g fat
Ingredients:
– 2 ripe avocados
– 1/2 cup cocoa powder
– 1/4 cup honey or maple syrup
– 1 teaspoon vanilla extract
– Pinch of salt
Instructions:
1. Start by scooping the ripe avocados into a blender. Their creaminess is key!
2. Add in the cocoa powder, honey (or maple syrup), vanilla extract, and a pinch of salt.
3. Blend everything until smooth and creamy. Taste it and adjust the sweetness if you prefer it sweeter.
4. Chill the pudding in the refrigerator for about 30 minutes. This step helps the flavors meld together beautifully.
5. Serve the pudding chilled, topped with fresh berries for a pop of color and flavor!
Want to elevate the flavor? Consider adding a splash of espresso or coffee for a rich depth. If you’re looking for a lighter version, almond milk can be a fantastic alternative.
FAQ:
– Can I make this vegan? Absolutely! Just stick with maple syrup for sweetness.
– How long will this last in the fridge? Store it in an airtight container for up to 3 days.
This Chocolate Avocado Pudding isn’t just a dessert; it’s a healthy indulgence that fits perfectly into your lifestyle. Enjoy every creamy bite, knowing you’re nourishing your body while satisfying your sweet tooth!
Chocolate Avocado Pudding
Editor’s Choice

HERSHEY’S Natural Unsweetened Cocoa Powder Can, 8 oz

Butternut Mountain Farm Pure Vermont Maple Syrup, Grade A, Dark Color, R…

Ninja BL660 Professional Compact Smoothie & Food Processing Blender, 110…
15. Coconut Flour Chocolate Chip Cookies

Craving something sweet that fits your autoimmune paleo lifestyle? Look no further than these delightful Coconut Flour Chocolate Chip Cookies! They are soft, chewy, and made from wholesome ingredients that you can feel great about enjoying. Perfect for an afternoon treat or a late-night snack, these cookies satisfy your sweet tooth without straying from your health goals.
Recipe Overview:
– Servings: 12 cookies
– Prep Time: 10 minutes
– Cook Time: 15 minutes
– Total Time: 25 minutes
– Calories: 160 per cookie
Nutrition Information:
– 3g protein
– 10g carbohydrates
– 12g fat
Ingredients:
– 1/2 cup coconut flour
– 1/4 cup coconut oil, melted
– 1/4 cup honey or maple syrup
– 2 eggs
– 1/2 cup dark chocolate chips (dairy-free)
– 1 teaspoon vanilla extract
– Pinch of salt
Instructions:
1. Preheat your oven to 350°F (175°C).
2. In a mixing bowl, combine coconut flour, melted coconut oil, honey (or maple syrup), eggs, vanilla, and salt. Stir until the mixture is smooth.
3. Gently fold in the dark chocolate chips.
4. Scoop tablespoon-sized portions of dough onto a baking sheet lined with parchment paper.
5. Bake for 15 minutes, or until the edges turn golden brown.
6. Let the cookies cool on a wire rack before diving in!
Store any leftovers in an airtight container for up to 5 days, but trust me—these won’t last long! For an extra crunch, consider adding a handful of chopped nuts to the dough.
FAQ:
– Can I substitute coconut flour? Yes, you can use almond flour, but remember to adjust the measurements since coconut flour absorbs more moisture.
– Are these gluten-free? Absolutely! These cookies are naturally gluten-free, making them a safe option for your dietary needs.
Now you can enjoy a sweet treat that not only tastes amazing but also supports your healing journey!
Coconut Flour Chocolate Chip Cookies
Editor’s Choice


GHIRARDELLI Non-Dairy Dark Chocolate Chips for Baking, Premium Baking Ch…

Rubbermaid Brilliance 16-Cup Airtight Food Storage Container with Lid Cl…
16. Maple Pecan Granola

Start your day on a delicious note with Maple Pecan Granola. This crunchy treat blends healthy fats with a touch of natural sweetness. It’s perfect on its own, with yogurt, or even sprinkled over smoothie bowls. Plus, making it is a breeze, and you can easily tweak the recipe to fit your taste!
Imagine the warm aroma of cinnamon filling your kitchen as you prepare this simple dish. With just a few ingredients, you can create a wholesome breakfast that packs a satisfying crunch. Pinterest is buzzing with similar DIY granola recipes, and this one is a must-try!
Here’s how to whip up your Maple Pecan Granola:
Recipe Overview:
– Servings: 8
– Prep Time: 10 minutes
– Cook Time: 2 hours on low
– Total Time: 2 hours 10 minutes
– Calories: 200 per serving
Nutritional Information: 5g protein, 25g carbohydrates, 10g fat
Ingredients:
– 2 cups rolled oats (gluten-free)
– 1 cup pecans, chopped
– 1/4 cup maple syrup
– 1/4 cup coconut oil, melted
– 1 teaspoon cinnamon
– Pinch of salt
Instructions:
1. In a large bowl, combine oats, chopped pecans, maple syrup, melted coconut oil, cinnamon, and salt. Mix well until everything is coated.
2. Spread the mixture evenly on a baking tray lined with parchment paper.
3. Cook in your crockpot on low for 2 hours, stirring occasionally to ensure even cooking.
4. Once it’s done, let it cool before breaking it into clusters. Store in an airtight container for maximum freshness.
Want to jazz it up? Add dried fruits for a sweet and chewy twist!
FAQs:
– Can I use different nuts? Absolutely! Almonds or walnuts make great substitutes.
– Is this gluten-free? Yes, just ensure you use gluten-free oats.
Enjoy your homemade granola, knowing it’s a step towards healthy, effortless meals!
Maple Pecan Granola
Editor’s Choice

Bob’s Red Mill Gluten Free Old Fashioned Rolled Oats, 32oz (Pack of 4) -…

Amazon Brand – Happy Belly Pecan Halves, No Added Salt, 16 ounce (Pack o…

Viva Naturals Organic Coconut Oil – Unrefined, Cold-Pressed Extra Virgin…
17. Pumpkin Spice Chia Pudding

Dive into the cozy flavors of fall with this delightful Pumpkin Spice Chia Pudding. This creamy treat not only satisfies your sweet tooth but also supports your health goals. With chia seeds packed full of fiber and omega-3 fatty acids, you’re treating yourself to a dessert that nourishes your body and soul. Imagine enjoying a rich, spiced pudding that feels like a warm hug on a chilly day!
Making this pudding is a breeze. You only need five simple ingredients, and it takes just five minutes to prepare. Plus, it’s a fantastic make-ahead snack. Just prepare it the night before and let it chill in the fridge. When you wake up, you’ll have a delicious breakfast waiting for you. It’s perfect for busy mornings or a sweet afternoon pick-me-up!
Recipe Overview:
– Servings: 4
– Prep Time: 5 minutes
– Cook Time: None
– Total Time: 5 minutes
– Calories: 180 per serving
Nutrition Information:
– 6g protein
– 21g carbohydrates
– 8g fat
Ingredients:
– 1 cup almond milk
– 1/2 cup pumpkin puree
– 1/4 cup chia seeds
– 1 teaspoon pumpkin spice
– 2 tablespoons maple syrup
Instructions:
1. In a mixing bowl, combine almond milk, pumpkin puree, chia seeds, pumpkin spice, and maple syrup.
2. Stir well until everything is mixed.
3. Cover the bowl and refrigerate for at least 2 hours or, for best results, overnight.
4. Before serving, give it a good stir, then enjoy!
Feel free to add toppings like nuts or coconut flakes for extra crunch. This pumpkin spice chia pudding not only tastes great but is also a fun way to boost your nutrient intake!
FAQ:
– How long does it last in the fridge? It stays fresh for up to 5 days.
– Can I use coconut milk instead? Absolutely! It will give your pudding a creamier texture.
Pumpkin Spice Chia Pudding
Editor’s Choice

Garden of Life Chia Seeds 100% Organic for Smoothies, Pudding – Raw Orga…

McCormick Finishing Sugar, Pumpkin Spice, Limited Edition, Sweet Blend o…

Silk Shelf-Stable Almond Milk, Unsweetened Vanilla, Dairy-Free, Vegan, N…
18. Lemon Coconut Energy Bites

When you’re in need of a quick pick-me-up, these Lemon Coconut Energy Bites are your answer. They’re not just delicious; they pack a punch of nutrition that fuels your day. The bright, zesty lemon flavor dances perfectly with the sweetness of dates, creating a delightful treat that satisfies your cravings without any guilt.
These energy bites are a breeze to whip up. In just ten minutes, you can prepare a dozen nutritious snacks. Whether you need a boost after a workout or a convenient snack to take on the go, these bites have got you covered. Plus, they are gluten-free, making them suitable for various dietary needs.
Let’s dive into the recipe details:
Recipe Overview:
– Servings: 12 bites
– Prep Time: 10 minutes
– Cook Time: None
– Total Time: 10 minutes
– Calories: 100 per bite
Nutritional Information:
– 2g protein
– 15g carbohydrates
– 4g fat
Ingredients:
– 1 cup dates, pitted
– 1/2 cup shredded coconut
– 2 tablespoons lemon juice
– Zest of 1 lemon
– Pinch of salt
Instructions:
1. In a food processor, blend the dates, shredded coconut, lemon juice, lemon zest, and salt until you have a sticky mixture.
2. Roll this mixture into small balls, about the size of a tablespoon.
3. Refrigerate your bites for at least 30 minutes to firm them up.
4. Enjoy these bites whenever you need a quick snack!
You can even roll the bites in extra shredded coconut for a fun texture. Store them in the fridge, and they will last for up to two weeks, making them a perfect meal prep option.
FAQ:
– Can I use other fruits? Absolutely! Feel free to swap in other dried fruits if you prefer.
– Are these gluten-free? Yes, all the ingredients are gluten-free, so you can enjoy them worry-free!
These energy bites are simple yet effective. They combine taste and nutrition in a way that makes healthy snacking easy. So go ahead, give them a try, and feel the boost!
Lemon Coconut Energy Bites
Editor’s Choice

Hamilton Beach Food Processor & Vegetable Chopper for Slicing, Shredding…

365 by Whole Foods Market, Organic Shredded Coconut, 8 Ounce

50 Pack (100-Piece) 32 oz Meal Prep Containers Reusable with Lids 3-Comp…
19. Chocolate Banana Smoothie Bowl

Treat yourself to a delightful Chocolate Banana Smoothie Bowl! This tasty treat is not only delicious but also packed with nutrients. Whether you enjoy it for breakfast or as a light dessert, its creamy texture and rich flavors will satisfy your cravings. With the sweet taste of bananas and the richness of cocoa, you can customize it with a variety of toppings to make it your own.
Recipe Overview:
– Servings: 2
– Prep Time: 5 minutes
– Cook Time: None
– Total Time: 5 minutes
– Calories: 250 per serving
Nutrition Information: 5g protein, 35g carbohydrates, 10g fat
Ingredients:
– 1 frozen banana
– 1 cup almond milk
– 1/4 cup cocoa powder
– Toppings: berries, nuts, coconut flakes
Instructions:
1. Begin by placing the frozen banana, almond milk, and cocoa powder into a blender.
2. Blend until the mixture is smooth and creamy.
3. Pour the smoothie into bowls.
4. Add your favorite toppings, such as fresh berries, crunchy nuts, or coconut flakes.
5. Dig in and enjoy right away!
Want to elevate your smoothie bowl? Try adding a handful of spinach for extra vitamins or a scoop of protein powder for a satisfying boost. Remember, using ripe bananas will enhance the flavor, making it even tastier.
FAQ:
– Can I use fresh bananas? Yes, but frozen bananas create a creamier consistency.
– How long can I store it? It’s best enjoyed immediately, but you can keep it in the fridge for a few hours.
With this quick and tasty recipe, you can enjoy a nutritious meal that supports your health goals effortlessly!
Chocolate Banana Smoothie Bowl
Editor’s Choice
Ninja BL660 Professional Compact Smoothie & Food Processing Blender, 110…

Amazon Fresh, Unsweetened Cocoa Powder, 8 Oz (Pack of 3)

Califia Farms – Organic Unsweetened Almond Milk, 48 Oz, Dairy Free, Keto…
20. Fig Coconut Energy Bars

Looking for a tasty snack that fuels your day? Try these delightful Fig Coconut Energy Bars! They’re perfect for busy mornings or a quick pick-me-up anytime. Packed with healthy fats, natural sweetness, and a hint of coconut, these bars are not only delicious but also super easy to prepare. You’ll love how they fit into your meal prep routine, making snacking both enjoyable and nutritious.
Here’s what you need to know about making your own Fig Coconut Energy Bars:
Recipe Overview:
– Servings: 10 bars
– Prep Time: 10 minutes
– Cook Time: None
– Total Time: 10 minutes
– Calories: 180 per bar
Nutritional Information:
– Protein: 3g
– Carbohydrates: 28g
– Fat: 7g
Ingredients:
– 2 cups dried figs, chopped
– 1/2 cup shredded coconut
– 1/4 cup almond butter
– 1/4 cup chia seeds
– Pinch of salt
Instructions:
1. In a food processor, combine dried figs, shredded coconut, almond butter, chia seeds, and salt. Blend until the mixture is well combined.
2. Press the mixture firmly into a lined dish, shaping it into a compact bar.
3. Refrigerate for at least one hour to let the bars set before slicing them up.
4. Store your bars in an airtight container in the fridge for freshness.
Feel free to customize your bars! Add nuts or seeds for a delightful crunch. You can also freeze them for longer storage, making them an ideal treat to grab anytime.
FAQs:
– Can I use other dried fruits? Absolutely! Apricots or dates can be great substitutes.
– How long do they last? These bars will keep in the fridge for up to two weeks, perfect for meal prep!
With these easy-to-make Fig Coconut Energy Bars, you’ll have a nourishing snack that’s ready to go whenever you are. Enjoy the blend of flavors and the energy boost they provide!
Fig Coconut Energy Bars
Editor’s Choice
Hamilton Beach Food Processor & Vegetable Chopper for Slicing, Shredding…
Garden of Life Chia Seeds 100% Organic for Smoothies, Pudding – Raw Orga…
Rubbermaid Brilliance 16-Cup Airtight Food Storage Container with Lid Cl…
21. No-Bake Chocolate Chia Brownies

Looking for a sweet treat that won’t derail your health goals? These No-Bake Chocolate Chia Brownies are your answer! Rich, fudgy, and filled with wholesome ingredients like chia seeds and avocado, they satisfy your cravings without the guilt. Best of all, you can whip them up in just 15 minutes—no baking required! Plus, they’re gluten-free and dairy-free, making them a perfect dessert for everyone.
Here’s what you need to create these delicious brownies:
Recipe Overview:
– Servings: 12 brownies
– Prep Time: 15 minutes
– Cook Time: None
– Total Time: 15 minutes
– Calories: 180 per brownie
Nutritional Facts:
4g protein, 20g carbohydrates, 10g fat per brownie.
Ingredients:
– 1 cup dates, pitted
– 1/2 cup almond butter
– 1/4 cup cocoa powder
– 1/4 cup chia seeds
– 1/4 cup almond milk
– Pinch of salt
Instructions:
1. Add the dates, almond butter, cocoa powder, chia seeds, almond milk, and salt to a food processor. Blend until smooth and creamy.
2. Line a baking dish with parchment paper for easy removal. Press the brownie mixture evenly into the dish.
3. Chill in the refrigerator for at least 2 hours. This helps the brownies firm up. Afterward, cut them into squares.
4. Enjoy these brownies chilled! For an extra creamy bite, top with a dollop of nut butter before serving.
Storage Tips:
Keep your brownies in the fridge for a refreshing snack all week long! They’ll stay fresh for up to 7 days.
Frequently Asked Questions:
– Can I swap almond butter for peanut butter? Yes, peanut butter works wonderfully!
– How long can I keep these brownies? Store them in the fridge for up to a week for the best taste.
Creating these No-Bake Chocolate Chia Brownies not only satisfies your sweet tooth but also infuses your diet with nutrients. Whether you need a quick snack or a healthy dessert, these brownies are a great choice that you can feel good about eating.
No-Bake Chocolate Chia Brownies
Editor’s Choice
Hamilton Beach Food Processor & Vegetable Chopper for Slicing, Shredding…

MaraNatha Natural Creamy Almond Butter, No Stir, No Sugar or Salt Added,…

BetterBody Foods Organic Chia Seeds 2 lbs, 32 Oz, with Omega-3, Non-GMO,…
22. Vanilla Coconut Rice Pudding

Satisfy your cravings with a delightful bowl of Vanilla Coconut Rice Pudding. This creamy dessert is not only comforting but also free from dairy, making it perfect for those on a special diet. The rich flavor of coconut combined with the sweetness of vanilla brings a touch of the tropics to your kitchen. You’ll love how simple it is to whip up this treat in your crockpot!
Here’s the breakdown of this easy recipe:
Recipe Overview:
– Servings: 4
– Prep Time: 5 minutes
– Cook Time: 2 hours on low
– Total Time: 2 hours 5 minutes
– Calories: 220 per serving
Nutrition Information:
– Protein: 4g
– Carbohydrates: 33g
– Fat: 8g
Ingredients:
– 1 cup brown rice
– 2 cups coconut milk
– 1/4 cup maple syrup
– 1 teaspoon vanilla extract
– Pinch of salt
Instructions:
1. In your crockpot, mix together the brown rice, coconut milk, maple syrup, vanilla extract, and salt.
2. Stir everything until it’s well combined, then cover the crockpot and set it to cook on low for 2 hours.
3. Once done, serve the pudding warm or chilled. For a special touch, sprinkle some coconut flakes on top.
Enhance the flavor by adding a splash of almond extract, or brighten your dish with fresh fruit slices for a splash of color and nutrition.
FAQ:
– Can I use white rice instead? Yes, but adjust the cooking time to about 1 hour.
– How long will it last in the fridge? You can store it for up to 5 days in an airtight container.
This Vanilla Coconut Rice Pudding is not just a dessert; it’s a cozy hug in a bowl, making it a perfect end to any meal!
Vanilla Coconut Rice Pudding
Editor’s Choice
Crock-Pot 7 Quart Oval Manual Slow Cooker, Stainless Steel (SCV700-S-BR)…

365 by Whole Foods Market, Organic Coconut Milk, 13.5 Fl Oz

Butternut Mountain Farm Pure Maple Syrup From Vermont, Grade A (Prev. Gr…
You Might Also Like
23. Berry Chia Seed Jam

Start your day on a sweet note with this easy and wholesome Berry Chia Seed Jam. This delightful spread is not only quick to make but also brimming with nutrients. Free from refined sugars, it’s a fantastic way to add flavor and fiber to your breakfast. Spread it on toast, mix it into yogurt, or use it in your smoothies for a fruity boost. The best part? You can customize it with any berries you have at home!
Recipe Overview:
– Servings: 8
– Prep Time: 5 minutes
– Cook Time: None
– Total Time: 5 minutes
– Calories: 50 per tablespoon
Nutrition Information: 1g protein, 12g carbohydrates, 2g fat
Ingredients:
– 2 cups of mixed berries (fresh or frozen)
– 1/4 cup maple syrup (or adjust to your taste)
– 3 tablespoons chia seeds
Instructions:
1. In a small saucepan over medium heat, combine your berries and maple syrup.
2. Cook them for about 5 minutes or until the berries start to break down.
3. Remove the pan from heat and stir in the chia seeds.
4. Allow the mixture to cool and thicken before transferring it to a jar.
This jam is perfect for experimenting. Try different berry combinations to create unique flavors! You can store it in the fridge for up to two weeks, making it a convenient option for your busy mornings.
FAQs:
– Can I use sweeteners other than maple syrup? Absolutely! Honey or agave syrup are great alternatives.
– How do I use this jam? Spread it on toast, swirl it into yogurt, or blend it into smoothies for added flavor.
With this simple recipe, you can enjoy a delicious, healthy jam that supports your wellness journey. Happy cooking!
Berry Chia Seed Jam
Editor’s Choice
BetterBody Foods Organic Chia Seeds 2 lbs, 32 Oz, with Omega-3, Non-GMO,…
Butternut Mountain Farm Pure Vermont Maple Syrup, Grade A, Dark Color, R…

365 by Whole Foods Market, Organic Berry Blend, 32 Ounce
24. Almond Joy Energy Bites

Indulge your sweet tooth without the guilt with these delightful Almond Joy Energy Bites! They combine the rich flavors of chocolate, the crunch of almonds, and the sweetness of coconut into a simple snack that’s perfect for any time of day. Whether you need a midday pick-me-up or a post-workout boost, these bites are your go-to solution. Plus, they take just minutes to prepare, making healthy snacking effortless!
Let’s dive into the recipe:
Recipe Overview:
– Servings: 12 bites
– Prep Time: 10 minutes
– Cook Time: None
– Total Time: 10 minutes
– Calories: 120 per bite
Nutritional Information:
3g protein, 15g carbohydrates, 7g fat
Ingredients:
– 1 cup dates, pitted
– 1/2 cup almond butter
– 1/2 cup shredded coconut
– 1/4 cup dark chocolate chips (dairy-free)
Instructions:
1. Place the dates, almond butter, shredded coconut, and dark chocolate chips in a food processor. Blend until everything is combined and smooth.
2. Scoop out the mixture and roll it into small balls.
3. Chill the bites in the refrigerator for 30 minutes to firm them up.
4. Enjoy these energy bites as a quick and healthy snack!
Storage Tips:
– Keep them fresh by storing in an airtight container in the fridge for up to two weeks.
– For an added crunch, sprinkle some crushed almonds into the mixture before rolling!
FAQs:
– Can I use other nut butters? Absolutely! Peanut butter or cashew butter work great too!
– Are these gluten-free? Yes! All the ingredients are naturally gluten-free, making them safe for those with sensitivities.
These Almond Joy Energy Bites are not just tasty; they are a fantastic way to fuel your day with wholesome ingredients. So go ahead, prepare a batch, and enjoy these little bites of joy anytime you crave something sweet!
Almond Joy Energy Bites
Editor’s Choice
Hamilton Beach Food Processor & Vegetable Chopper for Slicing, Shredding…
Rubbermaid Brilliance 16-Cup Airtight Food Storage Container with Lid Cl…
GHIRARDELLI Non-Dairy Dark Chocolate Chips for Baking, Premium Baking Ch…
25. Pineapple Coconut Smoothie

Escape to a tropical paradise with a delightful Pineapple Coconut Smoothie! This creamy treat is not only delicious but also packed with nutrients, making it a fantastic choice for breakfast or an afternoon pick-me-up. The sweet and tangy notes of pineapple, combined with the rich creaminess of coconut, will transport your taste buds straight to the beach.
Ready to whip this up? It takes just five minutes! You’ll feel energized and refreshed, perfect for starting your day or recharging during a busy afternoon. Plus, it’s a great way to sneak in some fruits and healthy fats into your diet.
Recipe Overview:
– Servings: 2
– Prep Time: 5 minutes
– Cook Time: None
– Total Time: 5 minutes
– Calories: 200 per serving
Nutrition Information: 3g protein, 30g carbohydrates, 9g fat
Ingredients:
– 1 cup pineapple chunks (fresh or frozen)
– 1 banana, frozen
– 1 cup coconut milk
– 1 tablespoon shredded coconut (for garnish)
Instructions:
1. Toss the pineapple, banana, and coconut milk into a blender.
2. Blend until smooth and creamy.
3. Pour the smoothie into glasses.
4. Top with shredded coconut for a nice finish.
5. Enjoy right away!
Feel like mixing it up? Add a handful of spinach or kale to boost the nutrients without changing the taste. Also, if you have leftovers, freeze them in ice cube trays. This way, you can pop out a smoothie cube for a quick and refreshing treat later!
FAQ:
– Can I use light coconut milk? Yes, but it will be less creamy.
– How long does it last? Best enjoyed fresh, but it can sit out for a couple of hours.
With this Pineapple Coconut Smoothie, you’ll not only enjoy a burst of flavor but also nourish your body effortlessly. Cheers to your health!
Pineapple Coconut Smoothie
Editor’s Choice
Ninja BL660 Professional Compact Smoothie & Food Processing Blender, 110…

Simply Asia Unsweetened Coconut Milk, 13.66 fl oz – One 13.66 Ounce Can …

365 by Whole Foods Market Organic Pineapple Chunks, 10 OZ
26. Peanut Butter Banana Overnight Oats

Kickstart your mornings with a delightful bowl of Peanut Butter Banana Overnight Oats! This simple recipe is not just easy to prepare; it’s also packed with flavor and nutrients to power your day. Imagine waking up to creamy oats blended with sweet banana and rich peanut butter, all waiting for you in the fridge. It’s a hearty breakfast that satisfies your hunger and keeps you energized!
Recipe Overview:
– Servings: 2
– Prep Time: 5 minutes
– Cook Time: None
– Total Time: 5 minutes
– Calories: 300 per serving
Nutrition Information: 10g protein, 45g carbohydrates, 12g fat
Ingredients:
– 1 cup rolled oats (gluten-free)
– 2 cups almond milk
– 1 ripe banana, sliced
– 1/4 cup peanut butter
– 2 tablespoons honey
Instructions:
1. In a bowl or jar, mix the rolled oats and almond milk together.
2. Add the sliced banana, peanut butter, and honey. Stir until everything is well combined.
3. Cover your bowl or jar and place it in the refrigerator overnight.
4. In the morning, enjoy your oats cold or warm them up if you prefer!
Feel free to top your oats with extra banana slices or a sprinkle of nuts for added crunch. This recipe is perfect for meal prep, allowing you to grab a delicious breakfast on busy mornings without any hassle.
FAQ:
– Can I use different nut butters? Sure! Almond butter is a tasty alternative.
– How long do leftovers last? Keep them in the fridge for up to 3 days for the best taste.
Embrace this easy recipe and enjoy a nutritious start to your day!
Peanut Butter Banana Overnight Oats
Editor’s Choice
Bob’s Red Mill Gluten Free Old Fashioned Rolled Oats, 32oz (Pack of 4) -…
Califia Farms – Organic Unsweetened Almond Milk, 48 Oz, Dairy Free, Keto…

SKIPPY Natural Creamy Peanut Butter Spread Twin Pack 2-Pack, 5 LB
27. Raspberry Coconut Chia Pudding

Indulge in the lusciousness of Raspberry Coconut Chia Pudding! This delightful dessert is not only a treat for your taste buds but also a breeze to whip up. You can enjoy its creamy texture while packing in essential nutrients, making it a smart choice for your healthy lifestyle. Plus, it’s a fun way to satisfy your sweet cravings without any guilt.
Let’s dive into the details of this quick recipe:
Recipe Overview:
– Servings: 4
– Prep Time: 5 minutes
– Cook Time: None
– Total Time: 5 minutes
– Calories: 150 per serving
Nutrition Information:
4g protein, 20g carbohydrates, 7g fat
Ingredients:
– 1 cup almond milk
– 1/2 cup raspberries (fresh or frozen)
– 1/4 cup chia seeds
– 2 tablespoons maple syrup
Instructions:
1. In a mixing bowl, combine almond milk, raspberries, chia seeds, and maple syrup.
2. Stir the mixture well and let it sit for about 10 minutes to thicken.
3. After that, stir again and refrigerate for at least 2 hours, or overnight for best results.
4. Once ready, serve it chilled and top with extra raspberries for a pop of color!
Want to jazz it up? Here are some fun ideas:
– Add a scoop of your favorite protein powder for an extra nutrient boost.
– Top with coconut flakes for a delightful crunch!
FAQ:
– Can I use different fruits? Absolutely! Blueberries or strawberries are fantastic substitutes.
– How long will it last in the fridge? This pudding stays fresh for up to 5 days, perfect for meal prep!
This Raspberry Coconut Chia Pudding is a great way to nourish your body while enjoying a delicious dessert. It’s simple, healthy, and a treat you can feel good about. Enjoy every bite!
Raspberry Coconut Chia Pudding
Editor’s Choice
BetterBody Foods Organic Chia Seeds 2 lbs, 32 Oz, with Omega-3, Non-GMO,…
Silk Shelf-Stable Almond Milk, Unsweetened Vanilla, Dairy-Free, Vegan, N…
Butternut Mountain Farm Pure Vermont Maple Syrup, Grade A, Dark Color, R…
28. Chocolate Peanut Butter Smoothie

Indulge in the rich, creamy goodness of a Chocolate Peanut Butter Smoothie! This delightful drink is not just a treat; it’s a powerhouse of nutrients. Perfect for breakfast or a quick afternoon boost, it combines the satisfying flavors of chocolate and peanut butter with the natural sweetness of bananas. You’ll love how easy it is to whip up this delicious smoothie in just five minutes.
Here’s how to make it:
Recipe Overview:
– Servings: 2
– Prep Time: 5 minutes
– Cook Time: None
– Total Time: 5 minutes
– Calories: 300 per serving
Nutritional Information:
Protein: 10g
Carbohydrates: 40g
Fat: 12g
Ingredients:
– 1 frozen banana
– 1 tablespoon cocoa powder
– 1/4 cup peanut butter
– 1 cup almond milk
– 1 tablespoon honey
Instructions:
1. Start by placing the frozen banana, cocoa powder, peanut butter, almond milk, and honey in your blender.
2. Blend everything until smooth and creamy.
3. Pour the mixture into glasses, and enjoy!
Want to amp up the nutrition? Add spinach to your blend! You won’t even taste it, but your body will thank you for the extra vitamins. For a fun twist, use dairy-free chocolate chips as a topping.
Common Questions:
– Can I use fresh bananas? Yes! But freezing gives a creamier texture that many love.
– How long can I store it? It’s best fresh, but you can keep it in the fridge for a couple of hours if needed.
This Chocolate Peanut Butter Smoothie is more than just a drink; it’s a quick and delicious way to fuel your day while sticking to your health goals. Enjoy the rich flavors and the burst of energy it brings!
Chocolate Peanut Butter Smoothie
Editor’s Choice

Isopure Zero Carb 100% Pure Whey Isolate Protein Powder, Lactose Free, G…

Personal Blender, Shakes, Smoothies, Food Prep, and Frozen Blending, 24 …

Viva Naturals Organic Cacao Powder, 1lb – Unsweetened Cacao Powder With …
29. Apple Cinnamon Energy Bites

Craving a snack that’s both delicious and nutritious? Try these Apple Cinnamon Energy Bites! They’re sweet, chewy, and bursting with the cozy flavors of fall. Perfect for busy days, these bites will keep your energy up and your taste buds happy. Plus, they take just 15 minutes to make—no cooking required!
Here’s how to whip them up:
Recipe Overview:
– Servings: 12 bites
– Prep Time: 15 minutes
– Cook Time: None
– Total Time: 15 minutes
– Calories: 120 per bite
Nutrition Information:
2g protein, 20g carbohydrates, 5g fat
Ingredients:
– 1 cup dried apples, chopped
– 1 cup oats
– 1/2 cup almond butter
– 1 teaspoon cinnamon
– Pinch of salt
Instructions:
1. In a mixing bowl, combine the dried apples, oats, almond butter, cinnamon, and salt. Stir until everything is sticky and well mixed.
2. Roll the mixture into small balls, about the size of a golf ball.
3. Place the bites in the fridge for 30 minutes to firm up.
4. Enjoy your healthy snack anytime!
These bites can last up to a week in the fridge, making them a great option for meal prep. Feel free to get creative! Try adding different dried fruits or nuts to change the flavor.
FAQ:
– Can I use fresh apples? Dried apples are best for the right texture and sweetness.
– Are these gluten-free? Yes! Just use certified gluten-free oats.
With these simple bites, you’ll have a tasty treat ready to go whenever you need a quick energy boost. Enjoy the flavors of fall, no matter the season!
Apple Cinnamon Energy Bites
Editor’s Choice
Bob’s Red Mill Gluten Free Old Fashioned Rolled Oats, 32oz (Pack of 4) -…
365 by Whole Foods Market, Organic Creamy Almond Butter, 16 Ounce

30. Orange Coconut Chia Pudding

Treat yourself to the tropical delight of Orange Coconut Chia Pudding. This refreshing dessert bursts with vibrant flavors, combining creamy coconut with the zesty brightness of orange. It’s not just delicious; it’s a guilt-free way to satisfy your sweet tooth while sticking to your health goals. Perfect for any meal, this pudding is quick to whip up and can be made ahead of time!
With just five minutes of prep, you can create a dessert that serves four people. You’ll love how easy it is to prepare. Let’s break down the recipe so you can enjoy this tasty treat in no time.
Recipe Overview:
– Servings: 4
– Prep Time: 5 minutes
– Cook Time: None
– Total Time: 5 minutes
– Calories: 160 per serving
Nutritional Information:
– Protein: 4g
– Carbohydrates: 20g
– Fat: 7g
Ingredients:
– 1 cup almond milk
– 1/2 cup fresh orange juice
– 1/4 cup chia seeds
– Zest of 1 orange
– 2 tablespoons maple syrup (adjust to taste)
Instructions:
1. In a mixing bowl, combine almond milk, orange juice, chia seeds, orange zest, and maple syrup.
2. Stir the mixture thoroughly and let it sit for 10 minutes to thicken.
3. Refrigerate for at least 2 hours, or better yet, overnight for optimal texture.
4. Serve chilled and garnish with fresh orange slices for a beautiful presentation.
Want to add a little crunch? Consider topping your pudding with nuts or toasted coconut flakes. This simple addition will elevate the flavor and texture, making it even more enjoyable!
FAQ:
– Can I use a different juice? Yes! Feel free to experiment with juices like pineapple or grapefruit for a unique twist.
– How long can I store it? This pudding keeps well in the fridge for up to five days, making it a great make-ahead option for busy weeks.
Try this Orange Coconut Chia Pudding today! It’s a delightful, healthy dessert that makes you feel good inside and out. Enjoy the taste of paradise with every spoonful!
Did you know you can whip up a creamy Orange Coconut Chia Pudding in just five minutes? This autoimmune paleo friendly dessert serves four and keeps cravings satisfied without derailing healing goals.
Orange Coconut Chia Pudding
Editor’s Choice
BetterBody Foods Organic Chia Seeds 2 lbs, 32 Oz, with Omega-3, Non-GMO,…
Silk Shelf-Stable Almond Milk, Unsweetened Vanilla, Dairy-Free, Vegan, N…
Butternut Mountain Farm Pure Vermont Maple Syrup, Grade A, Dark Color, R…
Conclusion

These 30+ Autoimmune Paleo crockpot recipes are not only healing but also comforting and delicious. They offer a variety of flavors and ingredients to keep your meals exciting while adhering to your dietary needs. Whether you’re in the mood for savory stews or sweet treats, there’s something here for everyone!
Experiment with the dishes that resonate with you, and don’t hesitate to make them your own by swapping ingredients or adding personal touches. Enjoy the journey towards health and wellness, one slow-cooked meal at a time!
Note: We aim to provide accurate product links, but some may occasionally expire or become unavailable. If this happens, please search directly on Amazon for the product or a suitable alternative.
This post contains Amazon affiliate links, meaning I may earn a small commission if you purchase through my links, at no extra cost to you.
Frequently Asked Questions
What Are Autoimmune Paleo Crockpot Recipes?
Autoimmune Paleo Crockpot Recipes are delicious, healing meals designed specifically for those following the Autoimmune Protocol (AIP) diet. They utilize a slow cooker to make meal preparation effortless and can include a variety of ingredients that are autoimmune friendly. These recipes often focus on whole foods, avoiding grains, dairy, and processed ingredients to support overall health and wellness.
By using a crockpot, you can save time and enjoy nutritious meals with minimal effort!
How Can I Make My Crockpot Recipes More Autoimmune Friendly?
To make your crockpot recipes more autoimmune friendly, focus on using fresh, whole ingredients. Avoid items that contain gluten, dairy, and legumes. Instead, consider using vegetables, lean meats, and healthy fats like coconut oil or olive oil. Spices and herbs can enhance flavor without compromising your dietary needs. Don’t forget to explore various paleo meal prep ideas to keep your meals interesting and satisfying!
Are There Any Easy Healing Recipes for Beginners?
Absolutely! There are plenty of easy healing recipes perfect for beginners. Look for simple dishes like slow-cooked chicken with vegetables or hearty soups that require minimal prep time. Many of the paleo slow cooker recipes included in our article are straightforward and can be made in under 10 minutes of prep time. Just set your crockpot, and let it do the work while you enjoy your day!
What Are Some Must-Try Healthy Crockpot Dishes?
You’ll want to try a few standout healthy crockpot dishes like beef stew with root vegetables, chicken curry, or vegetable chili. Each of these can easily be made in a slow cooker, allowing flavors to meld beautifully while you go about your day. These dishes are not only nourishing but also autoimmune paleo crockpot recipes that support your healing journey!
How Do I Meal Prep Using Autoimmune Paleo Crockpot Recipes?
Meal prepping with autoimmune paleo crockpot recipes is a breeze! Start by choosing a few recipes you’d like to try, then gather your ingredients. Spend a day prepping by chopping vegetables and marinating meats. You can even assemble raw ingredients in freezer bags for quick access later. On the day you plan to eat, simply dump everything into the crockpot, set it, and let it cook. This way, you have autoimmune friendly meals ready to go for the week!