Are you tired of the daily dinner struggle? You know what I mean. You walk into the kitchen after a long day, and the thought of whipping up a meal feels overwhelming. If you’re someone who wants to eat healthy while keeping things simple, you’re in the right place.
This post is all about making your life easier with 30+ paleo sheet pan recipes. These recipes are perfect for busy nights when you don’t want to spend hours cooking. I created this list because I understand how hard it can be to juggle work, family, and a healthy lifestyle. You want meals that are not just good for you, but also quick to prepare.
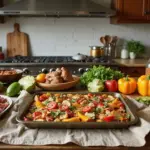
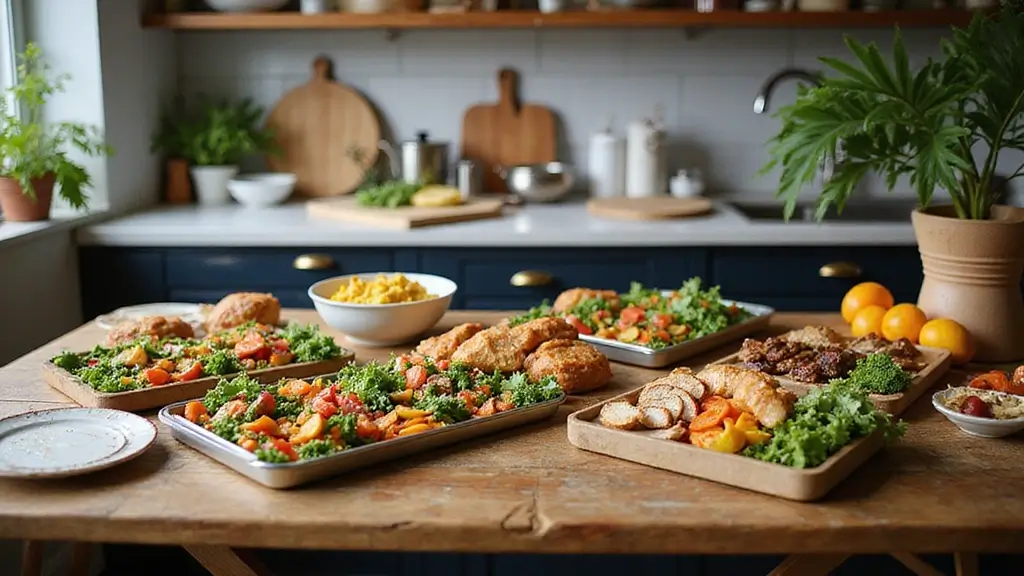
With these recipes, you’ll get a variety of delicious, easy-to-follow options that take advantage of your oven. Picture this: you toss your ingredients on a sheet pan, pop it in the oven, and let it do the work while you kick back. These meals are not only flavorful but also packed with wholesome ingredients.
Whether you’re a seasoned paleo follower or just dipping your toes into this way of eating, you’ll find something here that speaks to you. From hearty meats to colorful veggies, these recipes cater to all tastes. Plus, they’re great for families or anyone looking to meal prep for the week.
So, let’s dive in! You’re just a few clicks away from transforming your dinner routine into something effortless and delicious. Say goodbye to the stress of meal planning and hello to easy, tasty dinners that you’ll look forward to.
1. One-Pan Lemon Herb Chicken

Recipe Overview: Servings: 4 | Prep Time: 15 minutes | Cook Time: 30 minutes | Total Time: 45 minutes | Calories: 300 per serving.
Ready for a dinner that’s as easy as it is delicious? Try this One-Pan Lemon Herb Chicken! The bright zing of lemon complements the savory herbs, creating juicy, flavorful chicken. Toss in seasonal veggies, and you have a meal that’s not just tasty but also packed with nutrients.
Nutrition Information: Protein: 30g | Carbs: 15g | Fat: 15g.
Ingredients:
– 4 chicken thighs
– 2 cups broccoli florets
– 1 red bell pepper, sliced
– 1 lemon (zested and juiced)
– 1 tsp dried oregano
– 2 tbsp olive oil
– Salt and pepper to taste.
Instructions:
1. Preheat your oven to 400°F (200°C).
2. In a bowl, combine olive oil, lemon juice, lemon zest, oregano, salt, and pepper.
3. Coat the chicken thighs evenly with this zesty mixture.
4. Spread the chicken and veggies on a sheet pan, making sure they have some space.
5. Bake for 25-30 minutes or until the chicken is fully cooked.
For even more flavor, marinate the chicken the night before. You can also swap in any seasonal veggies you have on hand, like carrots or zucchini. They’ll soak up that lovely lemony goodness too!
Frequently Asked Questions:
– Can I use chicken breast instead of thighs? Yes, but keep an eye on cooking time.
– What can I substitute for broccoli? Try cauliflower or green beans for a tasty twist!
This dish is perfect for busy weeknights. It’s simple, healthy, and requires minimal cleanup. Enjoy your effortless dinner!
One-Pan Lemon Herb Chicken
Editor’s Choice

GoodCook Everyday Nonstick Carbon Steel Baking Sheet Set, 3 Pack – Small…

AOZITA 17oz Glass Olive Oil Bottle Dispenser – 500ml Green Oil and Vineg…

Practical Paleo, 2nd Edition (Updated And Expanded): A Customized Approa…
2. Spicy Shrimp and Asparagus

Recipe Overview: Servings: 4, Prep Time: 10 minutes, Cook Time: 15 minutes, Total Time: 25 minutes, Calories: 250 per serving.
Are you looking for a quick, delicious meal that won’t keep you in the kitchen for hours? This Spicy Shrimp and Asparagus dish is your answer! The shrimp cooks in a flash, making it ideal for those busy weeknights. You’ll love the bold, spicy rub that gives it a kick, while the asparagus adds a satisfying crunch and a healthy boost.
Nutrition Information: Protein: 25g, Carbs: 10g, Fat: 12g.
Ingredients:
– 1 lb shrimp, peeled and deveined
– 1 bunch asparagus, trimmed
– 2 tbsp olive oil
– 1 tsp chili powder
– 1 tsp garlic powder
– Salt and pepper to taste
Instructions:
1. Start by preheating your oven to 425°F (220°C). This ensures your shrimp and asparagus roast perfectly.
2. In a mixing bowl, toss the shrimp with olive oil, chili powder, garlic powder, salt, and pepper. Make sure every shrimp is coated with the spice mix for maximum flavor.
3. Spread the shrimp and asparagus evenly on a sheet pan. Roast for about 12-15 minutes, until the shrimp turn pink and the asparagus is tender.
Finish with a squeeze of lime for a refreshing zing. Serve your dish over cauliflower rice for a complete and satisfying meal.
Frequently Asked Questions:
– Can I use frozen shrimp? Yes, just ensure they are thawed before cooking for the best texture.
– What else can I add? Feel free to include bell peppers or zucchini for extra color and nutrients!
This recipe not only saves you time but also keeps your dinner delicious and healthy. Enjoy your effortless meal!
Spicy Shrimp and Asparagus
Editor’s Choice
GoodCook Everyday Nonstick Carbon Steel Baking Sheet Set, 3 Pack – Small…

Pompeian USDA Certified Organic Extra Virgin Olive Oil Non-Stick Cooking…
3. Roasted Sausage and Peppers

Recipe Overview: Servings: 4, Prep Time: 10 minutes, Cook Time: 30 minutes, Total Time: 40 minutes, Calories: 400 per serving.
Looking for a quick, satisfying meal? Try this roasted sausage and peppers dish! The juicy sausages combine perfectly with sweet bell peppers and onions for a hearty dinner. Roasting brings out rich flavors, making it feel indulgent yet healthy. You can switch up the sausages to match your taste or what you have on hand!
Nutrition Information: Protein: 28g, Carbs: 20g, Fat: 25g.
Ingredients:
– 1 lb sausage (choose chicken, pork, or turkey)
– 2 bell peppers, sliced (red or yellow adds sweetness)
– 1 onion, sliced
– 2 tbsp olive oil
– 1 tsp Italian seasoning
– Salt and pepper to taste
Instructions:
1. Preheat your oven to 400°F (200°C).
2. On a sheet pan, toss together the sausage, peppers, onions, olive oil, Italian seasoning, salt, and pepper.
3. Roast everything for about 30 minutes, stirring halfway through to ensure even cooking.
Want to add more veggies? Toss in some zucchini for extra color and nutrition. Pair this dish with a fresh side salad to round out your meal!
Frequently Asked Questions:
– Can I use pre-cooked sausage? Yes! Just cut down the cooking time.
– What other vegetables can I include? Carrots and mushrooms are great options too!
– How can I make this meal spicier? Add sliced jalapeños or a pinch of red pepper flakes for some heat!
– Can I prepare this ahead of time? Absolutely! Just store it in the fridge and reheat when ready to eat.
Roasted Sausage and Peppers
Editor’s Choice
GoodCook Everyday Nonstick Carbon Steel Baking Sheet Set, 3 Pack – Small…

TrendPlain 16oz/470ml Glass Olive Oil Sprayer for Cooking – 2 in 1 Olive…

Simply Organic Italian Seasoning, 0.95 Ounce, Organic Herbs, Oregano, Ma…
4. Herbed Pork Chops with Sweet Potatoes

Recipe Overview: Servings: 4, Prep Time: 15 minutes, Cook Time: 30 minutes, Total Time: 45 minutes, Calories: 350 per serving.
Imagine sinking your teeth into juicy, herbed pork chops paired with sweet potatoes that melt in your mouth. This dish is not only delicious but also quick to prepare, making it a go-to for busy weeknight dinners. The savory flavors of the pork combined with the natural sweetness of the potatoes create a meal that will please everyone at the table.
Nutrition Information: Protein: 34g, Carbs: 25g, Fat: 12g.
Ingredients:
– 4 pork chops
– 2 sweet potatoes, diced
– 2 tbsp olive oil
– 1 tsp dried thyme
– 1 tsp garlic powder
– Salt and pepper to taste
Instructions:
1. Start by preheating your oven to 425°F (220°C). This high heat will help caramelize the sweet potatoes.
2. In a large mixing bowl, combine the diced sweet potatoes with olive oil, thyme, garlic powder, salt, and pepper. Toss them until they are well coated.
3. Spread the seasoned sweet potatoes on a sheet pan. Place the pork chops on the same pan for easy cooking.
4. Roast everything in the oven for about 25-30 minutes. You want the pork to be fully cooked and the potatoes to be tender.
5. Let the pork chops rest for a few minutes after cooking. This step ensures they stay juicy. For an extra touch, sprinkle fresh herbs on top just before serving.
Frequently Asked Questions:
– Can I use bone-in pork chops? Yes, bone-in chops work well too; just adjust the cooking time slightly.
– What if I don’t have sweet potatoes? Regular potatoes are a great substitute!
This meal is simple yet satisfying, perfect for when you need to get dinner on the table fast without sacrificing flavor. Enjoy your culinary creation!
Herbed Pork Chops with Sweet Potatoes
Editor’s Choice
GoodCook Everyday Nonstick Carbon Steel Baking Sheet Set, 3 Pack – Small…
AOZITA 17oz Glass Olive Oil Bottle Dispenser – 500ml Green Oil and Vineg…
5. Balsamic Glazed Chicken and Brussels Sprouts

Recipe Overview: Servings: 4, Prep Time: 10 minutes, Cook Time: 25 minutes, Total Time: 35 minutes, Calories: 320 per serving.
Looking to make dinner a breeze? This Balsamic Glazed Chicken and Brussels Sprouts recipe is your answer. The tangy balsamic glaze transforms ordinary chicken and veggies into a dish that feels gourmet. As it cooks, the glaze thickens and caramelizes, adding a rich, sticky sweetness that makes every bite irresistible. Plus, you’re sneaking in those healthy Brussels sprouts without anyone complaining!
Nutrition Information: Protein: 28g, Carbs: 15g, Fat: 14g.
Ingredients:
– 4 chicken breasts
– 1 lb Brussels sprouts, halved
– 1/4 cup balsamic vinegar
– 2 tbsp honey
– 2 tbsp olive oil
– Salt and pepper to taste.
Instructions:
1. Preheat your oven to 400°F (200°C). This step is key for that beautiful caramelization.
2. In a bowl, whisk together balsamic vinegar, honey, olive oil, salt, and pepper until well combined. This glaze is what makes the dish shine!
3. Coat the chicken breasts and Brussels sprouts thoroughly in the balsamic mixture. Make sure everything is well covered for the best flavor.
4. Spread the chicken and sprouts evenly on a sheet pan. Bake for about 25 minutes, or until the chicken is cooked through and the Brussels sprouts are tender.
This dish pairs wonderfully with creamy mashed cauliflower to balance the flavors. Cut the Brussels sprouts evenly so they cook uniformly.
Frequently Asked Questions:
– Can I use a different type of vinegar? Yes, but balsamic really gives this dish a unique flavor that others can’t match!
– Is this dish freezer-friendly? Absolutely! You can freeze leftovers for up to 3 months. Just reheat when you’re ready to enjoy.
Whip this up for a quick weeknight dinner that impresses! You’ll love how simple it is to bring bold flavors to your table.
Balsamic Glazed Chicken and Brussels Sprouts
Editor’s Choice
GoodCook Everyday Nonstick Carbon Steel Baking Sheet Set, 3 Pack – Small…

Colavita Balsamic Vinegar of Modena, 17 Ounce Bottle

Pompeian Robust Extra Virgin Olive Oil, Contains Polyphenols, First Cold…
6. Mediterranean Roasted Veggies and Chicken

Recipe Overview: Servings: 4 | Prep Time: 15 minutes | Cook Time: 30 minutes | Total Time: 45 minutes | Calories: 290 per serving.
Craving a flavorful meal that takes little effort? Try this Mediterranean Roasted Veggies and Chicken recipe. It brings the sunny flavors of the Mediterranean right to your kitchen. With its colorful veggies and juicy chicken, this dish is not only healthy but also visually appealing. You’ll love the aroma of fresh herbs and roasted vegetables filling your home, making dinner feel special and inviting.
Nutrition Information: Protein: 27g | Carbs: 12g | Fat: 18g.
Ingredients:
– 4 chicken thighs
– 1 zucchini, sliced
– 1 eggplant, diced
– 1 bell pepper, chopped
– 1/4 cup olive oil
– 1 teaspoon oregano
– Salt and pepper to taste
Instructions:
1. Preheat your oven to 425°F (220°C).
2. In a bowl, mix the olive oil, oregano, salt, and pepper. Coat the chicken thighs and veggies with this flavorful mixture.
3. Spread the chicken and vegetables evenly on a sheet pan.
4. Roast everything in the oven for 30 minutes or until the chicken is cooked through and the veggies are tender.
Want to elevate your dish even more? Try adding olives or crumbled feta cheese for a burst of Mediterranean flair. Using vibrant seasonal veggies not only enhances the taste but also makes your plate look stunning, perfect for impressing guests or enjoying a cozy dinner.
Frequently Asked Questions:
– Can I use skinless chicken? Yes! Just keep an eye on the cooking time to ensure it stays juicy.
– What if I don’t have eggplant? No problem! Substitute it with any seasonal vegetable that you have on hand.
This recipe is a breeze to whip up on busy weeknights or when you want to treat yourself without a lot of fuss. Enjoy a delicious, nutrient-packed meal that feels like a culinary getaway!
Mediterranean Roasted Veggies and Chicken
Editor’s Choice
GoodCook Everyday Nonstick Carbon Steel Baking Sheet Set, 3 Pack – Small…
AOZITA 17oz Glass Olive Oil Bottle Dispenser – 500ml Green Oil and Vineg…
7. Garlic Butter Salmon and Green Beans

Recipe Overview: This garlic butter salmon and green beans dish serves four. You’ll spend just 10 minutes prepping and 20 minutes cooking, making a total of 30 minutes for a meal packed with flavor and nutrition. With only 350 calories per serving, it’s a perfect solution for busy weeknights when you crave something wholesome and delicious.
Imagine the rich aroma of garlic butter wafting through your kitchen as you prepare this easy-to-make dish. The tender salmon pairs beautifully with crisp green beans, creating a satisfying dinner that feels gourmet yet requires minimal effort. It’s a great way to enjoy healthy fats and protein without fussing over complicated recipes.
Nutrition Information: Each serving contains 30g of protein, 5g of carbs, and 25g of fat.
Ingredients:
– 4 salmon fillets
– 1 lb green beans, trimmed
– 1/4 cup melted butter
– 3 cloves garlic, minced
– Salt and pepper to taste
Instructions:
1. Preheat your oven to 400°F (200°C).
2. In a bowl, mix the melted butter with minced garlic, salt, and pepper.
3. Place the salmon and green beans on a sheet pan.
4. Drizzle the garlic butter mixture over the salmon and green beans.
5. Bake for 15-20 minutes until the salmon flakes easily with a fork.
You can swap green beans for asparagus or broccoli for a fresh twist. Just make sure not to overcook the salmon!
Frequently Asked Questions:
– Can I use frozen salmon? Yes, just add a few extra minutes to the cooking time.
– What should I serve with this? A light side salad pairs perfectly.
This meal not only saves you time but also fills your kitchen with delightful scents, making it a favorite in your recipe rotation. Enjoy!
Garlic Butter Salmon and Green Beans
Editor’s Choice
GoodCook Everyday Nonstick Carbon Steel Baking Sheet Set, 3 Pack – Small…

Kitessensu High Effective Garlic Press With Studs, Heavy Duty Garlic Min…

Alpha Grillers Meat Thermometer Digital – Instant Read Food Thermometer …
8. Teriyaki Chicken and Snap Peas

Turn your dinner routine into a delightful experience with Teriyaki Chicken and Snap Peas. This dish brings the rich flavors of Asia right to your table. The sweet and savory teriyaki sauce pairs beautifully with the crunchy snap peas, creating a colorful meal that your family will absolutely love. Plus, it’s super quick to prepare, making it a perfect choice for busy weeknights.
Here’s how to make it! You’ll need just a few ingredients, and the preparation takes only 15 minutes. The oven does all the heavy lifting, baking everything to perfection in about 25 minutes. This dish is not only tasty but also nutritious, with 26 grams of protein and only 280 calories per serving.
Ingredients:
– 4 chicken breasts, diced
– 2 cups snap peas
– 1/2 cup teriyaki sauce (choose gluten-free if preferred)
– 1 tablespoon sesame oil
– 1 teaspoon garlic, minced
Instructions:
1. Preheat your oven to 400°F (200°C).
2. In a large bowl, combine the diced chicken, snap peas, teriyaki sauce, sesame oil, and minced garlic. Toss until everything is well coated.
3. Spread the mixture evenly on a sheet pan. Bake for 20-25 minutes, or until the chicken is fully cooked and the snap peas are tender.
To add a finishing touch, sprinkle sesame seeds on top before serving. For a complete meal, serve it over cauliflower rice.
Frequently Asked Questions:
– Can I use other proteins? Absolutely! Shrimp or tofu work great in this recipe.
– Is this dish spicy? Not at all, but you can add chili flakes for a kick if you like heat!
Enjoy this hassle-free meal that’s packed with flavor and nutrition. It’s a dinner option that’s sure to please everyone at your table.
Teriyaki Chicken and Snap Peas
Editor’s Choice
GoodCook Everyday Nonstick Carbon Steel Baking Sheet Set, 3 Pack – Small…

Kikkoman Less Sodium Gluten-Free Gourmet Teriyaki Marinade and Sauce, (0…

La Tourangelle, Toasted Sesame Oil, Great for Cooking, Add to Noodles, S…
9. Moroccan Spiced Lamb with Carrots

Recipe Overview: Servings: 4 | Prep Time: 15 minutes | Cook Time: 30 minutes | Total Time: 45 minutes | Calories: 400 per serving.
Looking to spice up your dinner routine? Try this Moroccan Spiced Lamb with Carrots! This dish bursts with exotic flavors that transport your taste buds straight to North Africa. Tender lamb chops roast beautifully alongside sweet, caramelized carrots. It’s a delightful way to create a memorable family meal with minimal fuss.
Nutrition Information: Protein: 35g | Carbs: 15g | Fat: 20g.
Ingredients:
– 1 lb lamb chops
– 4 carrots, sliced
– 2 tbsp olive oil
– 2 tsp ground cumin
– 1 tsp ground coriander
– Salt and pepper to taste
Instructions:
1. Start by preheating your oven to 375°F (190°C).
2. In a large bowl, combine the lamb chops and sliced carrots. Drizzle with olive oil and sprinkle cumin, coriander, salt, and pepper. Toss everything until well-coated.
3. Spread the mixture evenly on a sheet pan. Roast in the oven for about 30 minutes, or until the lamb reaches your desired doneness. A meat thermometer can help here; aim for 145°F (63°C) for medium-rare.
4. Serve your Moroccan lamb and carrots with a side of cauliflower couscous for an authentic touch.
This dish is perfect for weeknight dinners or special occasions, making it feel festive without taking hours in the kitchen.
Frequently Asked Questions:
– Can I use beef instead of lamb? Yes! Beef is a great substitute and pairs well with the spices.
– What if I can’t find Moroccan spices? No worries! A mix of paprika, cinnamon, and garlic powder works wonderfully too.
Enjoy your culinary adventure with this Moroccan delight! It’s a simple way to add some flair to your dinner table.
Moroccan Spiced Lamb with Carrots
Editor’s Choice
GoodCook Everyday Nonstick Carbon Steel Baking Sheet Set, 3 Pack – Small…
Alpha Grillers Meat Thermometer Digital – Instant Read Food Thermometer …

Amazon Basics Electric Coffee Grinder, Coffee Bean and Spice Grinder, Wi…
10. BBQ Chicken and Roasted Corn

Recipe Overview: Servings: 4, Prep Time: 15 minutes, Cook Time: 30 minutes, Total Time: 45 minutes, Calories: 350 per serving.
Craving a BBQ feast that captures the spirit of summer? Look no further than this BBQ chicken paired with sweet roasted corn. Each bite is bursting with flavor, making it a delightful dish that everyone in the family will love. Plus, it’s super easy to prepare, bringing a taste of nostalgia to your dinner table, no matter the season.
Nutrition Information: Protein: 32g, Carbs: 20g, Fat: 15g.
Ingredients:
– 4 chicken thighs
– 4 ears of corn
– 1/2 cup BBQ sauce
– 2 tbsp olive oil
– Salt and pepper to taste.
Instructions:
1. Preheat your oven to 400°F (200°C).
2. Generously brush the chicken thighs with BBQ sauce. Don’t forget to season with salt and pepper for that extra zing.
3. Lay the chicken and corn on a sheet pan, keeping them spaced out for even cooking.
4. Bake for about 30 minutes. Halfway through, baste the chicken with more BBQ sauce to keep it juicy and flavorful.
Serve this dish with a fresh side salad for a pop of color and crunch. If you’re feeling adventurous, grill the corn before roasting to add a delicious smoky flavor.
Frequently Asked Questions:
– Can I swap the chicken for another protein? Absolutely! Pork tenderloin is a fantastic alternative.
– What if I don’t have BBQ sauce on hand? No problem! Mix tomato paste with vinegar and spices for a quick and tasty replacement.
Enjoy this simple yet satisfying meal that brings smiles to the dinner table!
BBQ Chicken and Roasted Corn
Editor’s Choice
GoodCook Everyday Nonstick Carbon Steel Baking Sheet Set, 3 Pack – Small…

Primal Kitchen Organic BBQ Sauce | Made with Real Ingredients | No Cane …
Pompeian USDA Certified Organic Extra Virgin Olive Oil Non-Stick Cooking…
11. Chili Lime Tilapia and Broccoli

Recipe Overview: Servings: 4 | Prep Time: 10 minutes | Cook Time: 20 minutes | Total Time: 30 minutes | Calories: 290 per serving.
Get ready to brighten your dinner with a dish that’s bursting with flavor! This chili lime tilapia is a delightful blend of zesty lime and spicy chili. Paired with crunchy broccoli, it makes for a healthy meal that’s quick and easy to prepare, perfect for your busiest nights.
Nutrition Information: Protein: 26g | Carbs: 12g | Fat: 9g.
Ingredients:
– 4 tilapia fillets
– 2 cups broccoli florets
– 1 lime (zested and juiced)
– 2 tbsp olive oil
– 1 tsp chili powder
– Salt and pepper to taste
Instructions:
1. Preheat your oven to 425°F (220°C).
2. In a mixing bowl, combine lime juice, zest, chili powder, olive oil, salt, and pepper.
3. Coat the tilapia fillets and broccoli florets in the mixture until they’re well covered.
4. Spread them evenly on a sheet pan. Bake for 15-20 minutes until the fish is flaky and tender.
For an extra creamy touch, serve this dish with slices of avocado. If you’re short on time, frozen tilapia works great too—just adjust the cooking time a bit.
Frequently Asked Questions:
– Can I swap tilapia for another fish? Yes! Any mild white fish, like cod or haddock, works well.
– Can I add more veggies? Absolutely! Try bell peppers or zucchini for a colorful twist.
This dish not only satisfies your taste buds but also fits perfectly into your Paleo lifestyle. It’s quick, nutritious, and will leave you feeling great! Enjoy a hassle-free dinner tonight!
Fun fact: This chili lime tilapia dish is one of my go-to paleo sheet pan recipes for busy weeknights—it’s a quick 30-minute meal. With 290 calories per serving, plus 26g protein and 12g carbs, it’s a practical, tasty win for families.
Chili Lime Tilapia and Broccoli
Editor’s Choice
GoodCook Everyday Nonstick Carbon Steel Baking Sheet Set, 3 Pack – Small…
TrendPlain 16oz/470ml Glass Olive Oil Sprayer for Cooking – 2 in 1 Olive…

12. Honey Mustard Chicken and Root Veggies

Recipe Overview: Servings: 4, Prep Time: 15 minutes, Cook Time: 30 minutes, Total Time: 45 minutes, Calories: 320 per serving.
Imagine a meal that brings together the sweetness of honey and the tang of mustard, all wrapped around juicy chicken thighs. This Honey Mustard Chicken and Root Veggies dish does just that. It pairs beautifully with hearty root vegetables, making it a wholesome option for a busy weeknight. The chicken roasts to perfection, and the veggies get tender and flavorful. This is a meal everyone at your table will enjoy, even those picky eaters!
Here’s what you need to make it happen:
Ingredients:
– 4 chicken thighs
– 2 carrots, sliced
– 2 parsnips, diced
– 1/4 cup honey mustard
– 2 tbsp olive oil
– Salt and pepper to taste
Instructions:
1. Preheat your oven to 400°F (200°C).
2. In a bowl, mix the honey mustard with olive oil, salt, and pepper.
3. Coat the chicken and root veggies in this tasty mixture.
4. Spread everything evenly on a sheet pan and roast for 30 minutes until the chicken is cooked through and the veggies are tender.
Want to make it heartier? Toss in some diced potatoes. They soak up the flavors and make the dish even more filling. This recipe is also super easy to double if you’re feeding a crowd!
Frequently Asked Questions:
– Can I use chicken breast? Yes, just remember to adjust the cooking time since breasts cook faster.
– Is this dish freezer-friendly? Absolutely! You can freeze leftovers for a quick meal later.
This recipe not only makes dinner effortless but also brings comfort and flavor to your table. Enjoy every bite!
Honey Mustard Chicken and Root Veggies
Editor’s Choice
GoodCook Everyday Nonstick Carbon Steel Baking Sheet Set, 3 Pack – Small…

Wish-Bone Salad Dressing, Sweet & Spicy Honey Mustard, 15 oz
TrendPlain 16oz/470ml Glass Olive Oil Sprayer for Cooking – 2 in 1 Olive…
You might also like

13. Pesto Chicken and Zucchini Noodles

Recipe Overview: Servings: 4, Prep Time: 10 minutes, Cook Time: 20 minutes, Total Time: 30 minutes, Calories: 290 per serving.
If you’re looking to shake up dinner, try this delightful Pesto Chicken with Zucchini Noodles. This dish swaps out traditional pasta for fresh zucchini noodles, making it a perfect fit for a Paleo lifestyle. The zesty pesto sauce adds a burst of flavor, while the chicken stays juicy and tender. It’s a quick and nutritious meal that your whole family will love.
Nutrition Information: Protein: 26g, Carbs: 8g, Fat: 18g.
Ingredients:
– 4 chicken breasts
– 4 cups zucchini noodles
– 1/2 cup pesto sauce
– 2 tbsp olive oil
– Salt and pepper to taste
Instructions:
1. Preheat your oven to 400°F (200°C). This ensures a nice roast.
2. In a bowl, coat the chicken breasts with pesto and olive oil. Add salt and pepper to taste.
3. Place the chicken on a sheet pan, spreading them out for even cooking.
4. Roast the chicken for 20 minutes or until fully cooked.
5. In the last 5 minutes, add the zucchini noodles to the pan. Toss them gently to warm through.
For an extra pop of flavor, consider making your own pesto. You can top the dish with pine nuts for that delightful crunch. This meal not only tastes great but also looks vibrant and fresh.
Frequently Asked Questions:
– Can I use chicken thighs instead? Yes, chicken thighs will work beautifully.
– How can I make this dish heartier? Serve it over a bed of quinoa or brown rice for added substance.
With this simple recipe, you can enjoy a wholesome dinner that’s both satisfying and quick to prepare. Your family will be asking for seconds!
Pesto Chicken and Zucchini Noodles
Editor’s Choice
GoodCook Everyday Nonstick Carbon Steel Baking Sheet Set, 3 Pack – Small…

Brieftons 5-Blade Vegetable Spiralizer: Strongest-Heaviest Spiral Slicer…

Classico Signature Recipes Traditional Basil Pesto Sauce & Spread, 8.1 o…
14. Sheet Pan Fajitas

Recipe Overview: If you’re looking for a quick and tasty dinner, these sheet pan fajitas are a game changer! With a prep time of just 15 minutes and a cook time of 30 minutes, you can have a delicious meal on the table in under an hour. Each serving offers a satisfying 320 calories, making it a healthy choice for the whole family.
Imagine the scent of sizzling chicken or beef mingling with sweet bell peppers and onions wafting through your kitchen. These fajitas bring the vibrant colors and flavors of a fiesta right to your dinner table. You can serve them in lettuce wraps for a fun low-carb twist that everyone will love!
Nutrition Information: Protein: 30g, Carbs: 18g, Fat: 14g.
Ingredients:
– 1 lb chicken breast or beef strips
– 2 bell peppers, sliced (choose red and yellow for color)
– 1 onion, sliced
– 2 tbsp olive oil
– 2 tsp fajita seasoning (homemade or store-bought)
– Salt and pepper to taste.
Instructions:
1. Preheat your oven to 400°F (200°C).
2. In a large bowl, combine the chicken or beef with olive oil, fajita seasoning, salt, and pepper. Mix well to coat every piece.
3. Spread the meat mixture on a sheet pan and top with the sliced bell peppers and onions.
4. Bake for 25-30 minutes, or until the meat is thoroughly cooked and the veggies are tender.
For an extra burst of flavor, top your fajitas with slices of avocado, a squeeze of fresh lime, and a sprinkle of cilantro. Save any leftovers for lunch wraps the next day—trust me, they taste just as good!
Frequently Asked Questions:
– Can I use shrimp? Absolutely! Just remember to reduce the cooking time to prevent overcooking.
– What sides pair well with this dish? Cauliflower rice is a great choice to complement your fajitas and make it a complete meal!
These sheet pan fajitas make dinner effortless, allowing you to enjoy a healthy meal without the fuss. Try them tonight!
Sheet Pan Fajitas
Editor’s Choice
GoodCook Everyday Nonstick Carbon Steel Baking Sheet Set, 3 Pack – Small…

Chef Merito | Fajitas Rancheras Seasoning | 13 OZ | Authentic Latin Flav…
Pompeian USDA Certified Organic Extra Virgin Olive Oil Non-Stick Cooking…
15. Spaghetti Squash and Meatballs

Recipe Overview: Servings: 4, Prep Time: 15 minutes, Cook Time: 30 minutes, Total Time: 45 minutes, Calories: 300 per serving.
Looking for a meal that feels indulgent but keeps it healthy? This Spaghetti Squash and Meatballs recipe brings the comfort of Italian cuisine to your table while sticking to paleo principles. Imagine tender roasted spaghetti squash topped with juicy meatballs, all smothered in a rich, flavorful tomato sauce. It’s a dish your family will love, minus the guilt of traditional pasta!
Nutrition Information: Protein: 28g, Carbs: 15g, Fat: 14g.
Ingredients:
– 1 spaghetti squash
– 1 lb ground beef or turkey
– 1 cup tomato sauce (sugar-free)
– 2 tbsp Italian seasoning
– Salt and pepper to taste
Instructions:
1. Preheat your oven to 375°F (190°C).
2. Cut the spaghetti squash in half and scoop out the seeds. Drizzle it with olive oil, then sprinkle with salt and pepper.
3. Form meatballs from the ground beef or turkey, season with Italian seasoning, and place them on a sheet pan.
4. Bake the meatballs for 30 minutes. In the last few minutes, add the squash to the oven to roast until tender.
For an extra flavor boost, mix some garlic powder into your meatball mixture. Don’t forget to garnish with fresh basil before serving—it adds a lovely pop of color and freshness!
Frequently Asked Questions:
– Can I use pre-made meatballs? Yes! Just check that they are paleo-friendly.
– What other sauces can I use? Try a homemade pesto for a tasty twist.
This dish is not just about flavor; it’s a simple way to get dinner on the table quickly. Enjoy this healthy twist on a classic favorite tonight!
Spaghetti Squash and Meatballs
Editor’s Choice

GoodCook Everyday Nonstick Carbon Steel Baking Sheet Set, 3 Pack – Small…

Amazon Grocery, Italian Seasoning, 1 Oz (Previously Happy Belly, Packagi…
16. Italian Chicken and Veggie Bake

Recipe Overview: Servings: 4, Prep Time: 10 minutes, Cook Time: 30 minutes, Total Time: 40 minutes, Calories: 340 per serving.
Looking for a simple yet delicious dinner? This Italian Chicken and Veggie Bake is your answer! It’s packed with vibrant flavors and fresh ingredients that will make your taste buds dance. The juicy chicken pairs perfectly with crunchy vegetables, creating a meal that’s both satisfying and nutritious. Plus, it’s quick to prepare, so you can spend less time in the kitchen and more time enjoying your meal.
Nutrition Information: Protein: 30g, Carbs: 12g, Fat: 18g.
Ingredients:
– 4 chicken breasts
– 2 cups zucchini, sliced
– 2 cups bell peppers, sliced
– 1/4 cup olive oil
– 2 tablespoons Italian seasoning
– Salt and pepper to taste
Instructions:
1. Preheat your oven to 400°F (200°C).
2. In a large bowl, combine the chicken, zucchini, bell peppers, olive oil, Italian seasoning, salt, and pepper. Toss everything until the chicken and veggies are well coated in the seasoning.
3. Spread the mixture evenly on a sheet pan.
4. Roast in the oven for 30 minutes until the chicken is cooked through and the veggies are tender.
Serve this lovely dish with a side salad for a refreshing crunch. Feel free to adjust the seasoning to match your family’s favorite flavors!
Frequently Asked Questions:
– Can I use other proteins? Absolutely! Turkey or pork are great alternatives.
– What if I don’t have fresh herbs? Dried herbs work in a pinch, but the flavor may differ slightly.
This recipe is not only easy to make, but it also encourages you to experiment with your favorite vegetables or spices. Enjoy the comfort of Italian cuisine without the fuss!
Did you know this Italian Chicken and Veggie Bake turns around dinner in 40 minutes? It serves 4 and clocks in at around 340 calories per serving, a perfect addition to your paleo sheet pan recipes lineup for busy families.
Italian Chicken and Veggie Bake
Editor’s Choice
GoodCook Everyday Nonstick Carbon Steel Baking Sheet Set, 3 Pack – Small…
AOZITA 17oz Glass Olive Oil Bottle Dispenser – 500ml Green Oil and Vineg…
Simply Organic Italian Seasoning, 0.95 Ounce, Organic Herbs, Oregano, Ma…
17. Coconut Curry Chicken with Cauliflower

Imagine diving into a bowl of Coconut Curry Chicken with Cauliflower. This dish brings together the rich, creamy taste of coconut milk and aromatic curry spices, making dinner feel like a mini-vacation. You’ll savor every bite as the tender chicken and cauliflower blend perfectly. Plus, it’s healthy, filling, and easy to prepare—great for busy weeknights!
Let’s break down how to make this delightful meal. You’ll need just a few simple ingredients, and in under an hour, you’ll have a delicious dinner on the table. Here’s what you’ll need:
Ingredients:
– 4 chicken thighs, diced
– 1 head of cauliflower, cut into florets
– 1 can of coconut milk
– 2 tablespoons of curry powder
– Salt and pepper to taste
Instructions:
1. Preheat your oven to 400°F (200°C).
2. In a mixing bowl, whisk together the coconut milk, curry powder, salt, and pepper.
3. Add the diced chicken and cauliflower florets to the bowl. Toss until everything is coated in the sauce.
4. Spread the mixture evenly on a sheet pan.
5. Bake for 30 minutes, or until the chicken is cooked through and the cauliflower is tender.
Garnish with fresh cilantro for an extra pop of flavor. You can even throw in some peas for a splash of color and added nutrients!
Frequently Asked Questions:
– Can I use other vegetables? Yes! Bell peppers and green beans work well.
– Is this dish spicy? Not really, but feel free to add chili flakes if you like a kick!
This Coconut Curry Chicken with Cauliflower isn’t just easy to make; it’s also a crowd-pleaser. Enjoy a taste of the tropics tonight!
Coconut Curry Chicken with Cauliflower
Editor’s Choice
GoodCook Everyday Nonstick Carbon Steel Baking Sheet Set, 3 Pack – Small…

Birch & Meadow 2 lb of Curry Powder, Stews & Soups, Authentic Flavor

365 by Whole Foods Market, Organic Coconut Milk, 13.5 Fl Oz
18. Chicken and Pineapple Stir Fry

Recipe Overview: Are you looking for a quick and tasty dinner? This chicken and pineapple stir fry is the answer! With a prep time of just 10 minutes and a cook time of 20 minutes, you can have a delicious meal on the table in about half an hour. Each serving has only 300 calories, making it a healthy choice for the whole family.
The sweet pineapple caramelizes in the oven, creating a mouthwatering blend of flavors. It pairs perfectly with cauliflower rice, keeping your meal nutritious and low-carb. You’ll enjoy the vibrant colors and tantalizing smells as this dish cooks.
Nutrition Information: Protein: 28g, Carbs: 15g, Fat: 10g.
Ingredients:
– 4 chicken breasts, diced
– 1 cup pineapple chunks
– 2 bell peppers, sliced (any color you like!)
– 2 tbsp coconut aminos (a great soy sauce alternative)
– 2 tbsp olive oil
– Salt and pepper to taste
Instructions:
1. Preheat your oven to 400°F (200°C) to get it nice and hot.
2. In a large bowl, combine the diced chicken, pineapple chunks, sliced bell peppers, coconut aminos, olive oil, salt, and pepper. Toss everything until coated well.
3. Spread the mixture evenly on a sheet pan, making sure it’s in a single layer.
4. Bake for 20 minutes, or until the chicken is cooked through and everything is golden.
For an extra crunch, top with sliced green onions before serving. Pair this stir fry with cauliflower rice, and you’ll have a satisfying, low-carb meal that’s sure to impress!
Frequently Asked Questions:
– Can I use frozen pineapple? Yes, just be sure to drain any excess liquid before adding it.
– What if I want it spicier? Feel free to sprinkle in some chili flakes or a dash of sriracha for a kick!
This dish is not just easy to make; it’s also a fun way to enjoy a healthy meal that your family will love. Enjoy your cooking!
Chicken and Pineapple Stir Fry
Editor’s Choice
GoodCook Everyday Nonstick Carbon Steel Baking Sheet Set, 3 Pack – Small…

365 by Whole Foods Market, Organic Riced Cauliflower, 24 Ounce

Bragg Organic Coconut Aminos – 16oz, Soy-Free Alternative, Gluten-Free, …
19. Beef and Broccoli Stir Fry

Recipe Overview: Servings: 4, Prep Time: 10 minutes, Cook Time: 20 minutes, Total Time: 30 minutes, Calories: 320 per serving.
Looking for a quick dinner that packs a flavor punch? Try this mouthwatering beef and broccoli stir fry! It’s a classic dish with a savory sauce that will leave everyone at the table wanting more. To make it even better, serve it over cauliflower rice for a healthy twist. This meal is not just easy to make; it’s also perfect for busy nights when you need something satisfying in a hurry.
Nutrition Information: Protein: 30g, Carbs: 10g, Fat: 15g.
Ingredients:
– 1 lb beef strips
– 2 cups broccoli florets
– 1/4 cup coconut aminos
– 2 tbsp olive oil
– Salt and pepper to taste
Instructions:
1. Preheat your oven to 400°F (200°C).
2. In a big bowl, toss together beef strips and broccoli florets with coconut aminos, olive oil, salt, and pepper. Make sure everything is well coated.
3. Spread the mixture evenly on a sheet pan. Bake for 20 minutes until the beef is cooked to your liking and the broccoli is tender.
4. For a special touch, sprinkle sesame seeds on top before serving. Pair it with cauliflower rice to create a complete meal that’s both healthy and hearty.
If you’re wondering about substitutions, yes, you can easily swap chicken for beef if you prefer. Want a bit more sauce? Add a splash of beef broth to the mix for extra flavor.
Enjoy this delightful dish that makes dinner effortless and delicious!
• Use fresh broccoli for the best flavor and nutrition
• Choose high-quality beef for tenderness
• Pick cauliflower rice for a low-carb option
• Add sesame seeds for a stylish finish
Beef and Broccoli Stir Fry
Editor’s Choice
GoodCook Everyday Nonstick Carbon Steel Baking Sheet Set, 3 Pack – Small…


BetterBody Foods Organic Coconut Aminos, Soy Sauce Alternative, Gluten F…
20. Chicken and Veggie Skewers

Recipe Overview: Servings: 4 | Prep Time: 15 minutes | Cook Time: 25 minutes | Total Time: 40 minutes | Calories: 300 per serving.
Are you looking for a fun and healthy dinner idea? These chicken and veggie skewers are perfect for you! They combine juicy chicken with colorful bell peppers, zucchini, and onion. Not only are they easy to make, but they also bring a burst of color to your dinner table. Whether it’s a family meal or a friendly gathering, these skewers will impress everyone!
Nutrition Information: Protein: 28g | Carbs: 12g | Fat: 15g.
Ingredients:
– 1 lb chicken breast, cubed
– 1 bell pepper, cubed (choose any color!)
– 1 zucchini, sliced into rounds
– 1 onion, cubed
– 2 tbsp olive oil
– Salt and pepper to taste
Instructions:
1. Preheat your oven to 400°F (200°C).
2. In a large bowl, mix the chicken, bell pepper, zucchini, onion, olive oil, salt, and pepper until everything is well coated.
3. Thread the ingredients onto skewers, alternating between chicken and veggies for a colorful look.
4. Place the skewers on a sheet pan and bake for about 25 minutes. Make sure the chicken is cooked through and no longer pink inside.
A quick tip: Soak wooden skewers in water for 30 minutes before using them. This helps prevent burning in the oven. Serve these skewers with a fresh salad or some quinoa for a complete meal that everyone will love!
Frequently Asked Questions:
– Can I add other vegetables? Absolutely! Try adding mushrooms, cherry tomatoes, or even asparagus for variety.
– What if I don’t have skewers? No problem! Simply spread the chicken and veggies on the sheet pan and roast them together for a delicious one-pan meal.
This meal is not just easy; it also adds a healthy twist to your dinner routine. Enjoy your cooking!
Chicken and Veggie Skewers
Editor’s Choice

HOPELF 12″ Natural Bamboo Skewers for BBQ,Appetiser,Fruit,Cocktail,Kabob…
GoodCook Everyday Nonstick Carbon Steel Baking Sheet Set, 3 Pack – Small…
AOZITA 17oz Glass Olive Oil Bottle Dispenser – 500ml Green Oil and Vineg…
21. Jerk Chicken with Roasted Pineapple

Recipe Overview: Servings: 4 | Prep Time: 15 minutes | Cook Time: 30 minutes | Total Time: 45 minutes | Calories: 400 per serving.
Craving a taste of the tropics? This Jerk Chicken with Roasted Pineapple is your ticket to a flavor adventure! The spicy jerk chicken pairs perfectly with the sweet, caramelized pineapple, creating a dish that’s both exciting and satisfying. It’s a fun family meal that transports your taste buds straight to the Caribbean.
Nutrition Information: Protein: 32g | Carbs: 20g | Fat: 18g.
Ingredients:
– 4 chicken thighs
– 1 pineapple, sliced
– 2 tbsp jerk seasoning
– 2 tbsp olive oil
– Salt to taste
Instructions:
1. Preheat your oven to 400°F (200°C).
2. Coat the chicken thighs in jerk seasoning and olive oil. Make sure they’re well covered for maximum flavor!
3. Arrange the chicken and pineapple slices on a sheet pan, spreading them out evenly.
4. Bake for 30 minutes, or until the chicken is fully cooked and the pineapple is golden and caramelized.
Serve this dish with coconut rice for an added tropical twist. Keep an eye on the pineapple to prevent it from overcooking; the caramelization is key!
Frequently Asked Questions:
– Can I use other cuts of chicken? Yes, chicken breasts work too! Just adjust the cooking time to ensure they don’t dry out.
– Is jerk seasoning spicy? It can be! If you prefer a milder flavor, look for mild jerk seasoning options to suit your taste.
This delicious recipe not only brings variety to your dinner table but also keeps cooking simple and fun. Enjoy the vibrant flavors and make mealtime memorable!
Jerk Chicken with Roasted Pineapple
Editor’s Choice
GoodCook Everyday Nonstick Carbon Steel Baking Sheet Set, 3 Pack – Small…

Walkerswood Traditional Jamaican Jerk Seasoning, Mild, 10 oz
Pompeian Robust Extra Virgin Olive Oil, Contains Polyphenols, First Cold…
22. Bacon-Wrapped Brussels Sprouts

Recipe Overview: Servings: 4 | Prep Time: 15 minutes | Cook Time: 30 minutes | Total Time: 45 minutes | Calories: 290 per serving.
Looking for a dish that wows your family and friends? Try these Bacon-Wrapped Brussels Sprouts! They bring together the savory crunch of bacon and the tender bite of Brussels sprouts. This recipe is not just tasty; it’s a fun way to serve greens that everyone will love.
Imagine the aroma of crispy bacon filling your kitchen while these little bites of heaven roast in the oven. They make for a perfect side dish or an exciting appetizer for your next gathering.
Nutrition Information: Protein: 20g | Carbs: 10g | Fat: 22g.
Ingredients:
– 1 lb Brussels sprouts, halved
– 8 slices bacon, cut in half
– 2 tbsp olive oil
– Salt and pepper to taste
Instructions:
1. Preheat your oven to 400°F (200°C). This temperature helps the bacon get crispy.
2. Take each Brussels sprout half and wrap it with a piece of bacon, securing it with a toothpick. This step is where the magic starts!
3. Drizzle the wrapped sprouts with olive oil, and sprinkle with salt and pepper. This adds flavor and helps with browning.
4. Arrange them on a sheet pan in a single layer. Bake for 30 minutes. Keep an eye on them, so the bacon doesn’t burn.
For an extra pop of flavor, drizzle some balsamic glaze over them before serving. It’s a small touch that makes a big difference!
Frequently Asked Questions:
– Can I use turkey bacon? Yes! Just remember that cooking times may vary.
– What can I pair this with? These sprouts shine as a side dish or a fun finger food for parties!
Get ready to impress with this easy recipe!
Bacon-Wrapped Brussels Sprouts
Editor’s Choice
GoodCook Everyday Nonstick Carbon Steel Baking Sheet Set, 3 Pack – Small…

600 Count Bamboo Toothpicks for Teeth Cleaning, Appetizer, Olive, Barbec…

Filippo Berio Glaze with Balsamic Vinegar of Modena, 8.4 Ounce Plastic B…
You Might Also Like
23. Eggplant Parmesan Bake

Recipe Overview: Servings: 4, Prep Time: 20 minutes, Cook Time: 30 minutes, Total Time: 50 minutes, Calories: 320 per serving.
Imagine indulging in a warm, cheesy Eggplant Parmesan Bake that satisfies your cravings without the pasta. This dish layers roasted eggplant with rich marinara sauce and gooey cheese, making it a perfect fit for your paleo diet. It’s hearty, delicious, and sure to impress everyone at your dinner table, even if they’re not following paleo!
Nutrition Information: Protein: 20g, Carbs: 15g, Fat: 22g.
Ingredients:
– 2 eggplants, sliced into rounds
– 2 cups marinara sauce (homemade or store-bought)
– 1 cup mozzarella cheese (substitute with dairy-free if preferred)
– 2 tablespoons olive oil
– Salt and pepper to taste
– Fresh basil for garnish (optional)
Instructions:
1. Preheat your oven to 375°F (190°C).
2. Lightly brush the eggplant slices with olive oil. Sprinkle salt and pepper on both sides.
3. In a baking dish or sheet pan, start layering. Place a layer of eggplant, followed by marinara sauce, then sprinkle cheese. Repeat this process.
4. Bake for 30 minutes or until the cheese is bubbly and golden brown.
5. Allow it to cool for a few minutes before slicing. Top with fresh basil for a burst of flavor.
Frequently Asked Questions:
– Can I prepare this in advance? Absolutely! This dish is great for meal prep. Just reheat it before serving.
– What if I don’t have marinara sauce? No worries! You can use a simple tomato sauce instead.
This Eggplant Parmesan Bake not only nourishes your body but also warms your soul. Serve it with a side salad for a complete meal that feels comforting and satisfying. Enjoy your cooking adventure!
Eggplant Parmesan Bake
Editor’s Choice
GoodCook Everyday Nonstick Carbon Steel Baking Sheet Set, 3 Pack – Small…

YARRAMATE 16oz/470ml Glass Olive Oil Sprayer for Cooking with Stickers, …

Silicone Baking Mat, 3 Pack Reusable Baking Mat, Non-Stick, Food Safe Si…
24. Stuffed Peppers

Stuffed peppers are a delightful way to bring color and nutrition to your dinner table. These vibrant veggies are not just pretty; they are filled with ground meat, veggies, and spices that create a flavor explosion. Plus, they are a hit with both kids and adults! You can even make them ahead of time for those busy weeknights.
Imagine biting into a tender pepper, bursting with savory goodness. Each serving is about 280 calories, making this a satisfying yet healthy option for dinner. Ready to give them a try?
Ingredients:
– 4 bell peppers, halved
– 1 lb ground turkey or beef
– 1 cup cauliflower rice
– 1 tsp Italian seasoning
– Salt and pepper to taste
Instructions:
1. Preheat your oven to 400°F (200°C). This ensures your peppers cook evenly.
2. In a large bowl, mix together the ground meat, cauliflower rice, Italian seasoning, salt, and pepper. This is where all the flavors come together!
3. Carefully stuff each pepper half with the meat mixture. Pack it in well for the best taste.
4. Arrange the stuffed peppers on a sheet pan and bake for 30 minutes. You’ll know they’re ready when they are tender and the meat is cooked through.
These stuffed peppers are great topped with avocado or fresh herbs for an extra layer of flavor. Want to make meal prep easier? Freeze the unbaked stuffed peppers for quick meals later.
Frequently Asked Questions:
– Can I swap cauliflower rice for quinoa? Absolutely! Just keep in mind it will change the texture slightly.
– Don’t have bell peppers? Zucchini makes a fantastic alternative for stuffing!
Give these stuffed peppers a go, and enjoy a meal that’s as easy to make as it is delicious!
Stuffed Peppers
Editor’s Choice
GoodCook Everyday Nonstick Carbon Steel Baking Sheet Set, 3 Pack – Small…

Kitchen & Love Organic Riced Cauliflower 8 oz (6 Pack) | Low Carb, Low C…
25. Sweet Potato and Black Bean Tacos

Delicious Sweet Potato and Black Bean Tacos
Looking for a quick and satisfying dinner? These sweet potato and black bean tacos are your answer! With vibrant flavors and a hearty feel, they fit perfectly into your busy weeknight routine. Plus, you can easily swap tortillas for lettuce wraps for a fresh, low-carb touch. Just imagine biting into these colorful, nutritious tacos that are as good for your body as they are for your taste buds.
This recipe serves four and takes just 15 minutes to prep and 30 minutes to cook. Each serving contains about 280 calories, making it a wholesome choice for dinner. Let’s break down what you’ll need and how to make these tasty tacos.
Ingredients:
– 2 sweet potatoes, diced
– 1 can black beans, drained
– 1 tsp cumin
– 1 tsp chili powder
– Lettuce leaves for wrapping
– Salt and pepper to taste
Instructions:
1. Preheat your oven to 400°F (200°C).
2. In a bowl, toss the diced sweet potatoes with cumin, chili powder, salt, and pepper until evenly coated.
3. Spread the sweet potatoes on a sheet pan in a single layer.
4. Roast the sweet potatoes for 25 minutes until they are tender and slightly caramelized.
5. Stir in the black beans and let them warm for about 5 minutes in the oven.
6. Serve the mixture in lettuce leaves, adding salsa or avocado for an extra kick.
Feel free to prepare the sweet potatoes ahead of time for a quicker meal. If you want to mix it up, try using other beans like kidney or pinto. These easy tacos are versatile and can easily become a family favorite or a go-to for your next gathering!
Quick Tips:
– Use fresh salsa for added flavor.
– Choose a variety of lettuce for different textures.
– Add avocado slices for creaminess.
– Make it a meal prep favorite by storing leftovers in the fridge.
Enjoy these delightful tacos that make healthy eating effortless and delicious!
Sweet Potato and Black Bean Tacos
Editor’s Choice
GoodCook Everyday Nonstick Carbon Steel Baking Sheet Set, 3 Pack – Small…

Reusable Food Bags, 12 Pack 100% Silicone Food Storage Bags Stand Up Zip…
26. Shrimp Tacos with Cabbage Slaw

Recipe Overview: Servings: 4, Prep Time: 15 minutes, Cook Time: 20 minutes, Total Time: 35 minutes, Calories: 310 per serving.
If you’re looking for a quick and tasty dinner, these shrimp tacos with cabbage slaw are a perfect choice. They bring the fresh flavors of the beach straight to your kitchen. The succulent shrimp cook in no time, while the crunchy cabbage slaw adds a refreshing crunch. This dish is not only easy to make but also fun for the whole family to enjoy!
Nutrition Information: Protein: 30g, Carbs: 25g, Fat: 10g.
Ingredients:
– 1 lb shrimp, peeled and deveined
– 2 cups cabbage, shredded
– 1 lime, juiced
– 2 tbsp olive oil
– Salt and pepper to taste
Instructions:
1. Preheat your oven to 400°F (200°C).
2. In a bowl, toss the shrimp with olive oil, lime juice, salt, and pepper until well coated.
3. Spread the shrimp evenly on a sheet pan.
4. Roast in the oven for about 15-20 minutes, or until the shrimp turn pink and opaque.
5. Serve the shrimp in lettuce wraps topped with a generous helping of cabbage slaw.
Want to amp up the flavor? Add some creamy avocado or sprinkle fresh cilantro on top for an extra zing!
Frequently Asked Questions:
– Can I use frozen shrimp? Yes, just be sure to thaw them completely before cooking.
– Looking for more crunch in your slaw? Toss in some grated carrots or sliced radishes for added texture.
This simple yet satisfying dish is perfect for busy weeknights. It’s quick to prepare and packed with flavor, ensuring dinner is both delicious and effortless.
Shrimp Tacos with Cabbage Slaw
Editor’s Choice
GoodCook Everyday Nonstick Carbon Steel Baking Sheet Set, 3 Pack – Small…

Nonoji MAX Cabbage Peeler and Shredder with Non-Slip Handle, Julienne, 2…
27. Baked Feta and Tomato Pasta

Recipe Overview: Servings: 4 | Prep Time: 10 minutes | Cook Time: 30 minutes | Total Time: 40 minutes | Calories: 350 per serving.
Imagine a dinner that combines creamy feta, sweet roasted tomatoes, and your favorite pasta—all in one pan! This Baked Feta and Tomato Pasta is not just easy to make; it’s a dish that will impress your family and friends. The magic happens when you blend the feta with tomatoes to create a rich, flavorful sauce. Perfect for busy weeknights, this recipe is both satisfying and delicious.
Nutrition Information: Protein: 18g | Carbs: 35g | Fat: 15g.
Ingredients:
– 1 block of feta cheese
– 2 cups cherry tomatoes
– 2 cups cooked pasta (use zucchini noodles for a paleo option)
– 2 tbsp olive oil
– Salt and pepper to taste
Instructions:
1. Preheat your oven to 400°F (200°C).
2. Place the block of feta in the center of a sheet pan. Surround it with cherry tomatoes. Drizzle everything with olive oil and sprinkle with salt and pepper.
3. Roast in the oven for about 30 minutes, until the tomatoes are blistered and the feta is soft.
4. Once cooked, mix the roasted feta and tomatoes with your choice of cooked pasta or zucchini noodles.
For a fresh touch, toss in some chopped basil just before serving. And don’t worry about leftovers; they make for a delightful lunch the next day!
Frequently Asked Questions:
– Can I make this vegan? Yes! Substitute the feta with your favorite plant-based cheese.
– What if I want to add more veggies? Spinach, arugula, or bell peppers are great additions.
Enjoy this delightful Baked Feta and Tomato Pasta for a meal that’s as easy to make as it is to enjoy!
Fun fact: This Baked Feta and Tomato Pasta hits the table in 40 minutes and serves 4. It clocks in around 350 calories per serving—perfect for busy families embracing paleo sheet pan recipes.
Baked Feta and Tomato Pasta
Editor’s Choice
GoodCook Everyday Nonstick Carbon Steel Baking Sheet Set, 3 Pack – Small…
AOZITA 17oz Glass Olive Oil Bottle Dispenser – 500ml Green Oil and Vineg…

Veggetti Veggie Slicer, Dual Stainless Steel Blade Vegetable Cutter for …
28. Cheesy Cauliflower Casserole

Recipe Overview: Servings: 4 | Prep Time: 15 minutes | Cook Time: 30 minutes | Total Time: 45 minutes | Calories: 320 per serving.
If you’re looking for a comfort dish that’s both delicious and easy to make, this Cheesy Cauliflower Casserole is a winner. It combines roasted cauliflower with a creamy cheese sauce that will have everyone at the table asking for seconds. Whether you enjoy it as a side dish or a hearty main course, it’s sure to satisfy your cravings.
Nutrition Information: Protein: 15g | Carbs: 20g | Fat: 25g.
Ingredients:
– 1 head cauliflower, cut into florets
– 1 cup shredded cheese (dairy-free if preferred)
– 1/2 cup heavy cream (or coconut cream for a paleo option)
– 2 tbsp olive oil
– Salt and pepper to taste
Instructions:
1. Preheat your oven to 375°F (190°C).
2. In a large bowl, toss the cauliflower florets with olive oil, salt, and pepper until well coated. Spread the cauliflower evenly on a sheet pan.
3. Roast in the oven for about 30 minutes, or until the cauliflower turns a lovely golden brown.
4. Remove the pan from the oven and mix in the shredded cheese and cream. Stir until everything is well combined.
5. Return the pan to the oven and bake for another 10 minutes, or until the cheese is bubbly and golden.
For added flavor, top your casserole with fresh herbs or a sprinkle of additional cheese. This dish pairs perfectly with grilled chicken or fish, making it a versatile addition to your dinner rotation.
Frequently Asked Questions:
– Can I make this vegan? Absolutely! Just swap in a plant-based cheese substitute.
– I want more texture. Any suggestions? Yes! You can sprinkle breadcrumbs on top for a delightful crunch before baking.
This Cheesy Cauliflower Casserole is not just a recipe; it’s a way to bring comfort to your table with minimal effort. Enjoy the rich flavors and watch your family devour it!
Cheesy Cauliflower Casserole
Editor’s Choice
GoodCook Everyday Nonstick Carbon Steel Baking Sheet Set, 3 Pack – Small…
Pompeian USDA Certified Organic Extra Virgin Olive Oil Non-Stick Cooking…
Silicone Baking Mat, 3 Pack Reusable Baking Mat, Non-Stick, Food Safe Si…
29. Grilled Lemon Garlic Shrimp

Recipe Overview: Servings: 4, Prep Time: 10 minutes, Cook Time: 15 minutes, Total Time: 25 minutes, Calories: 280 per serving.
Are you looking for a quick and flavorful dinner? Look no further than this Grilled Lemon Garlic Shrimp recipe! It bursts with zesty lemon and aromatic garlic, making each bite a delight. Perfect for those busy weeknights, this dish comes together in just 25 minutes. Pair it with a fresh salad or roasted veggies for a bright, satisfying meal.
Nutrition Information: Protein: 24g, Carbs: 6g, Fat: 12g.
Ingredients:
– 1 lb shrimp, peeled and deveined
– 2 tbsp olive oil
– 4 cloves garlic, minced
– Juice of 1 lemon
– Salt and pepper to taste
Instructions:
1. Preheat your oven to 400°F (200°C).
2. In a mixing bowl, toss the shrimp with olive oil, minced garlic, lemon juice, salt, and pepper until well coated.
3. Spread the shrimp evenly on a sheet pan.
4. Bake for 15 minutes, or until the shrimp turns pink and opaque.
For a fresh touch, garnish with chopped parsley and serve with lemon wedges for that extra zing.
Frequently Asked Questions:
– Can I use frozen shrimp? Yes, just make sure to thaw it before cooking.
– What should I serve with this dish? Quinoa or a mixed green salad complements it wonderfully.
– Can I add vegetables? Absolutely! Bell peppers or asparagus roast well alongside the shrimp.
– How can I store leftovers? Keep any extras in an airtight container in the fridge for up to 2 days.
This quick and tasty recipe can easily become a favorite in your meal rotation. Enjoy the delicious flavors, and make dinner effortless tonight!
Grilled Lemon Garlic Shrimp
Editor’s Choice
GoodCook Everyday Nonstick Carbon Steel Baking Sheet Set, 3 Pack – Small…
Kitessensu High Effective Garlic Press With Studs, Heavy Duty Garlic Min…
AOZITA 17oz Glass Olive Oil Bottle Dispenser – 500ml Green Oil and Vineg…
30. Mixed Veggie Sheet Pan Bake

Recipe Overview: Servings: 4 | Prep Time: 15 minutes | Cook Time: 30 minutes | Total Time: 45 minutes | Calories: 220 per serving.
Looking for a simple way to clear out your fridge? This Mixed Veggie Sheet Pan Bake is your answer. You can easily customize it to fit your taste and what’s in season. Just grab your favorite veggies, toss them with olive oil and spices, and roast them to a delicious perfection. This hassle-free meal is not only quick to prepare but also nutritious, giving you a hearty dish everyone will love.
Nutrition Information: Protein: 5g | Carbs: 15g | Fat: 10g.
Ingredients:
– 2 zucchinis, sliced
– 1 bell pepper, chopped
– 1 onion, sliced
– 1 cup cherry tomatoes
– 2 tbsp olive oil
– Salt and pepper to taste
Instructions:
1. Preheat your oven to 425°F (220°C).
2. On a sheet pan, toss all your veggies with olive oil, salt, and pepper.
3. Roast for 30 minutes, stirring halfway through for even cooking.
Feel free to mix in any other veggies you have lying around, like carrots or eggplant. For a flavor boost, drizzle some balsamic vinegar over the veggies right before serving.
Frequently Asked Questions:
– Can I use frozen vegetables? Yes, but they may not be as crispy after roasting.
– What can I add for protein? Chickpeas or grilled chicken work great to make this dish heartier.
This recipe is not just about using what’s in your fridge; it’s about making cooking easy and enjoyable. You’ll love how versatile it is, letting you create a wholesome meal that fits your schedule and cravings. Enjoy!
Mixed Veggie Sheet Pan Bake
Editor’s Choice
GoodCook Everyday Nonstick Carbon Steel Baking Sheet Set, 3 Pack – Small…
Pompeian USDA Certified Organic Extra Virgin Olive Oil Non-Stick Cooking…
Silicone Baking Mat, 3 Pack Reusable Baking Mat, Non-Stick, Food Safe Si…
Conclusion

These easy-to-make paleo sheet pan recipes are a lifesaver for busy families.
They offer a variety of flavors and ingredients, ensuring there’s something to please everyone at the table.
Try these delicious meals to simplify your dinner routine while enjoying healthy, nourishing foods!
Note: We aim to provide accurate product links, but some may occasionally expire or become unavailable. If this happens, please search directly on Amazon for the product or a suitable alternative.
This post contains Amazon affiliate links, meaning I may earn a small commission if you purchase through my links, at no extra cost to you.
Frequently Asked Questions
What Are Paleo Sheet Pan Recipes and Why Are They Great for Busy Families?
Paleo sheet pan recipes are meals that focus on whole, unprocessed foods, typically featuring vegetables, lean meats, and healthy fats, all cooked together on a single sheet pan.
These recipes are fantastic for busy families because they save time on both prep and cleanup. You can easily whip up a healthy dinner idea in one go, making mealtime less stressful and more enjoyable!
Can I Customize Paleo Sheet Pan Recipes to Fit My Family’s Preferences?
Absolutely! One of the best aspects of paleo sheet pan recipes is their versatility. Feel free to swap out proteins, veggies, or seasonings to suit your family’s taste buds.
This means you can create easy paleo recipes that everyone will love, ensuring that dinner is not only effortless but also tailored to your family’s preferences.
How Can I Ensure My Sheet Pan Meals Are Nutritionally Balanced?
To create balanced sheet pan meals, aim for a mix of protein, veggies, and healthy fats. For instance, pair chicken or fish with a variety of colorful vegetables like bell peppers, broccoli, and sweet potatoes.
Incorporating different food groups guarantees that your quick paleo dinners are not only delicious but also packed with nutrients, supporting your family’s health.
Are Sheet Pan Meals Suitable for Meal Prep?
Yes! Sheet pan meals are perfect for meal prep. You can prepare multiple servings at once and store leftovers for busy nights ahead.
Just make sure to use airtight containers for storage. This way, you can enjoy healthy dinner ideas throughout the week with minimal effort!
What Are Some Tips for Perfecting My Paleo Sheet Pan Recipes?
To perfect your paleo sheet pan recipes, start by choosing ingredients with similar cooking times, ensuring everything cooks evenly. Also, don’t overcrowd the pan—this helps achieve that lovely roasted flavor.
Lastly, experiment with different spices and marinades to add depth and flavor to your one-pan recipes. You’ll be amazed at how simple tweaks can elevate your meals!